
In this short guide, I will show you how you can use your LinkedIn ad engagement data for “warm outbound” – reaching out to the target accounts that are already showing some interest with your company/ product/ service. I will show you how to push the companies that reached a specific level of engagements = are aware of your brand and actively engaging with it – into Clay for “autoprospecting” – finding the contact details of the ICPs (Ideal Customer Personas) in those companies. I’ll show you how to use ZenABM (for just $59) to determine the LinkedIn ad engagements per company and combine with other data to set the account ABM stage – e.g. interested stage – send it to Clay, find relevant personas in the interested companies, and send the list of those with emails into Smartlead and Heyreach sequences.
Let’s see how you can quickly:


STEP 1: Copy the Clay Template
→ Open the free Clay template provided in the guide and duplicate it to your own Clay account.
STEP 2: Define Your ABM Stages in ZenABM (3 min setup)
→ In ZenABM, create or edit your “ABM Stages” (e.g. Aware, Interested, Considering).
→ These stages will automatically label companies based on LinkedIn ad engagement, CRM data (including custom properties!), and lifecycle stages.
STEP 3: Add Intent Labels to Campaigns
→ In ZenABM, tag your LinkedIn campaigns by intent (e.g. Analytics, Adoption, AI).
→ ZenABM will assign these “intent” tags to companies engaging with those campaigns.
STEP 4: Create a Webhook from ZenABM → Clay
→ Go to ZenABM → Webhooks.
→ Data Type: Companies
→ Add your Clay table’s destination URL.
→ Filter by “Interested” stage and any intent you want (e.g. Interested + AI intent).
→ Set data delivery to every 7 days, one row per company.
→ Click Save — ZenABM will now auto-send your interested accounts to Clay weekly.
STEP 5: Auto-Prospect into the “Interested” Accounts in Clay
→ In Clay, open your new table and use the “Find People” block.
→ Set job title filters to match your ICP (e.g. VP Product, Head of Growth).
→ Filter by seniority, location, and role relevance.
→ Save and run — Clay will find contact details (name, email, LinkedIn URL) for each company.
STEP 6: Connect Clay → Smartlead (Email Outreach)
→ Create a campaign in Smartlead (define steps, inbox, sender).
→ Copy your Smartlead API Key and Campaign ID.
STEP 7: Connect Clay → Heyreach (LinkedIn Outreach)
STEP 8: Test & Monitor
→ Check that “Interested” accounts flow correctly from ZenABM → Clay → Smartlead/Heyreach.
→ Verify that emails and DMs are personalized based on ad engagement and intent.
STEP 9: (Optional) Get It Done-For-You — Free
→ Book ZenABM × SalesCaptain setup before 5 December to get:
✅ Free ZenABM Starter
✅ Free Clay Credits
✅ 20% off HeyReach
✅ Complete done-for-you implementation
First of all, you need to somehow de-anonymize your LinkedIn ad engagements. LinkedIn Campaign Manager gives you the ability to see which companies engaged with your LinkedIn ads overall – but it doesn’t let you a) see which ad campaigns each company engaged with; b) send the engagement data anywhere…this isn’t particularly helpful for outreach 🤷♀️
This is where ZenABM comes in – from just $59 per month, you can deanonymize your Linkedin ad engagements on company level (directly from LinkedIn API – no guesswork!), and send them anywhere (filtered by stage, intent etc.) via a simple webhook.
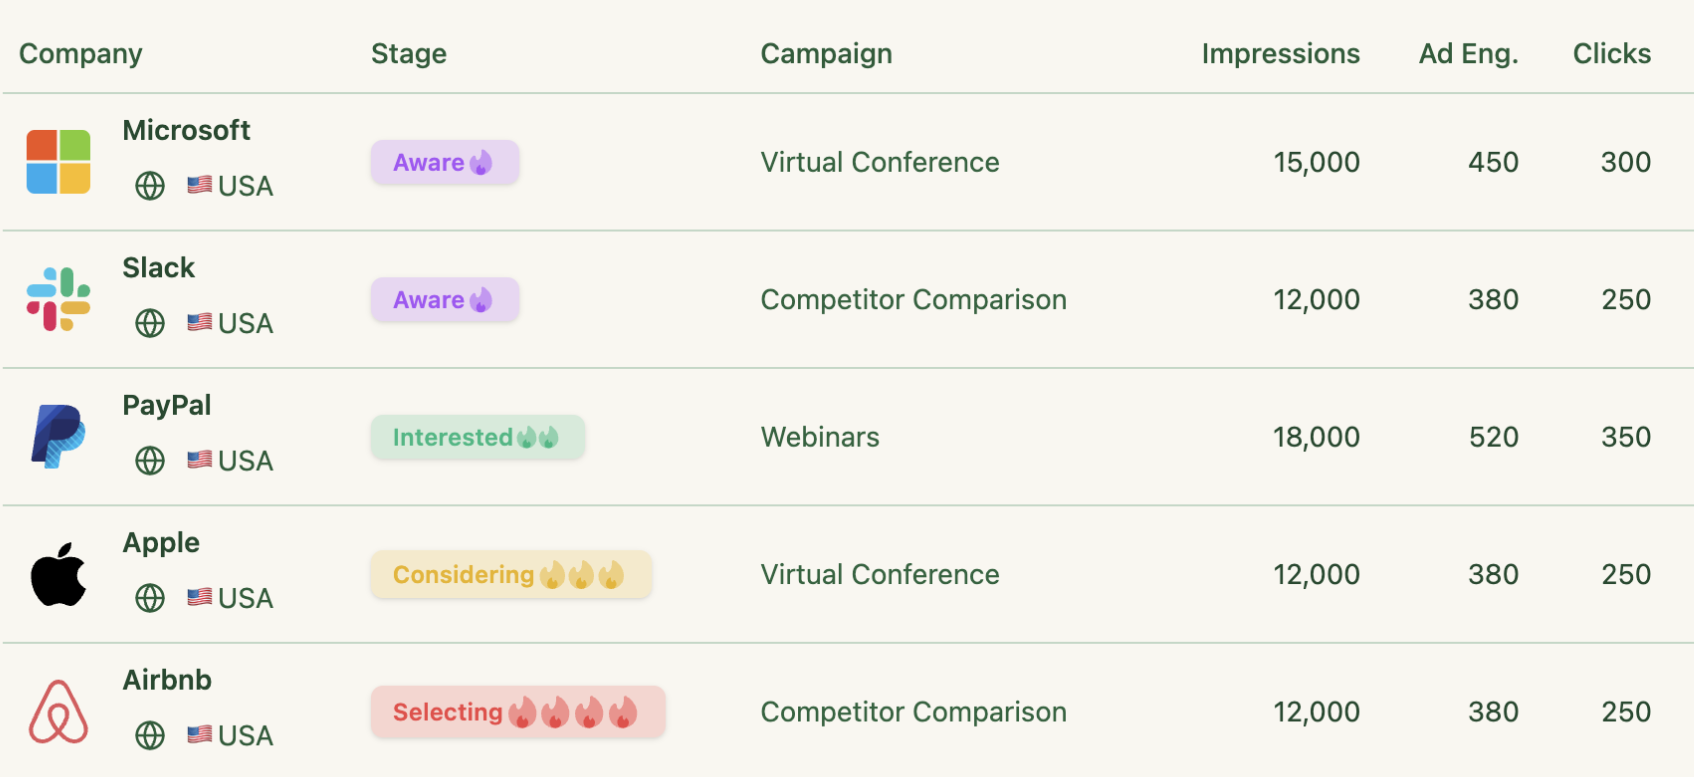
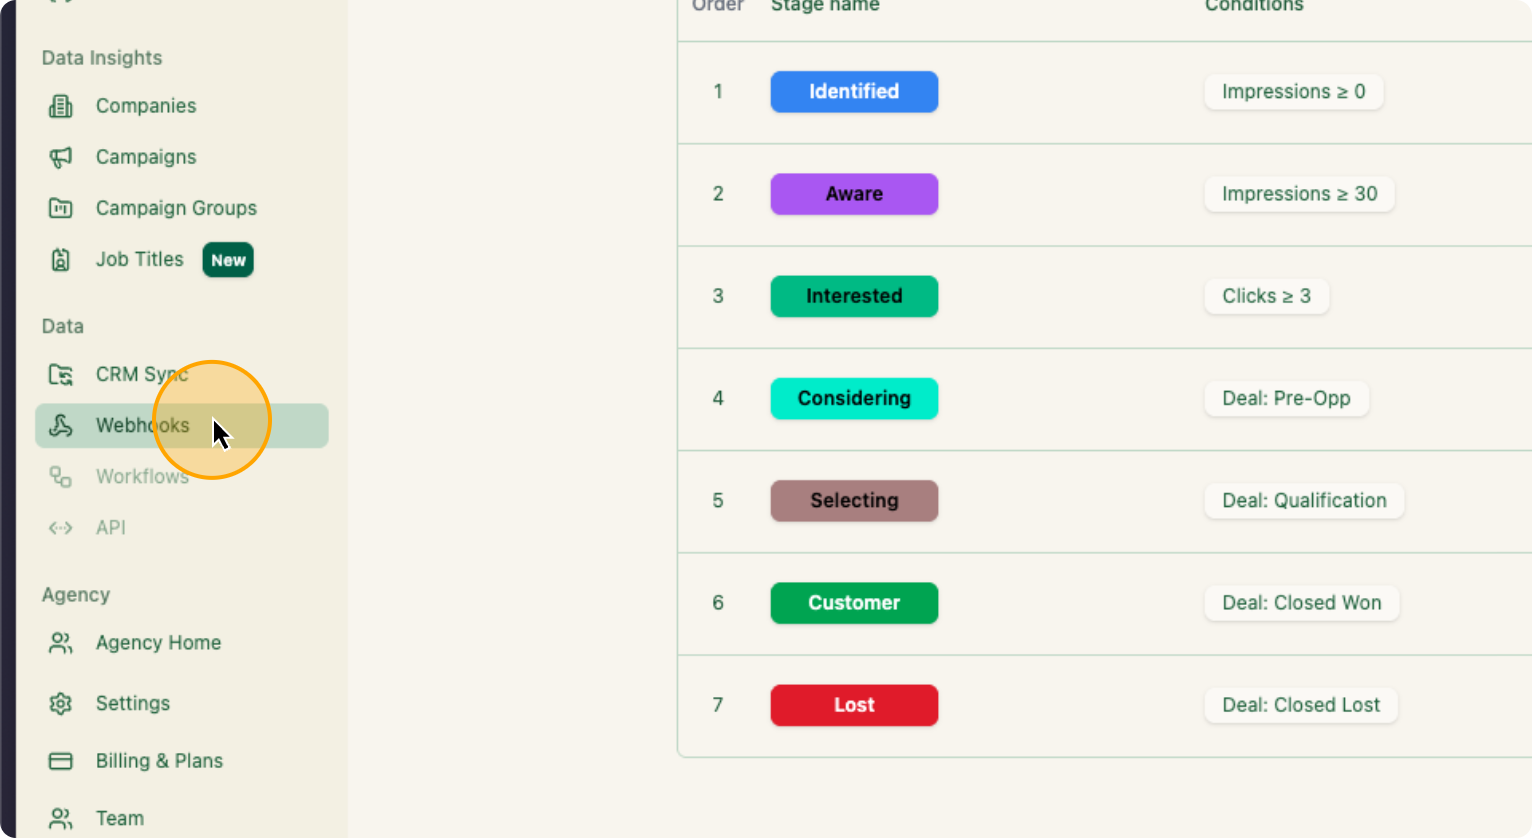
As well as the intent and engagement scores, ZenABM gives you the stages of the funnel each company is in, as defined by you in the “ABM stages”:

ZenABM’s ABM stages are fully customizable (you can define them yourself, add or remove them) – and are based on a combination of LinkedIn Ad engagements, CRM deal or lifecycle stages, and any custom CRM properties (you can use e.g. a specific form fill, ebook download etc!):


ZenABM is a cheap, but really powerful solution for orchestrating this without complicated workflows in Hubspot, Clay or revops resourcers.
Once you have defined your ABM stages on ZenABM (takes 3 minutes), all the companies you are targeting with your LinkedIn ads will be sorted into these stages and labelled with them. These “ABM stage” labels will be then sent to your CRM as a custom property – or to Clay…or wherever you need them 😉

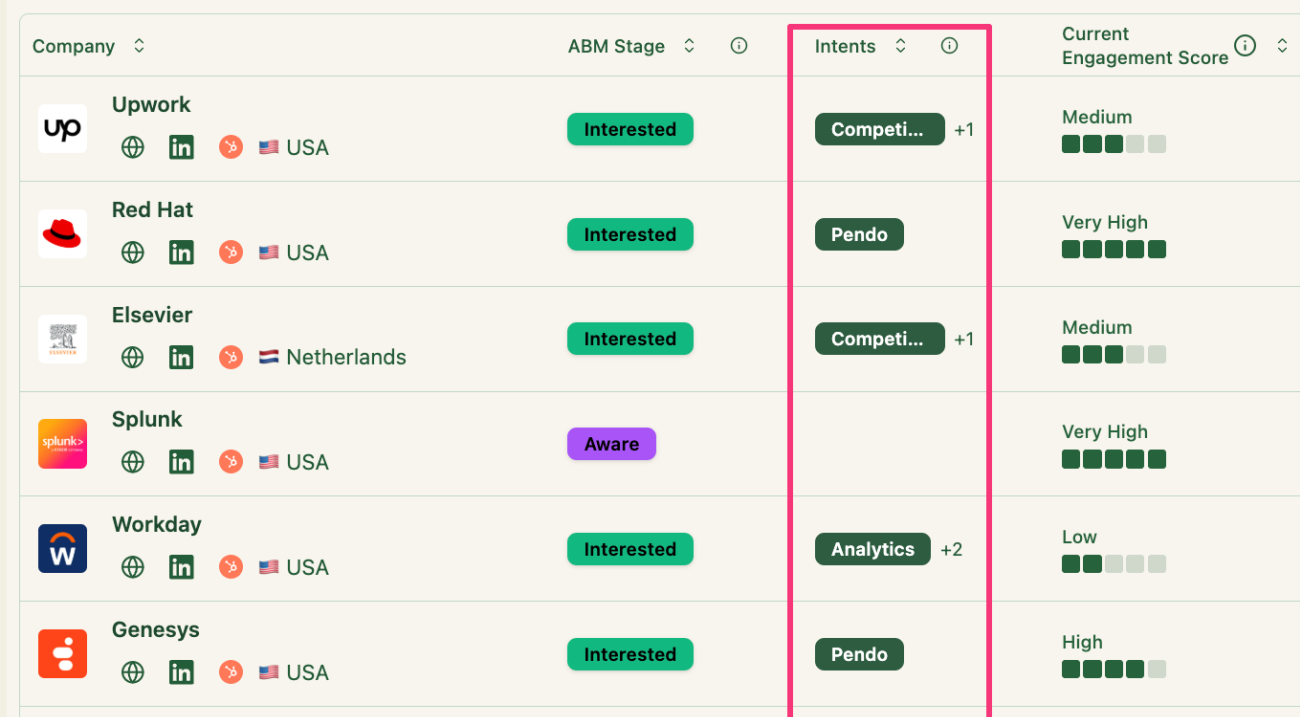
Now, apart from the ABM stages, you can also label your target accounts with “intents” based on which campaigns they are engaging with.
The intents are fully customizable and take 1 minute to set up:

You basically easily tag certain campaigns or several campaigns with an intent theme (e.g., “Analytics,” “Adoption,” “Security,” “AI Features”), and ZenABM automatically assigns those intents to companies when they engage with the corresponding ads:
This means if an account repeatedly clicks on analytics-focused ads, ZenABM labels them with an “Analytics intent”. These intent signals are then pushed into your CRM as company properties:

Now – in order to really do anything with the ABM stage or intent data – you need to have a list of contacts (matching your ICP profile) in your target accounts.
In order to do it – you can use Clay or first need to pull these data into Clay (or any other data prospecting/ data enrichment platform – but we use Clay, so we’ll stick to it as an example.)
Here’s exactly how to do that with ZenABM’s webhooks:

In Step 1: Data, select “Companies” as data type, and add the name of your webhook + the destination URL you want to send it to (in this case, the Clay table – grab this Clay template here – copy it to your account)


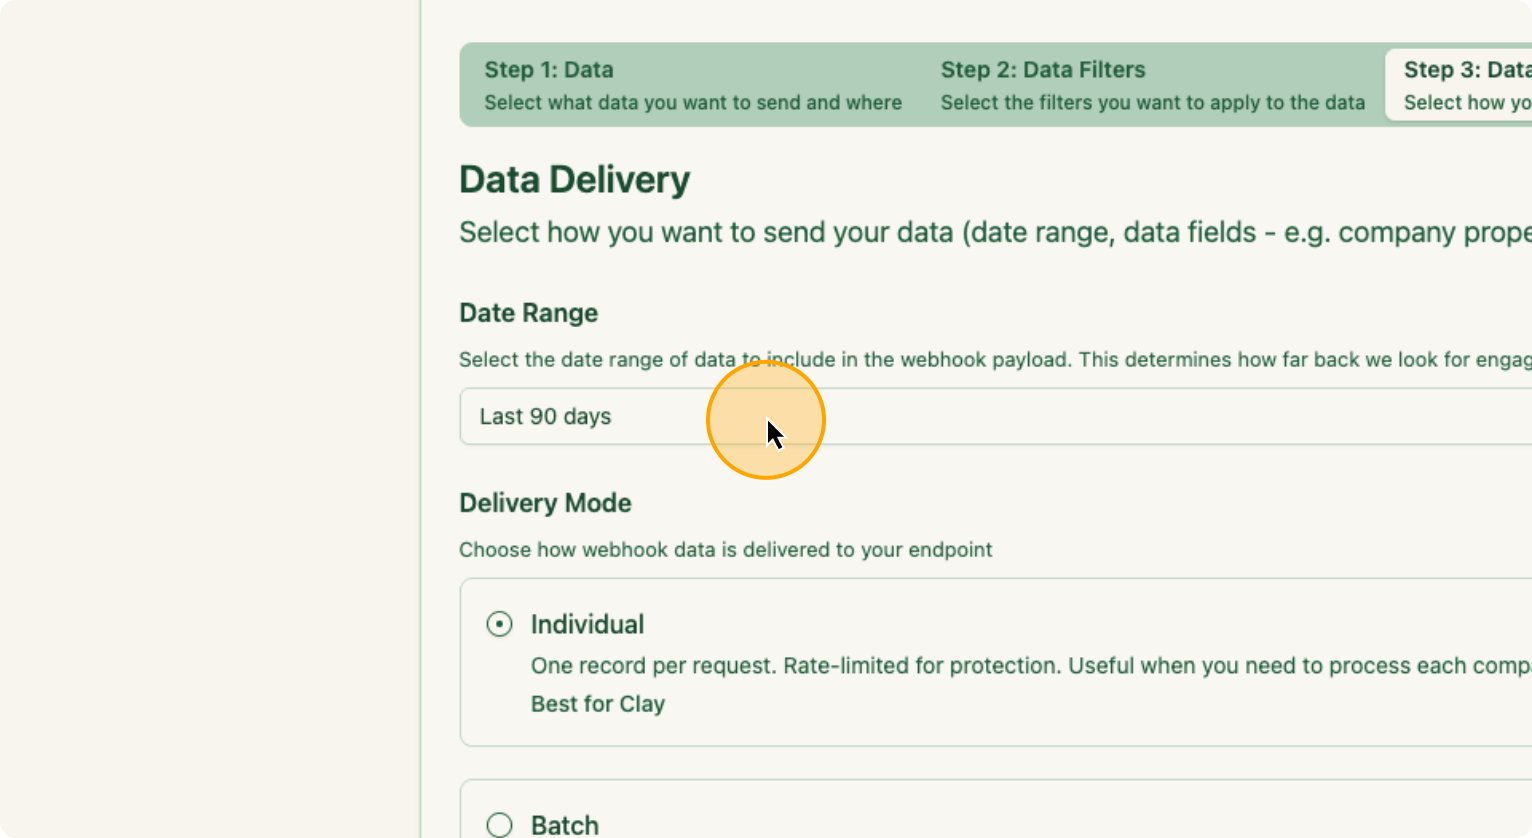
Step 3: Select how you want to send your data from ZenABM to Clay
In STEP 3 – Data Delivery – select date range, data fields – e.g. company metrics you want to send. In our case, we want to send the data:

Now, click “SAVE” and your webhook will now be sending a fresh batch of “interested” stage companies into the Clay table (copy this template to your Clay account) with the selected intent (in our case “analytics high”) every 7 days – on Sunday night!

Great, now – how do you find the right people in these interested companies, so you can add them to the email outreach / LinkedIn outreach sequences?
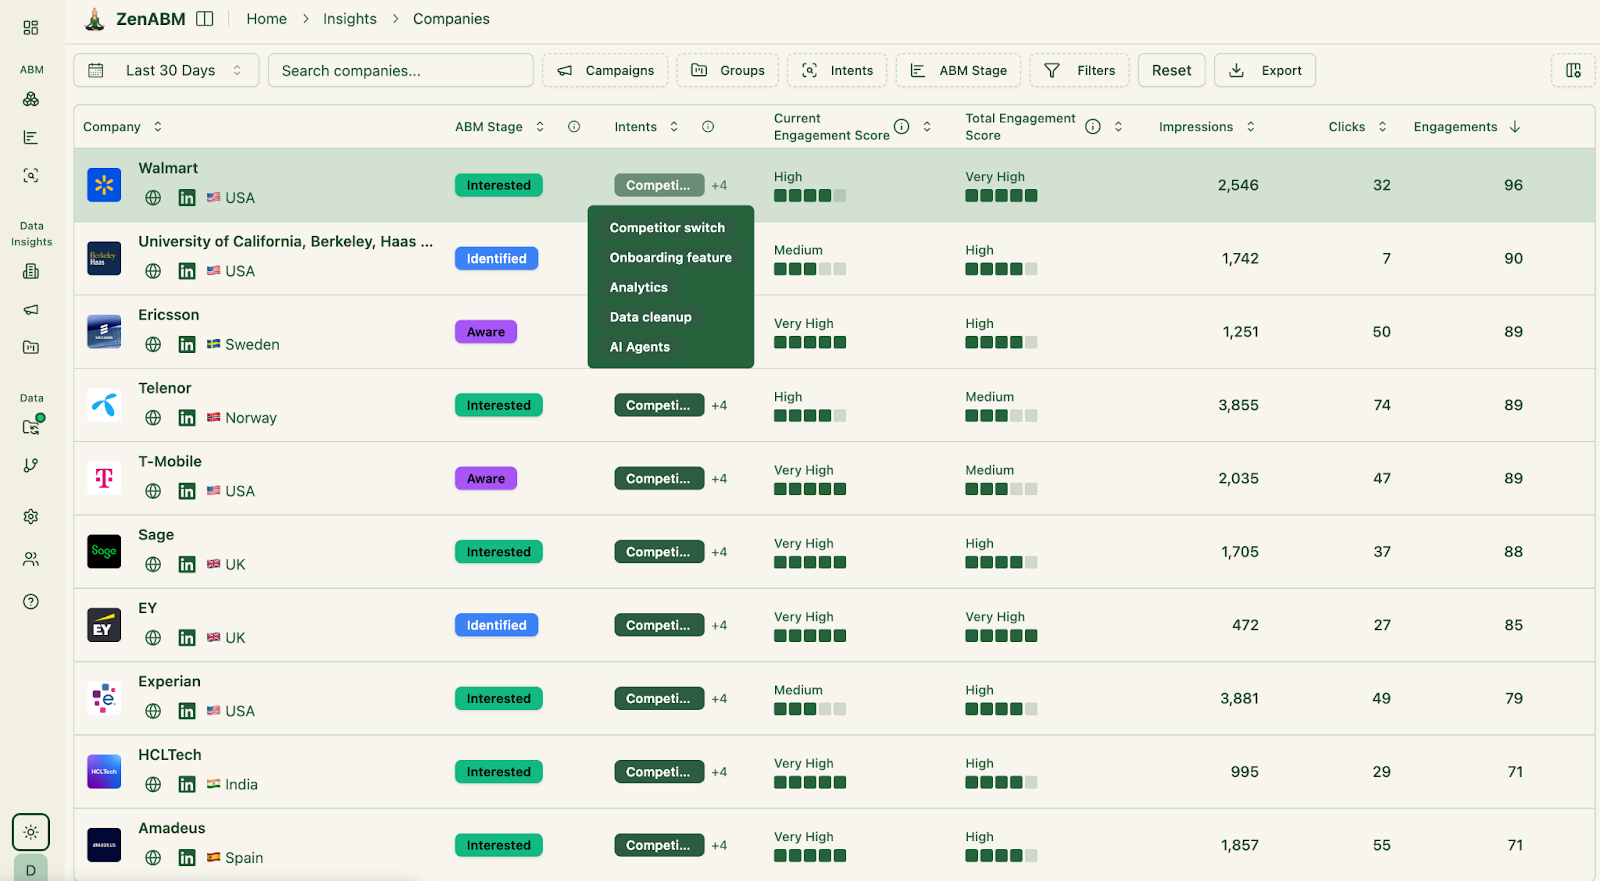
ZenABM is our source of not only LinkedIn ad interactions, but allows us to push scored accounts
ZenABM de-anonymizes your LinkedIn ad engagements (= tells which company engaged with which campaign) and then pushes this data automatically into your CRM – both the raw engagement date (impressions, engagements, clicks) and computed “account scores” (=ABM stages based on combinations of LinkedIn ad engagements, lifecycle stages and custom properties = any of the intent signals you have in your CRM that we’ve discussed before) 
…as well as intent (from the qualitative ad engagements = which campaigns the accounts engaged with):

ZenABM ingests your LinkedIn ad interactions at the company level, computes a real-time score for every account, and tags each account with the campaign or content they engaged:

Then all these intent signals flow directly into your CRM – ZenABM syncs account them into your CRM as custom fields automatically (and creates these fields as well).
You can then build workflows so that any company hitting a certain intent threshold triggers an alert or outreach task – or you can push the data to Clay for autoprospecting (automatically finding the right personas in these accounts for outreach), and then automated lead routing or follow-up sequences.

In short, ZenABM bridges marketing signals and sales action with very little rev-ops required.
In ZenABM’s dashboard we see company-level LinkedIn engagement visualized: each target account is listed with the campaigns it clicked and an inferred intent or ABM stage. You can also use its AI chatbot, Zena, to pull a specific list of accounts that engaged with any campaign, in any timeframe:

With ZenABM, those LinkedIn ad engagements and web visits automatically turn into CRM triggers, so your sales reps only spend time on accounts already primed to buy. As soon as a company shows buying signals, you can either automatically prospect into those accounts with Clay and send them into automated outreach sequences e.g. in Smartlead/Heyreach, or notify your sales team in your CRM (Hubspot).
I will explain how to set the automatic prospecting up in more detail in the next few paragraph.
OK but now you still need to know how to use the intent signals from account level, that you have in ZenABM – to find prospects for outreach in Clay, and add them to the right respective intent-based outreach sequences.
Below, I will show you how to do that + set up filters, connect your Smartlead (email outreach) account, and configure automatic updates to keep your campaigns running smoothly.
0. Copy the Clay Template from here [LINK – FREE CLAY TEMPLATE].

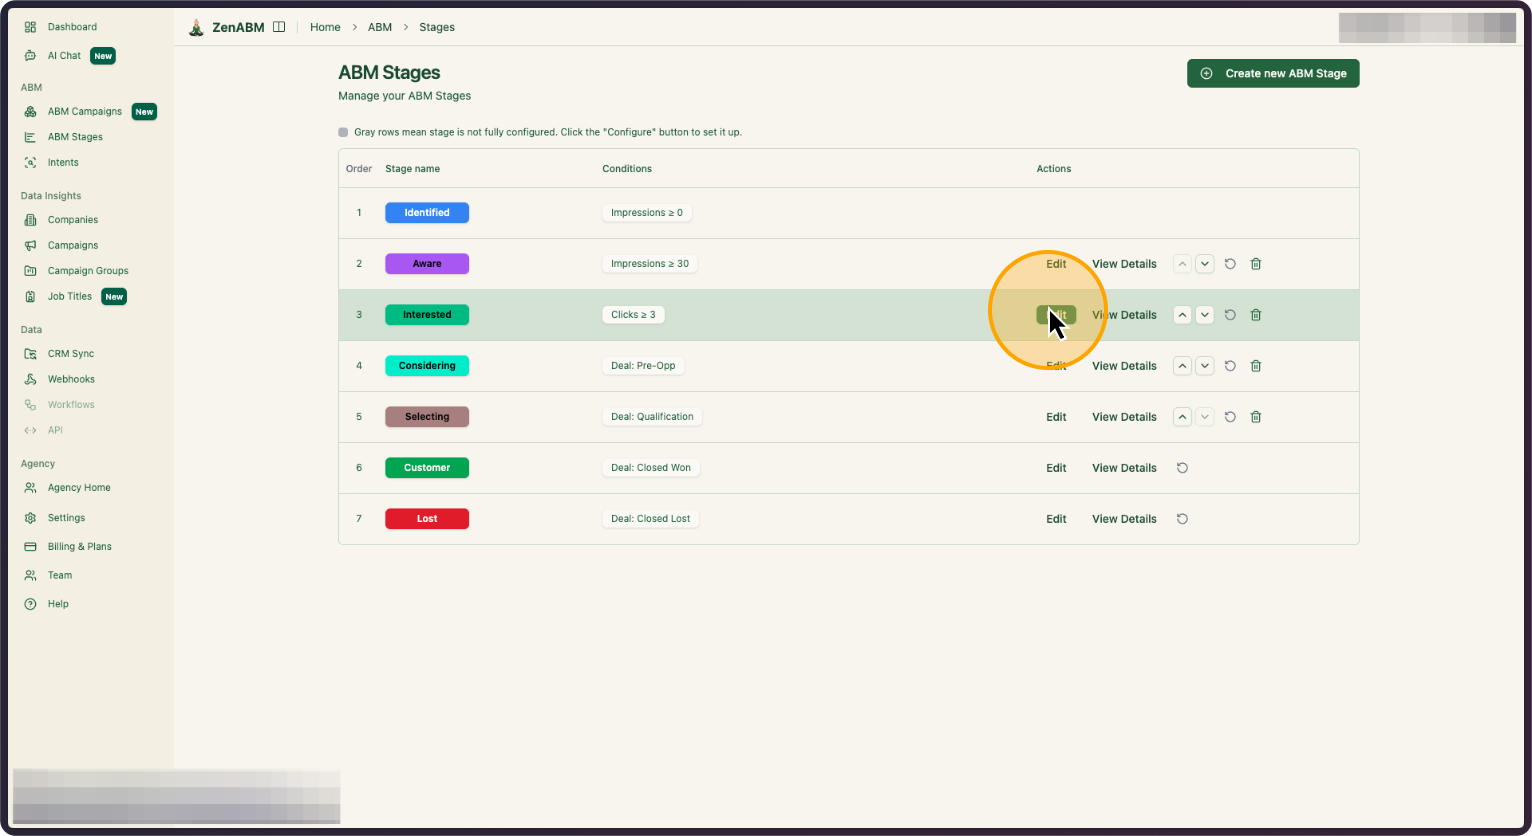
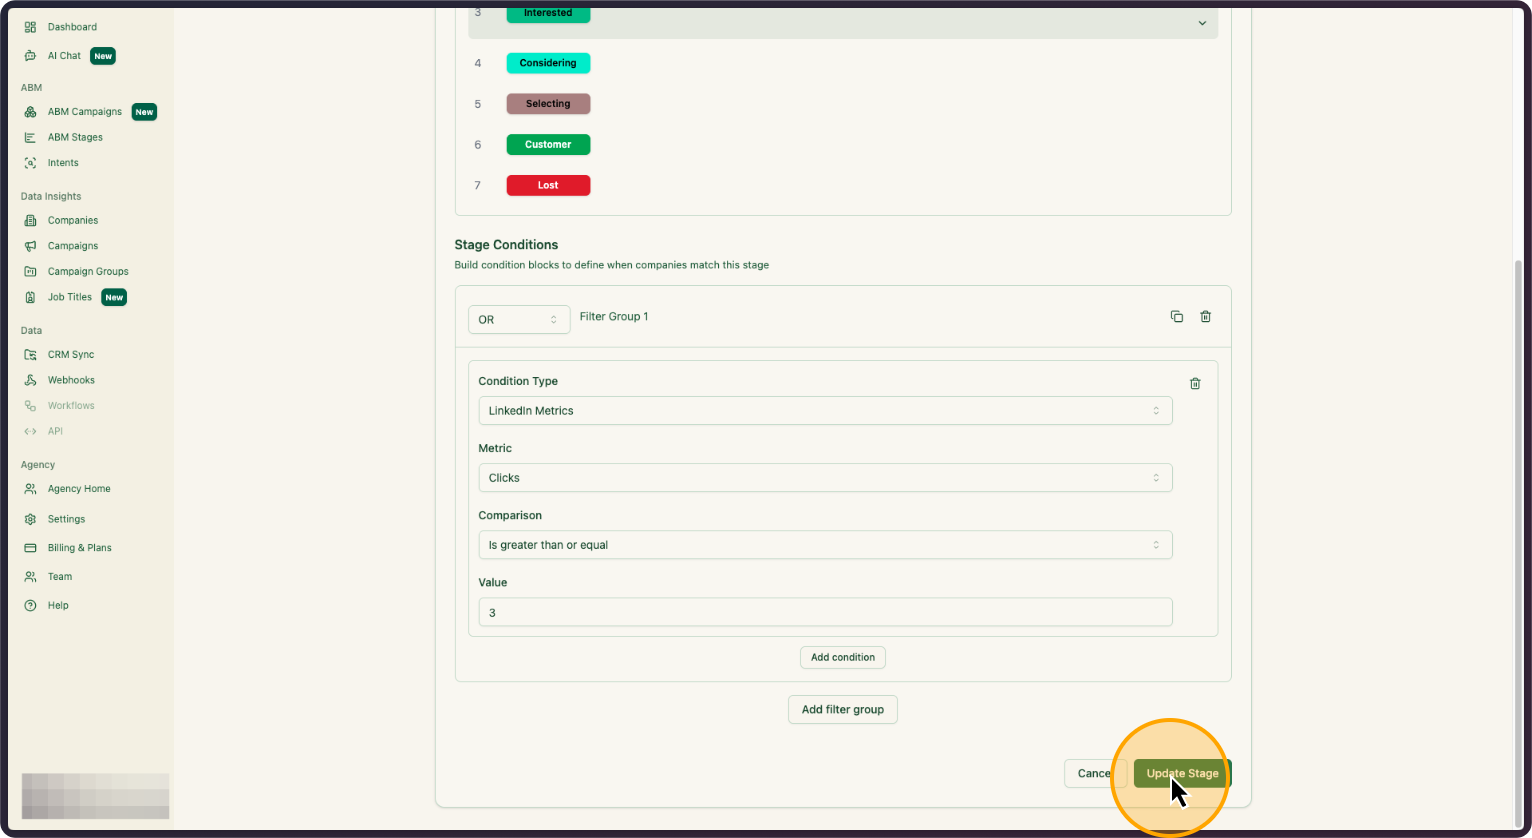
In this example, it’s companies with three or more clicks. Select what you prefer and then, click on “Update Stage”
2. Click on “Update Stage”
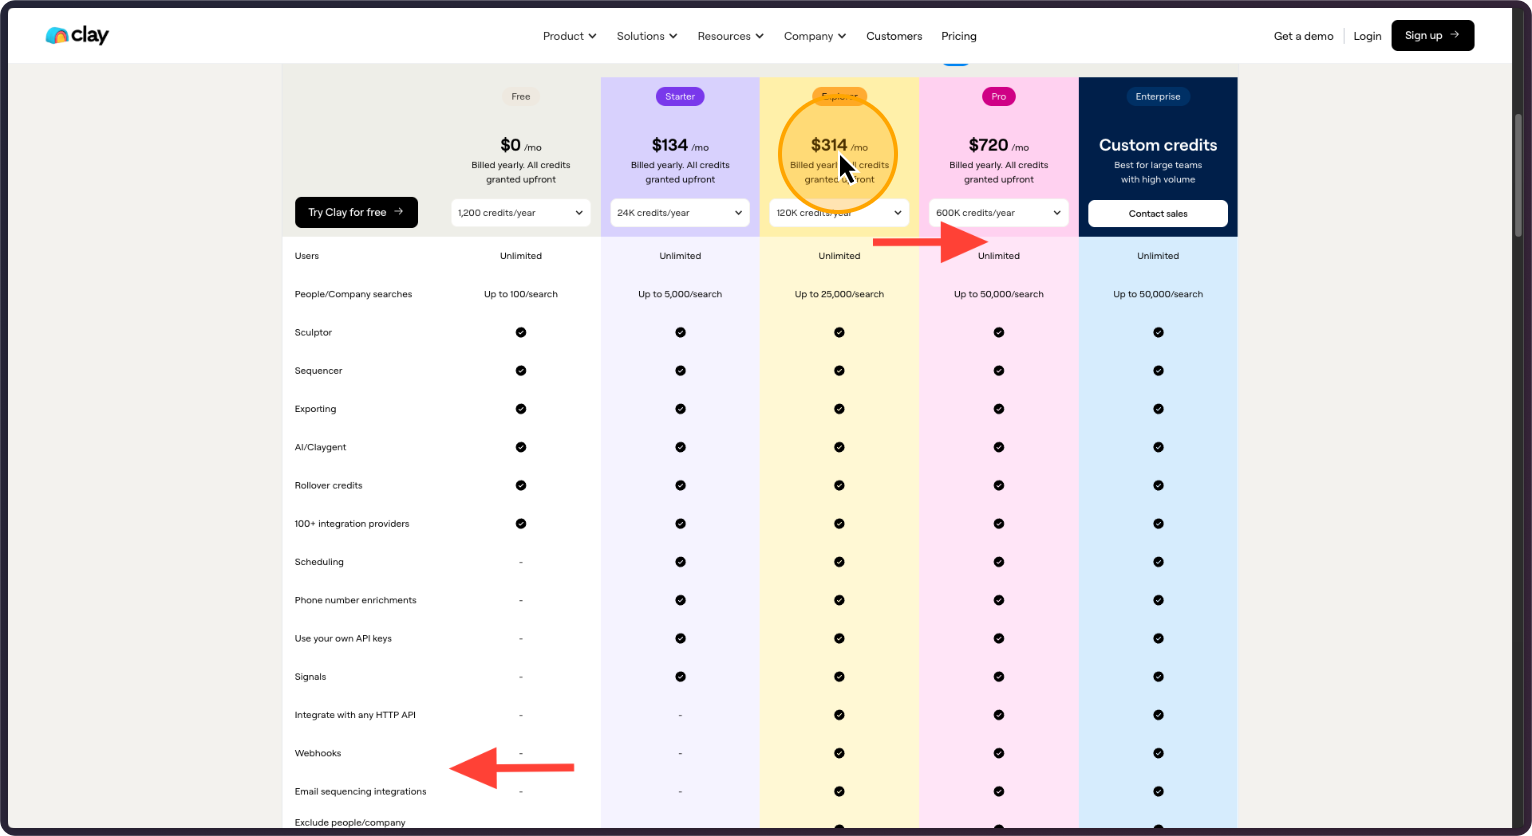
This playbook works only with Clay’s Explorer plan or higher or on the free trial because Webhooks and Email sequence integrations are only available with those plans.
3. You will need Clay’s Explorer plan at least to run this playbook
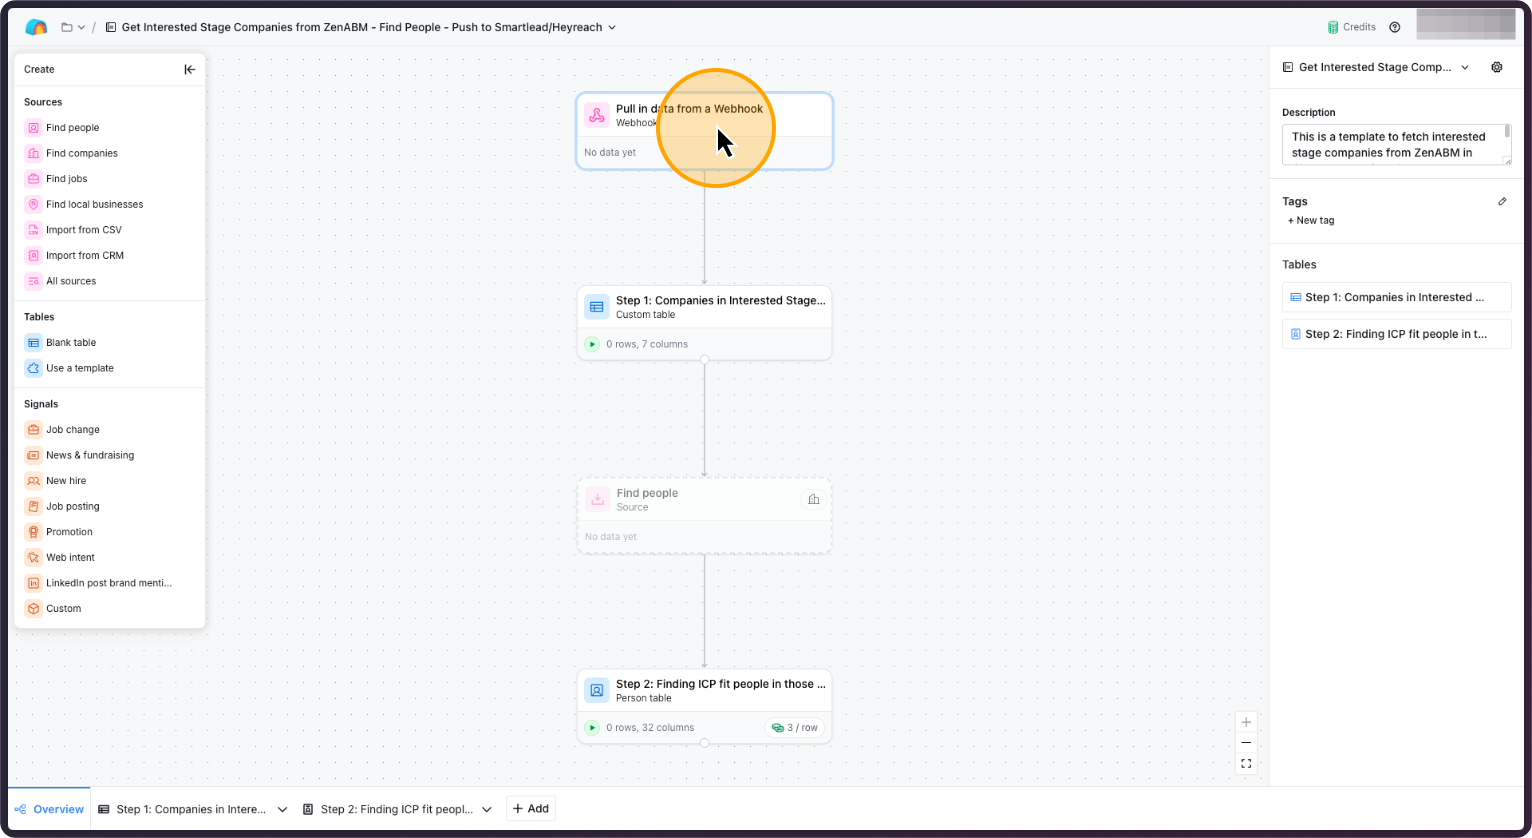
After you copy the Clay template, you will see the full workbook with 2 tables and an Overview.
Go to the first step and click on it.
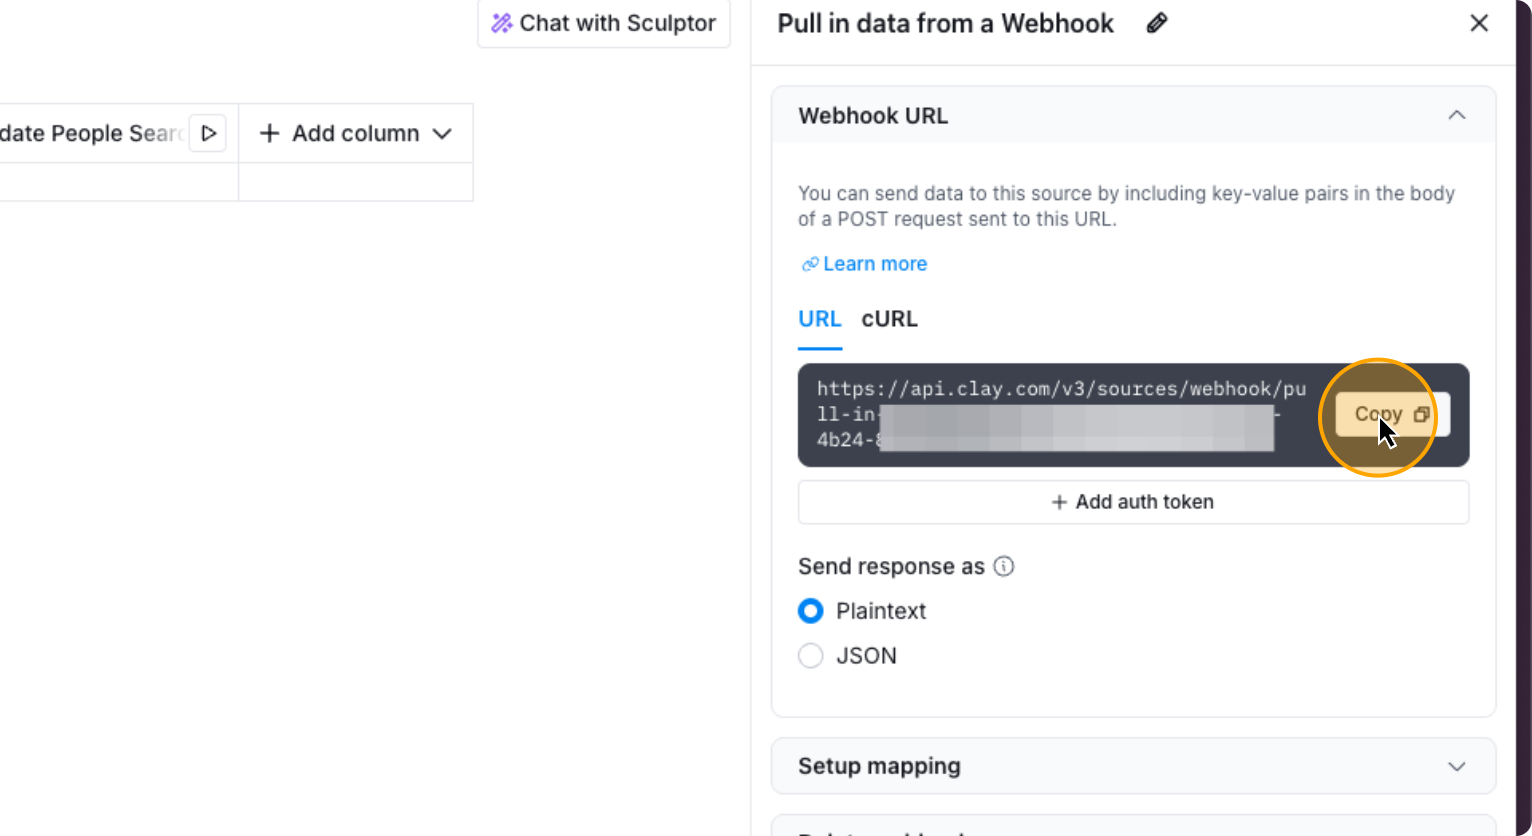
4. Click on “Pull in data from a Webhook”
5. Double-click here
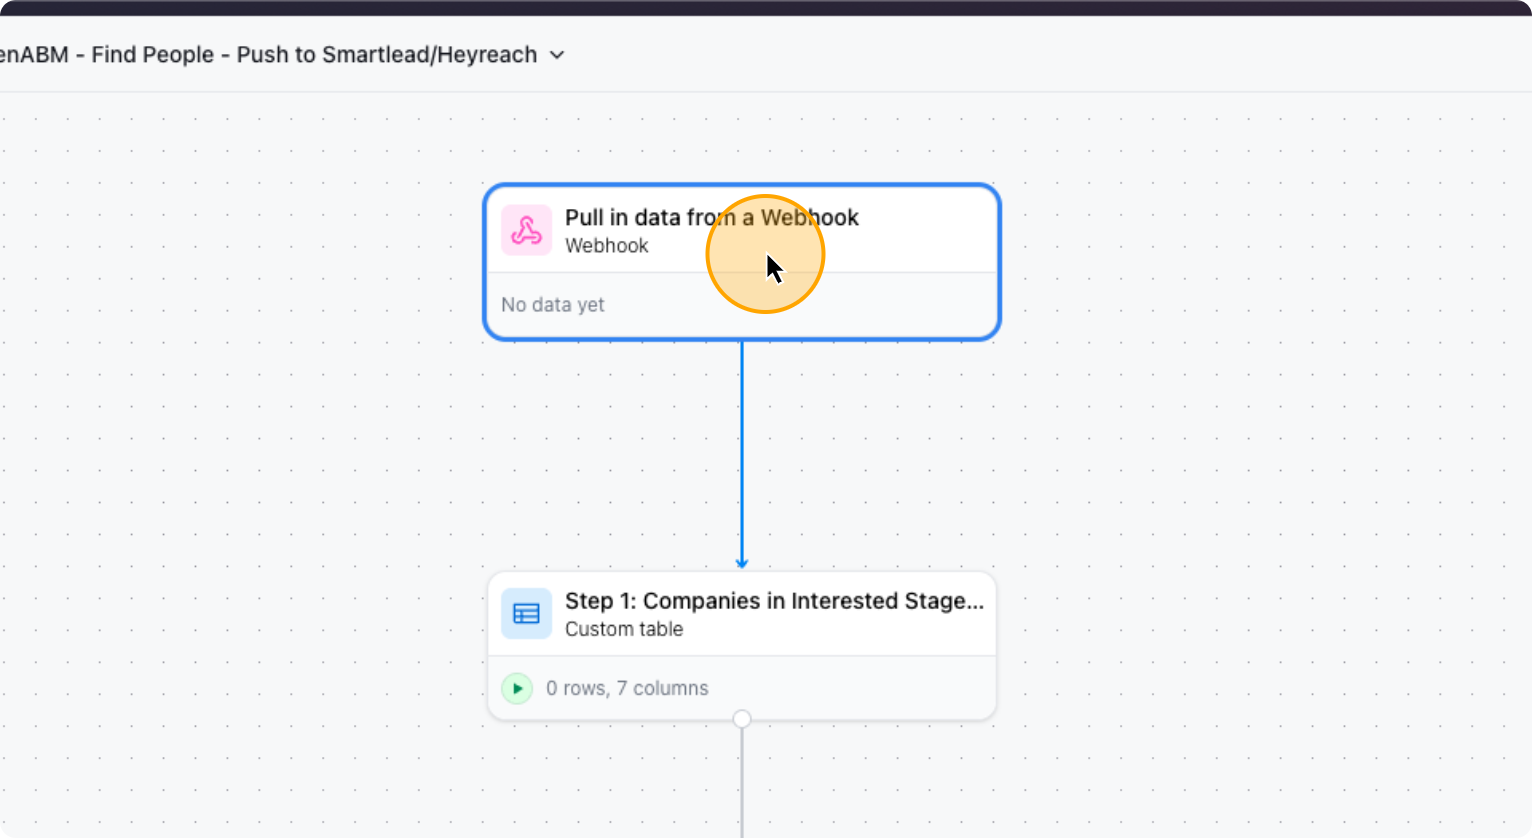
It will take you to step one, where you need to complete the first step. The first step is to copy the webhook URL you see. Copy it, then go to ZenABM. Click on “Webhooks,” and select “Create a new webhook.”
6. Click on “Copy”
7. Go to ZenABM, Click on “Webhooks”
8. Click on “Create new Webhook”
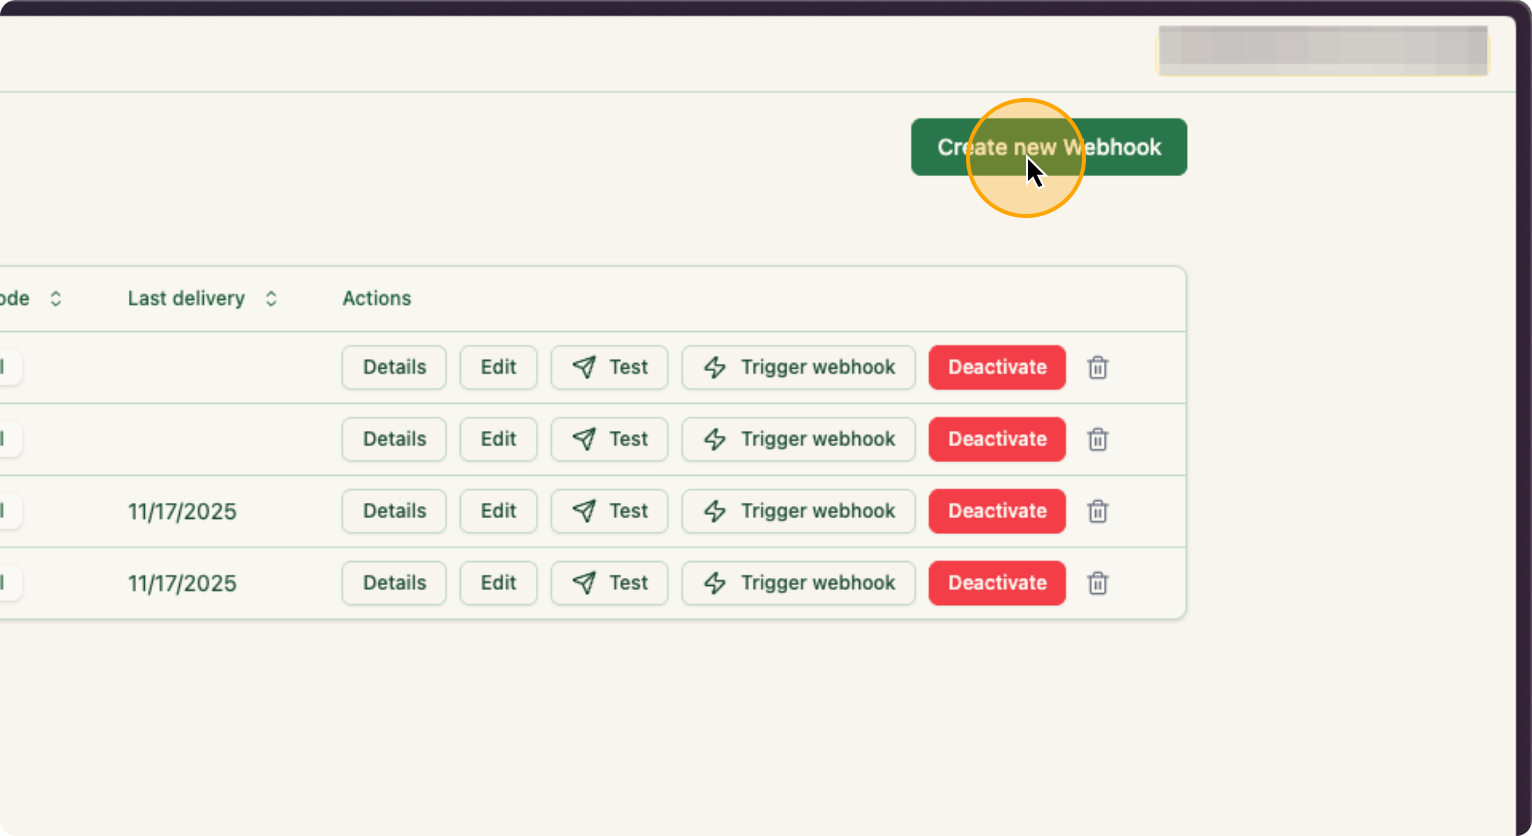
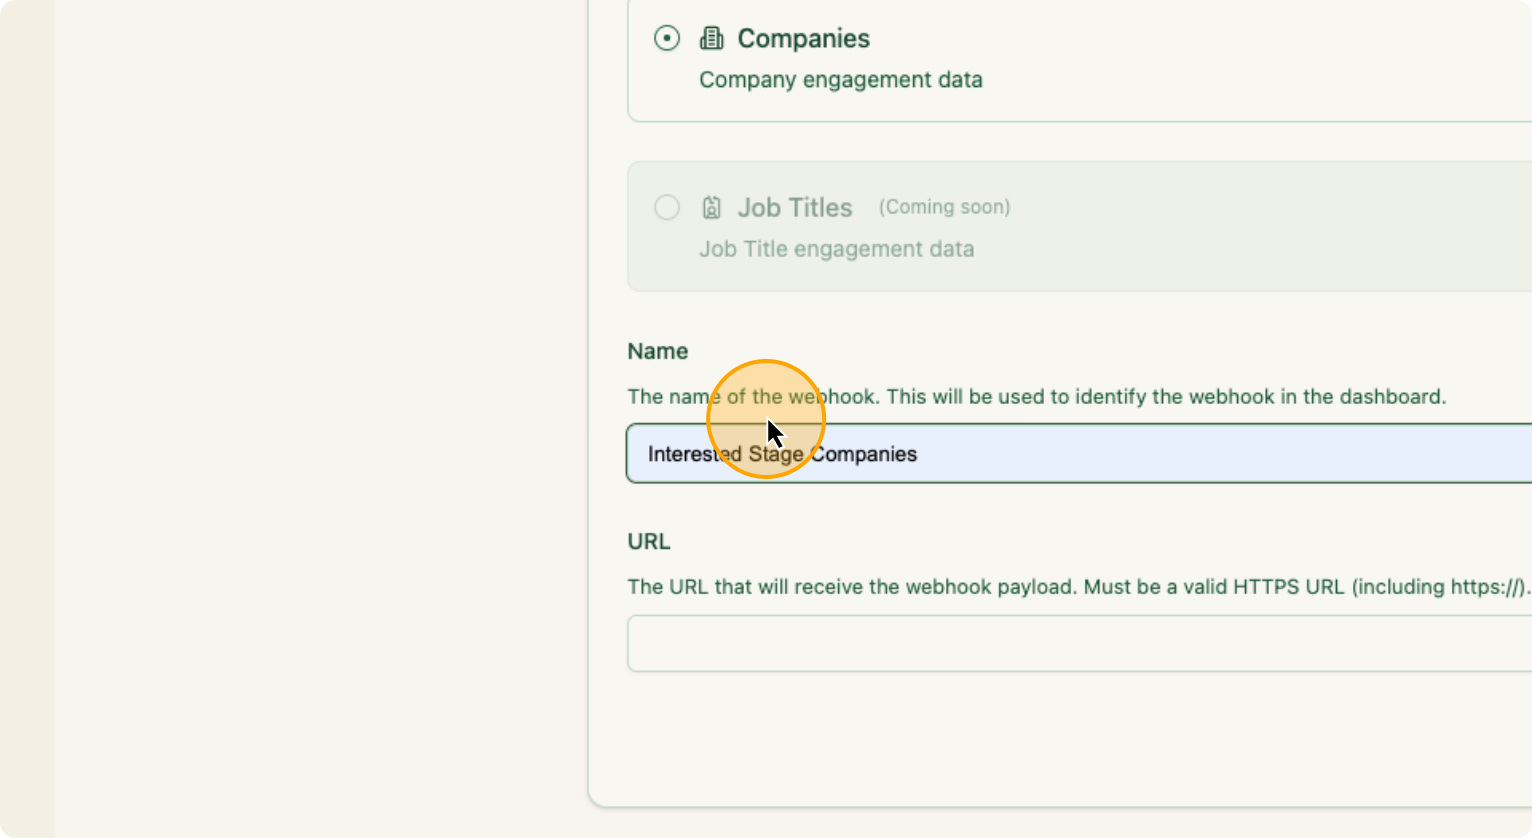
In this webhook, you will select companies and then name the webhook.
9. Click on “Companies”
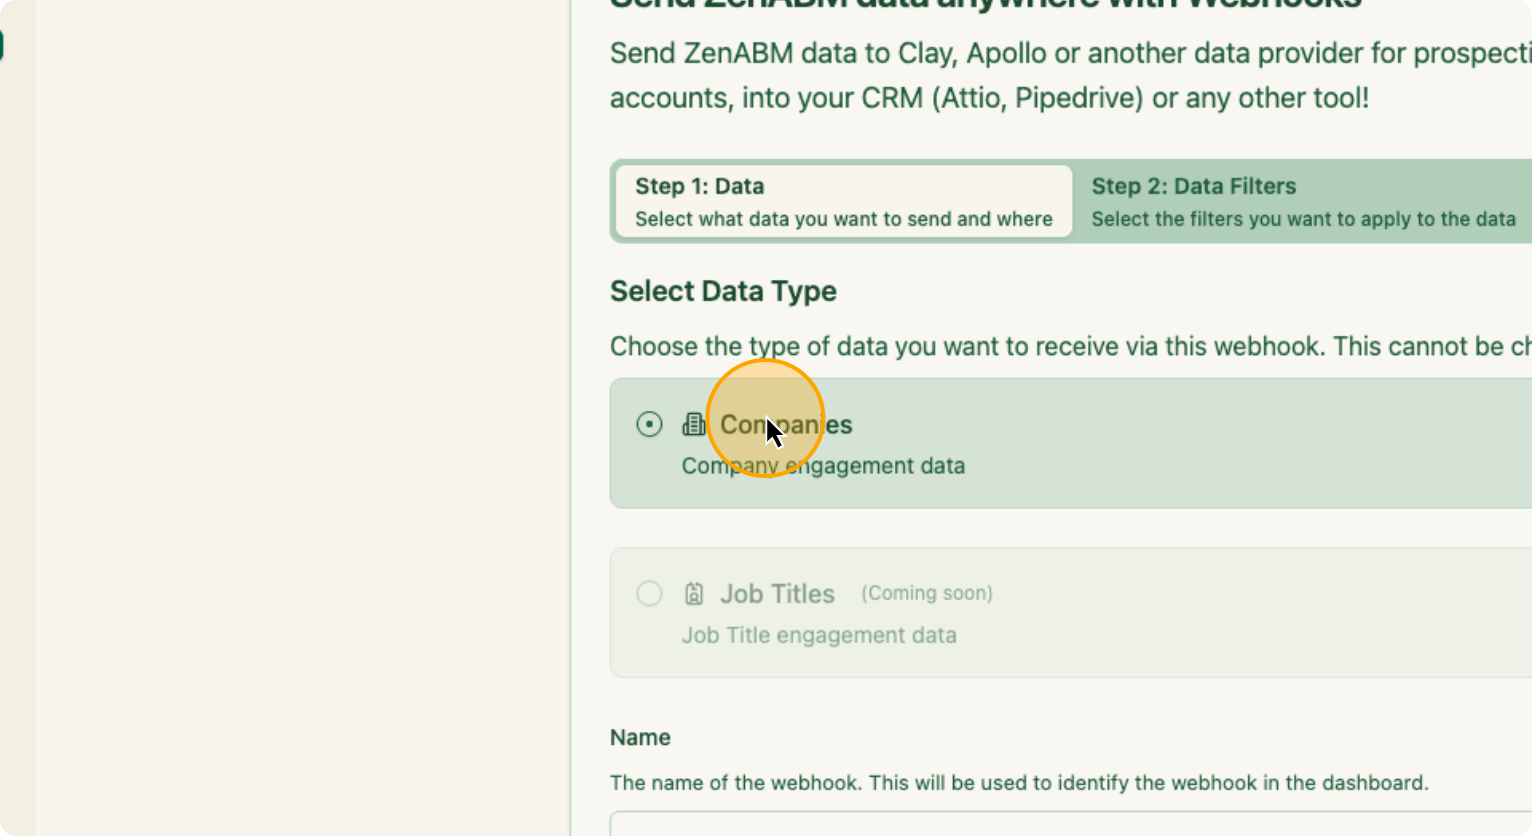
10.Name the Webhook here:
Paste the webhook you just copied from Clay in the “URL”. Click Next.
11. Paste the webhook you just copied from Clay here
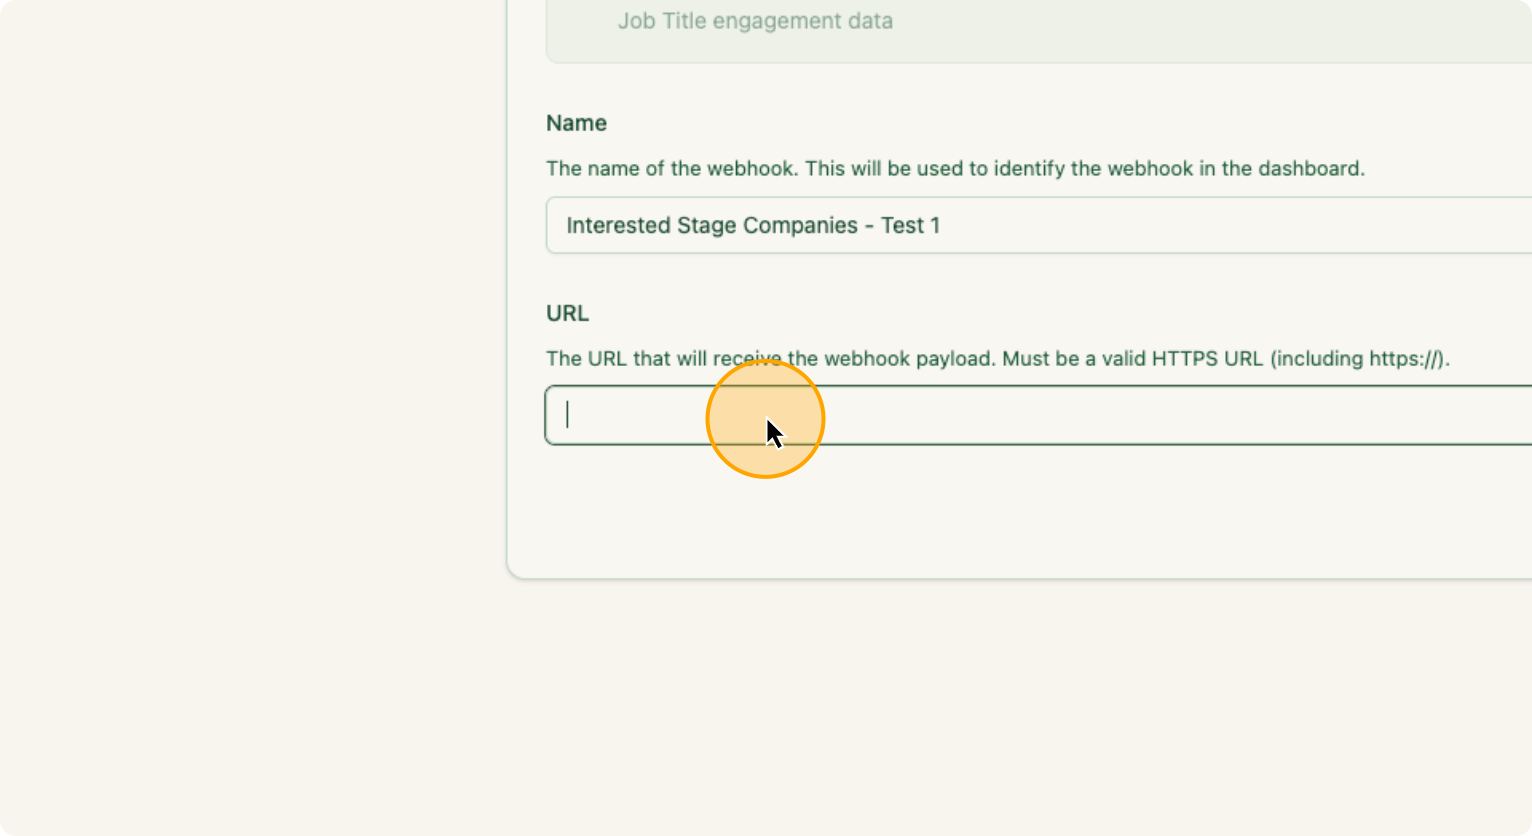
After you paste the webhook, click Next.
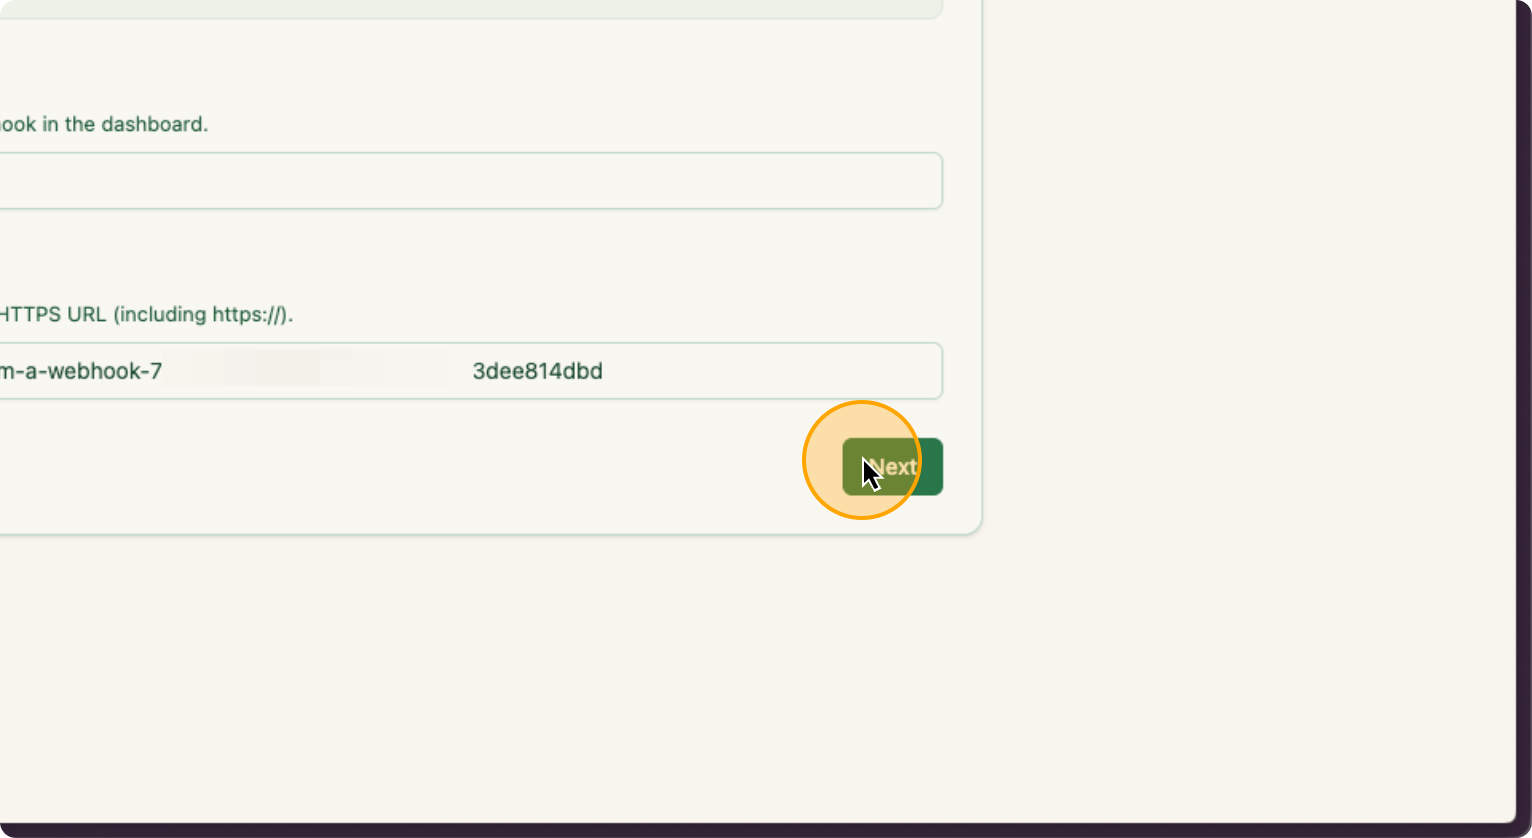
12.
Click on “Next”
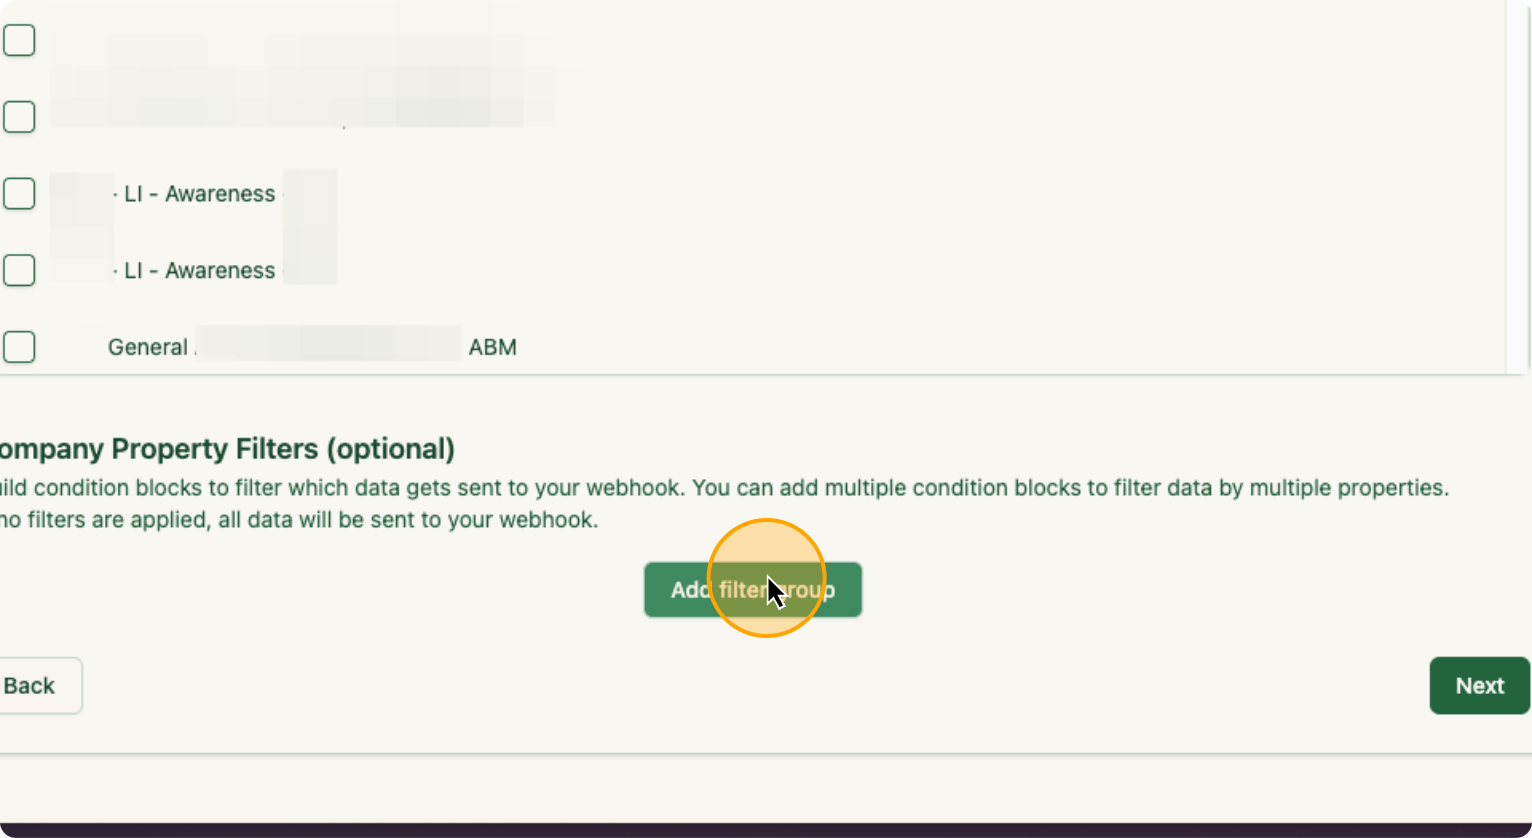
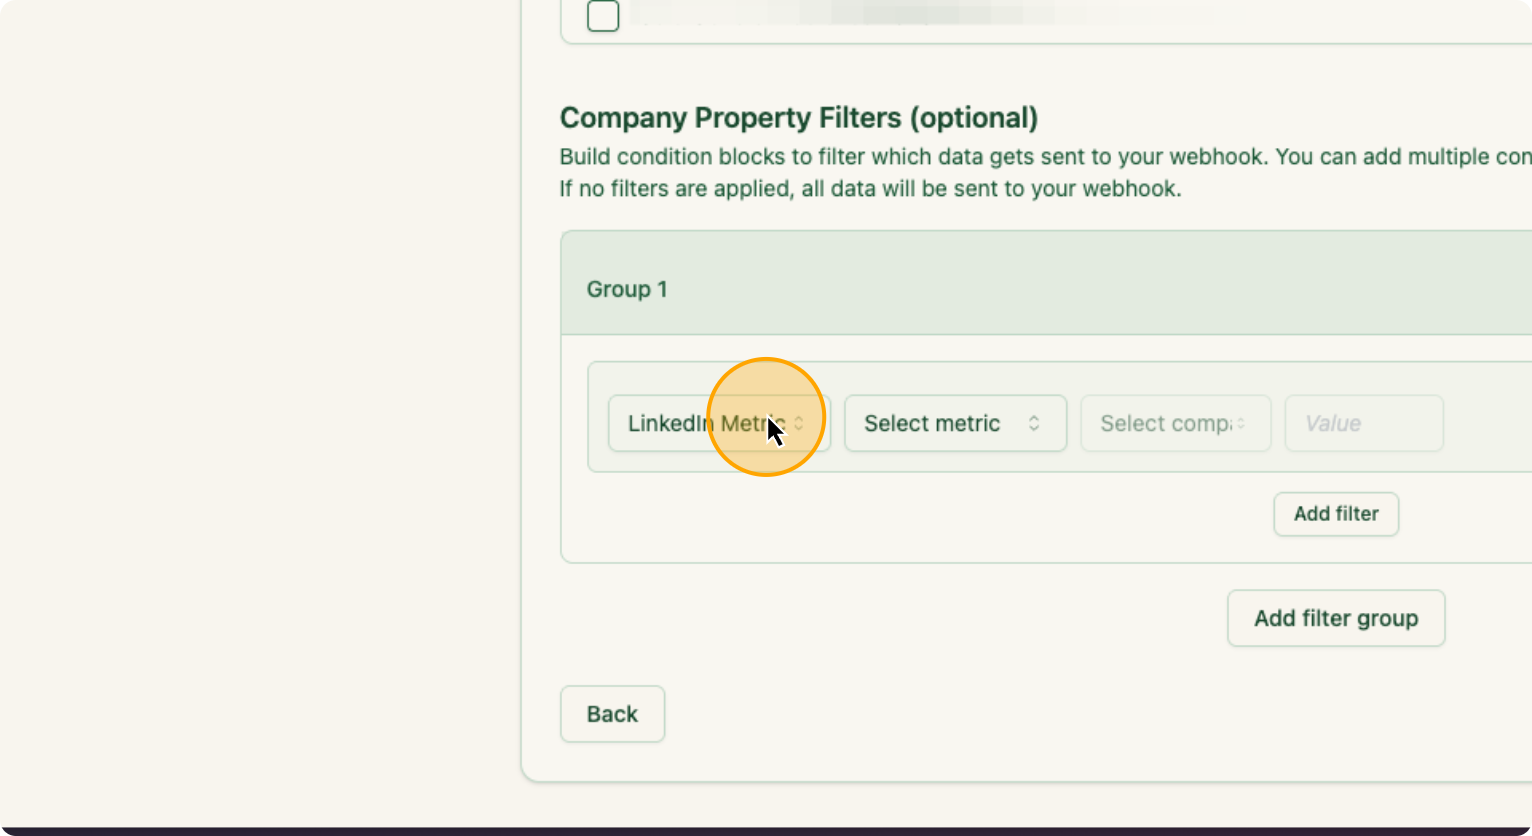
These are the filters. If you want companies from specific campaign groups, campaigns, or ABM campaigns, you can select them. I want everything, so I will ignore this. Click on “Add Filter.” Select “ABM stage” and choose “any of interested.” Ignore the other options.
13. Click on “Add filter group”
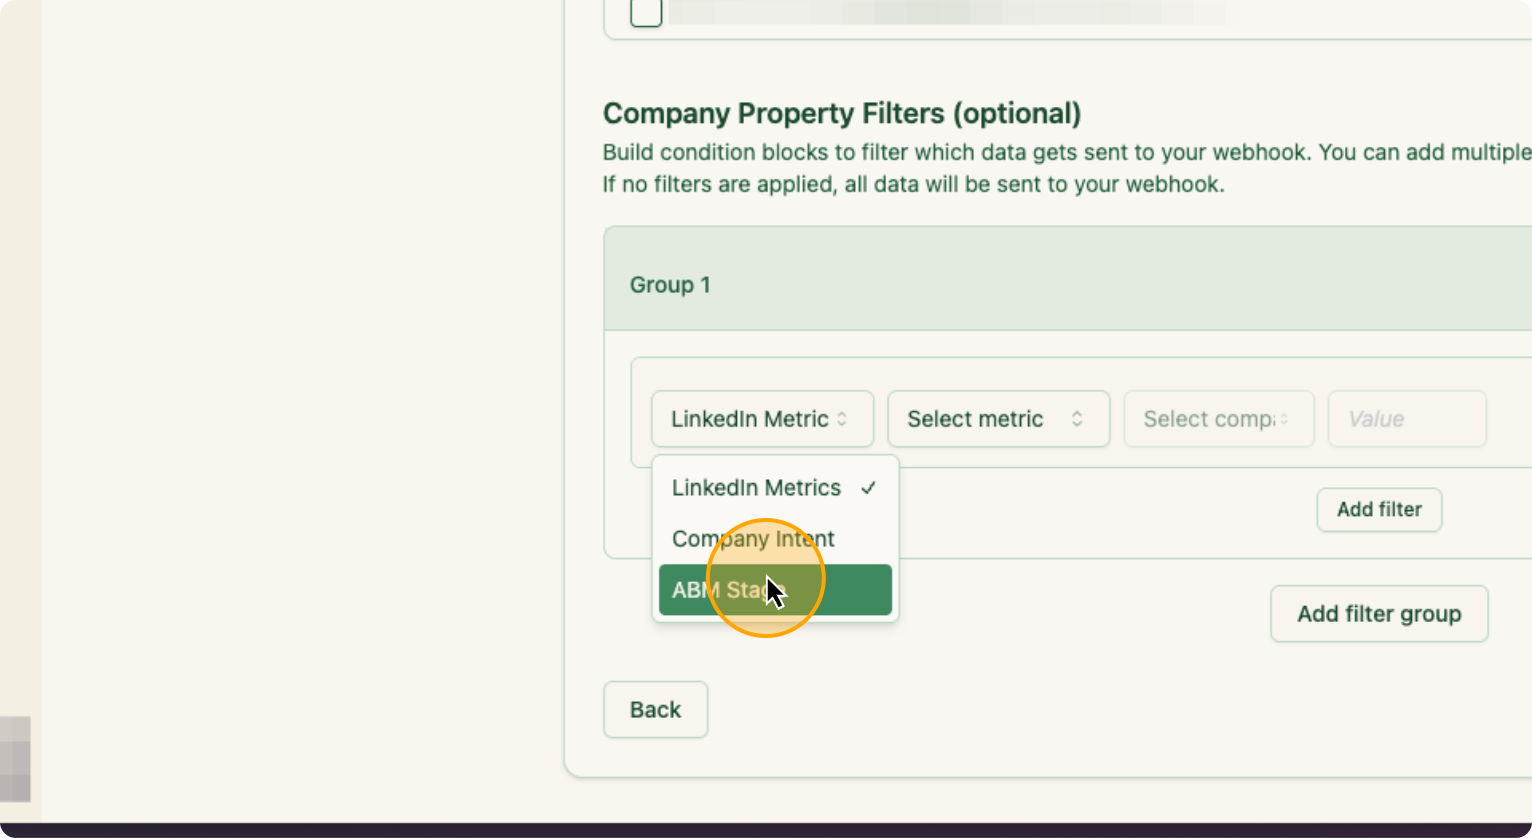
14. Click on “LinkedIn Metric”
15.
Click on “ABM Stage”
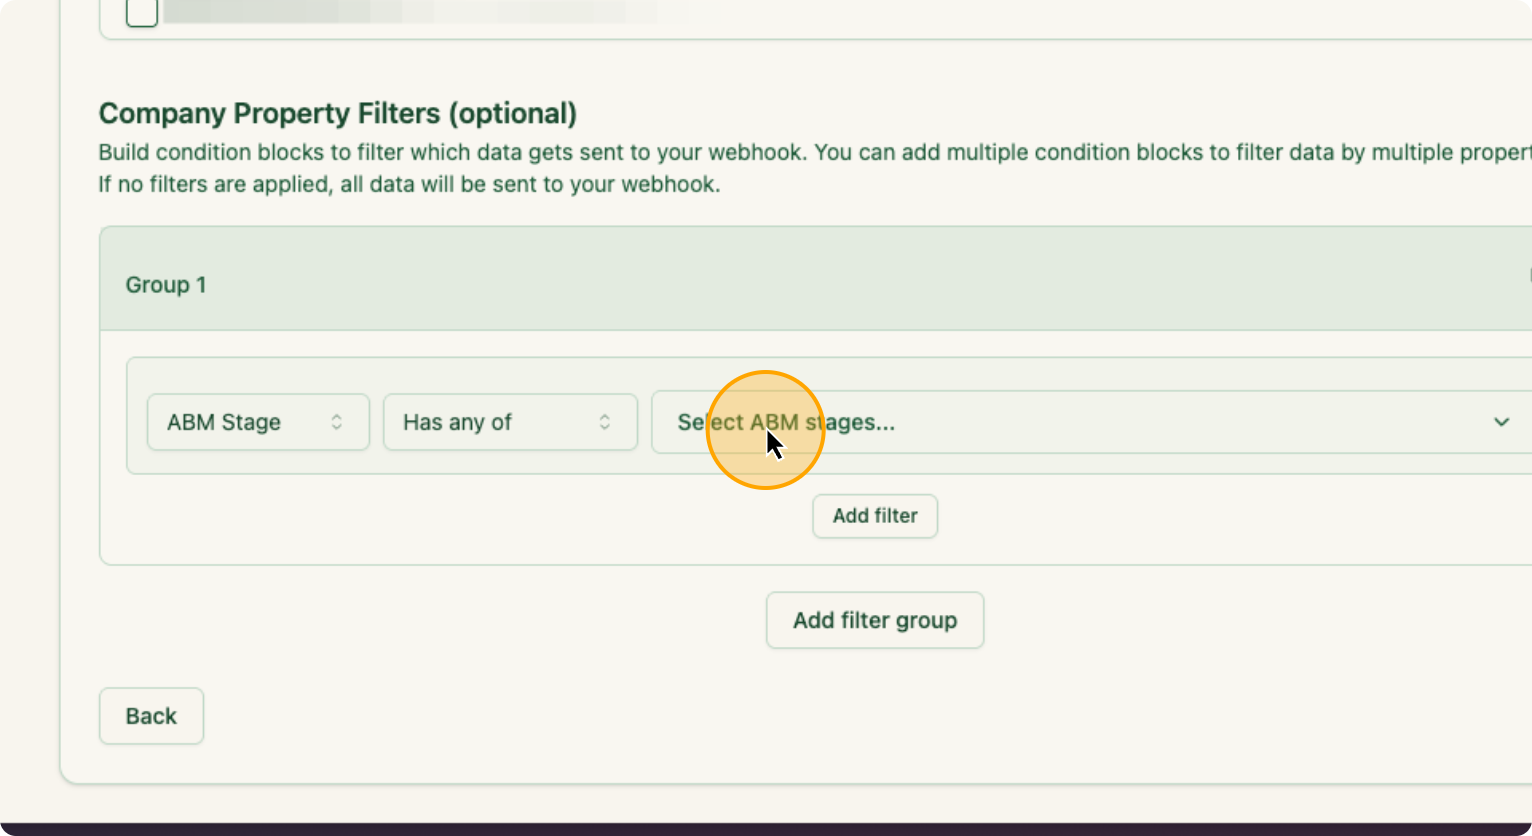
16. Click on “Has any of”

17. Click on “Select ABM stages”
18. Click on “Interested”
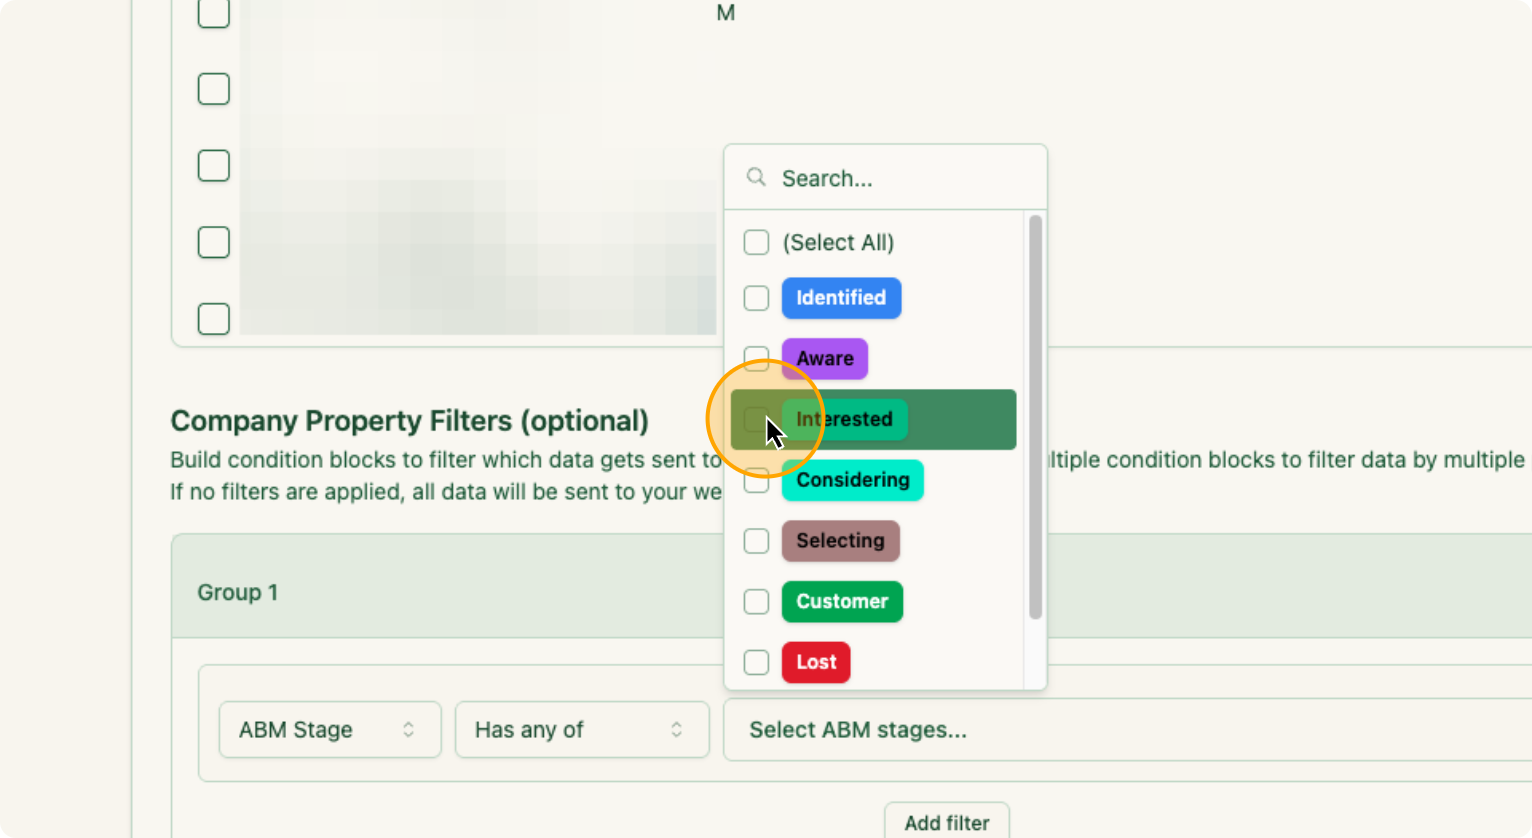
Then click Next.
19. Click on “Next”
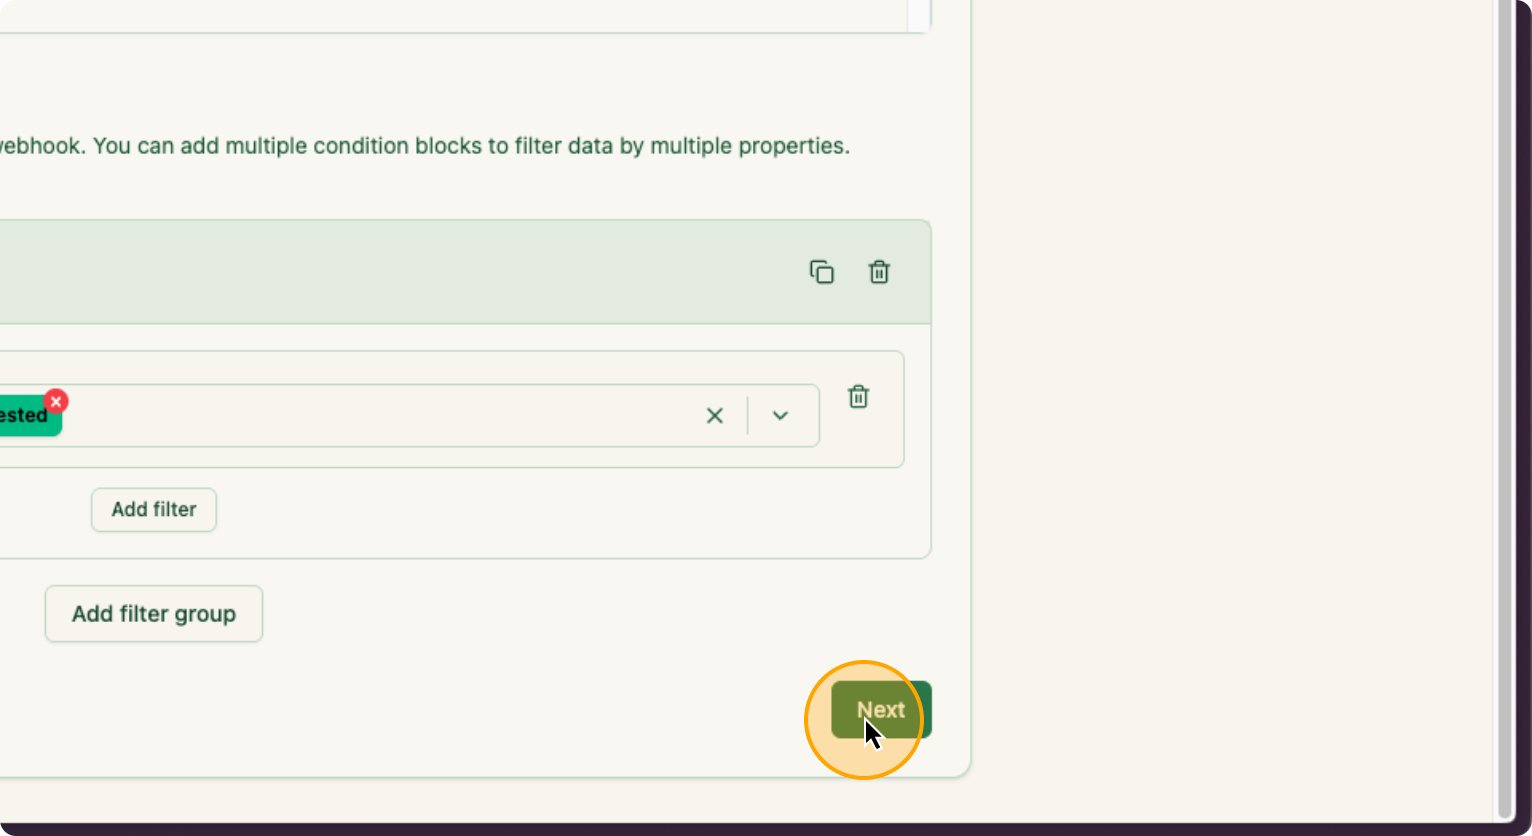
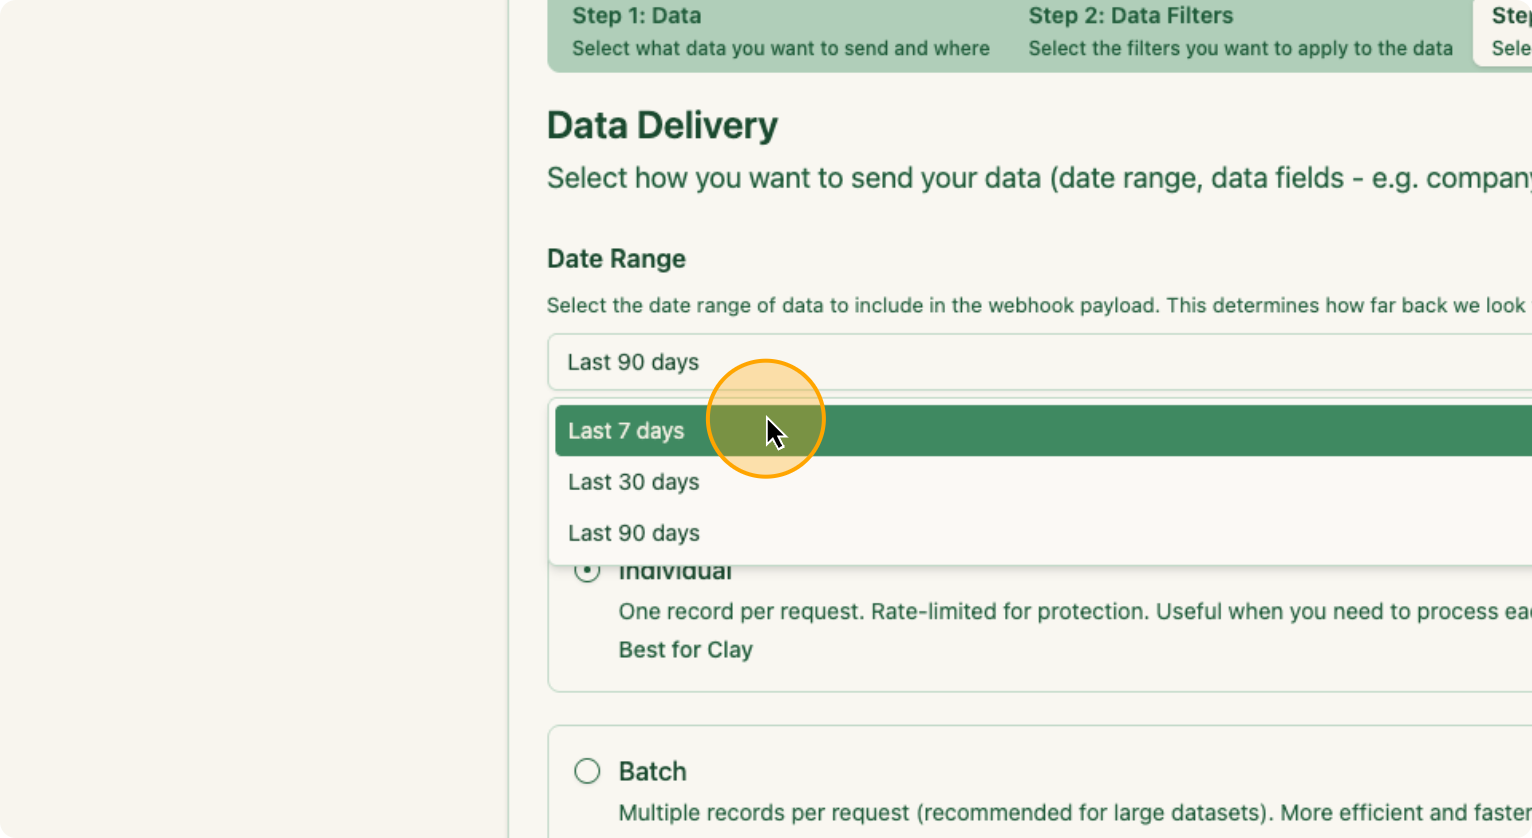
From here, I want it to recur for every 7 days, since I plan to run this weekly. So I am going to change the Date Range to “Last 7 Days”.
20. Click on Date Range
21. Select “Last 7 Days”
Each week, once this occurs, the companies are automatically included.
22. Click here:
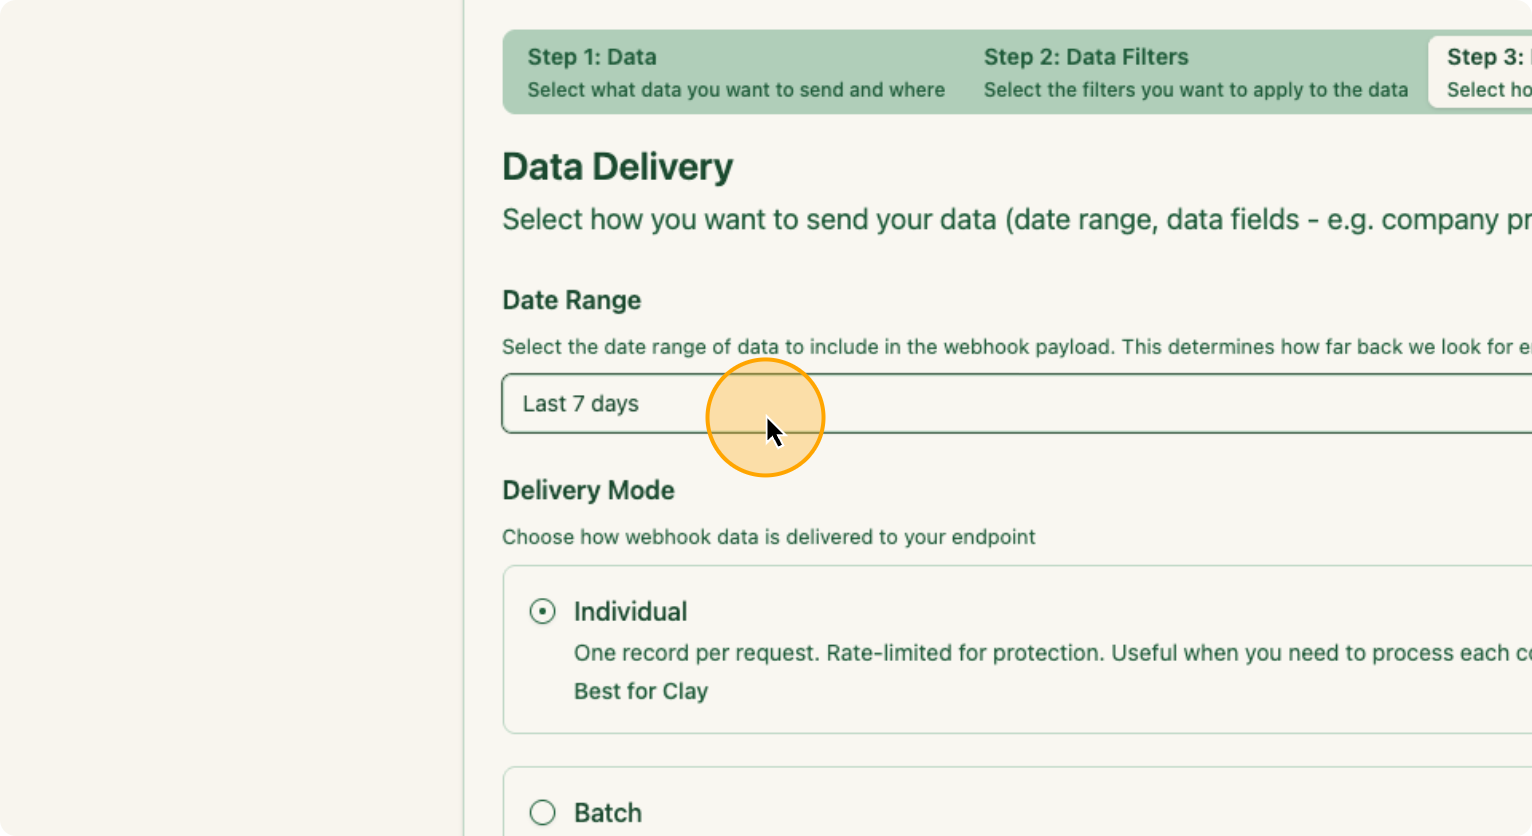
23. Click on “Individual” under Delivery Mode
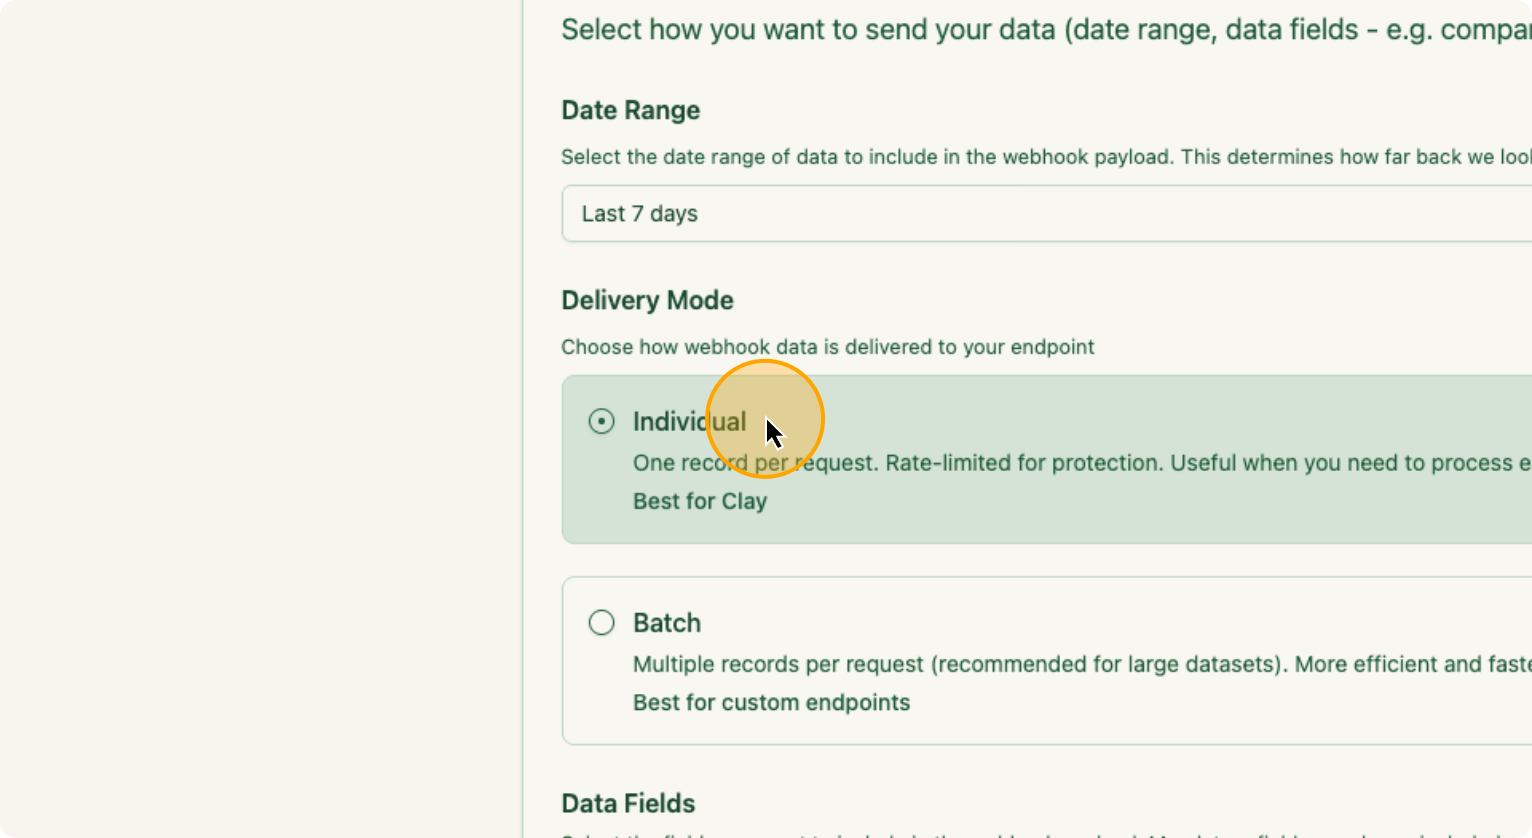
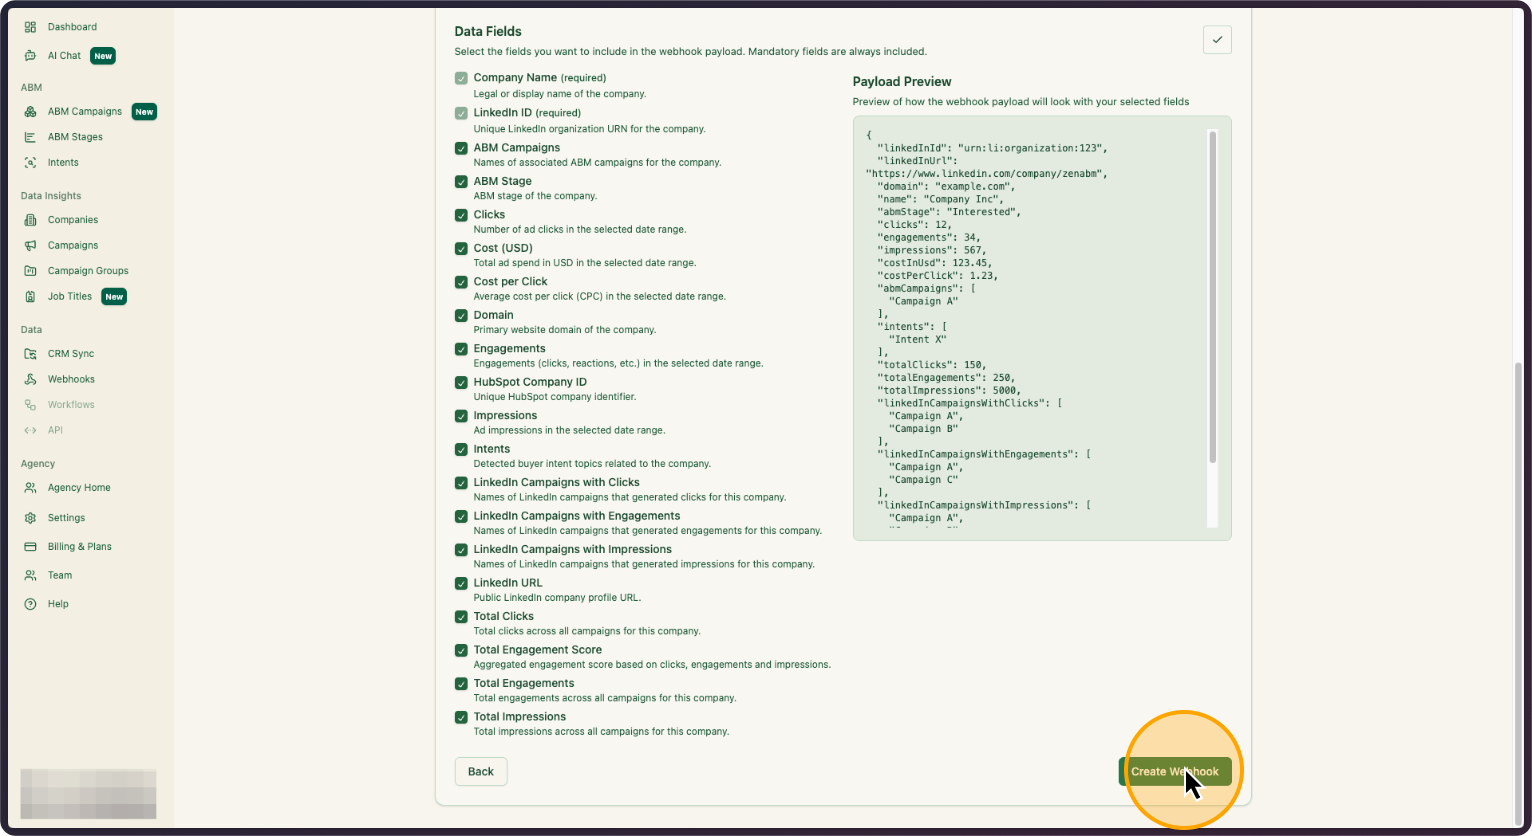
Individual, because that’s what’s best for Clay. I will select all of the “Data Fields”, then create the webhook.
24. Click on “Create Webhook”
Once I do this, I will go back to Clay for Step 2.
All of these company URLs will be pulled in automatically. I will click on Overview, then Find People, and then Edit Inputs.
25. In “Overview”, Click on “Find People”
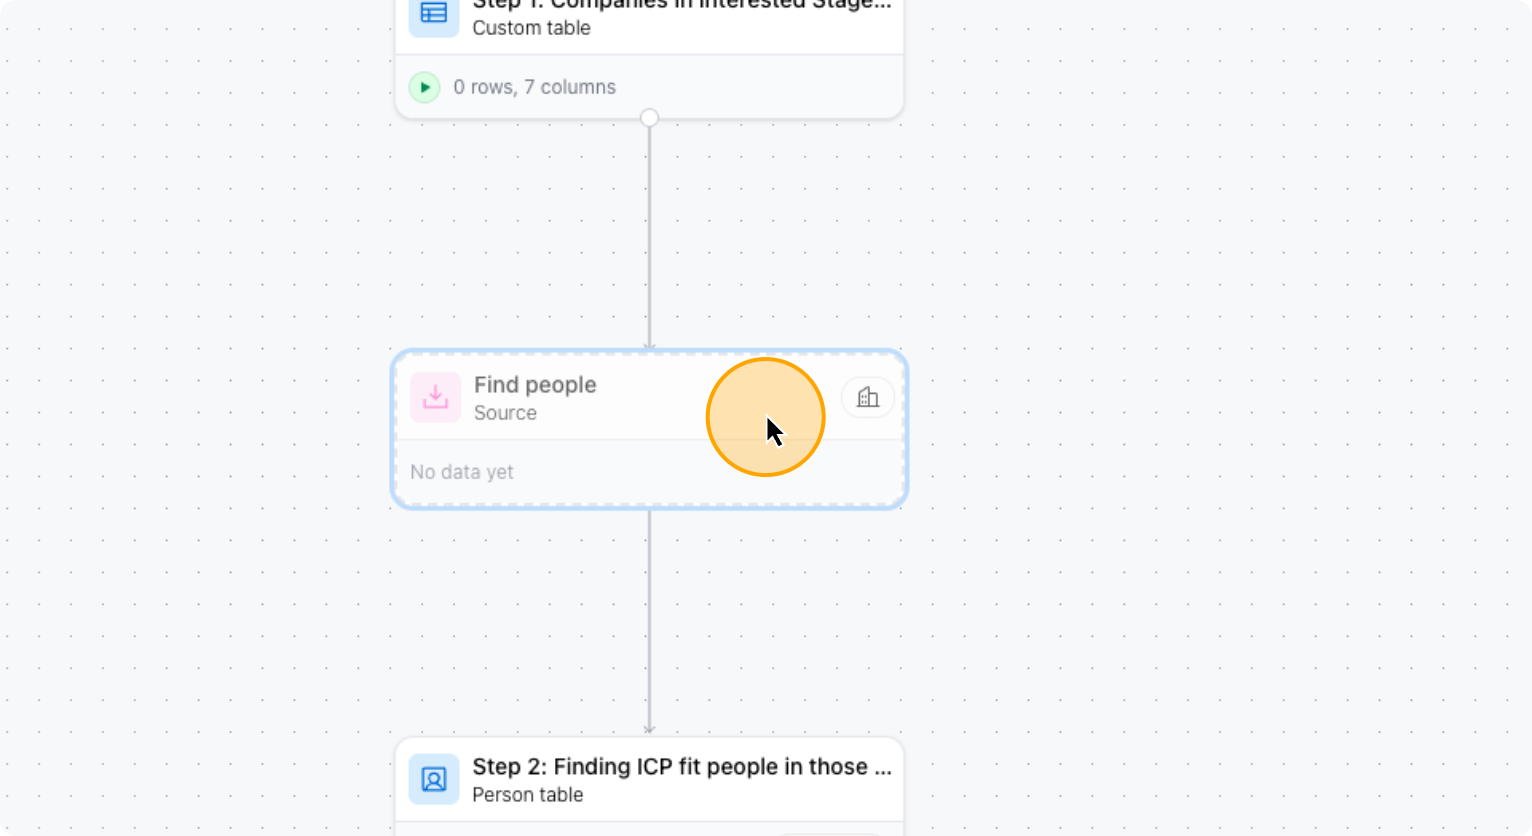
26. Click on “Edit inputs”
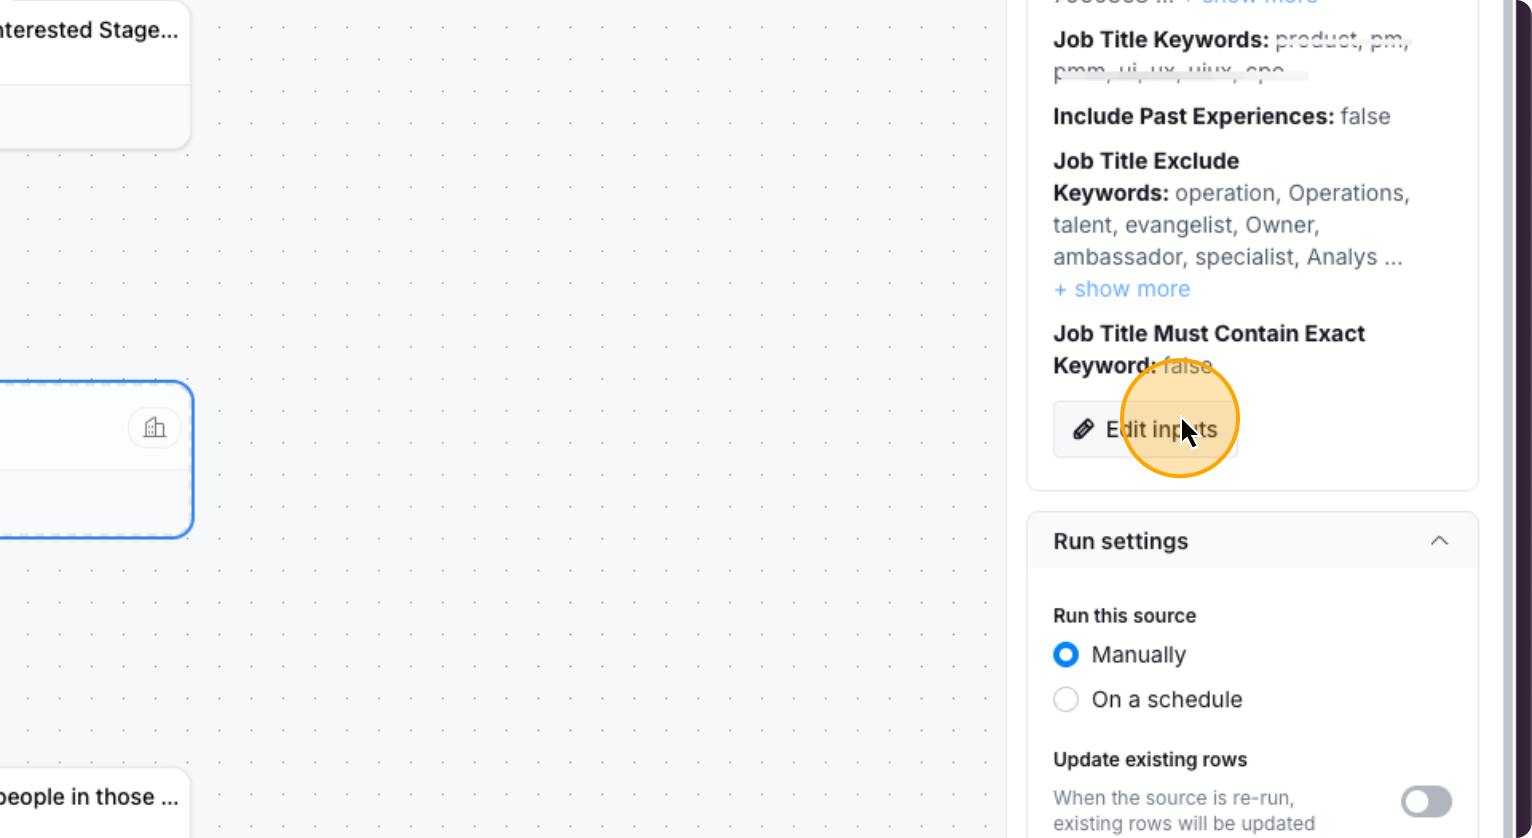
Here, select the filters for your ICP. Including Job Titles, Locations etc.
27. Edit the filters for your ICP here
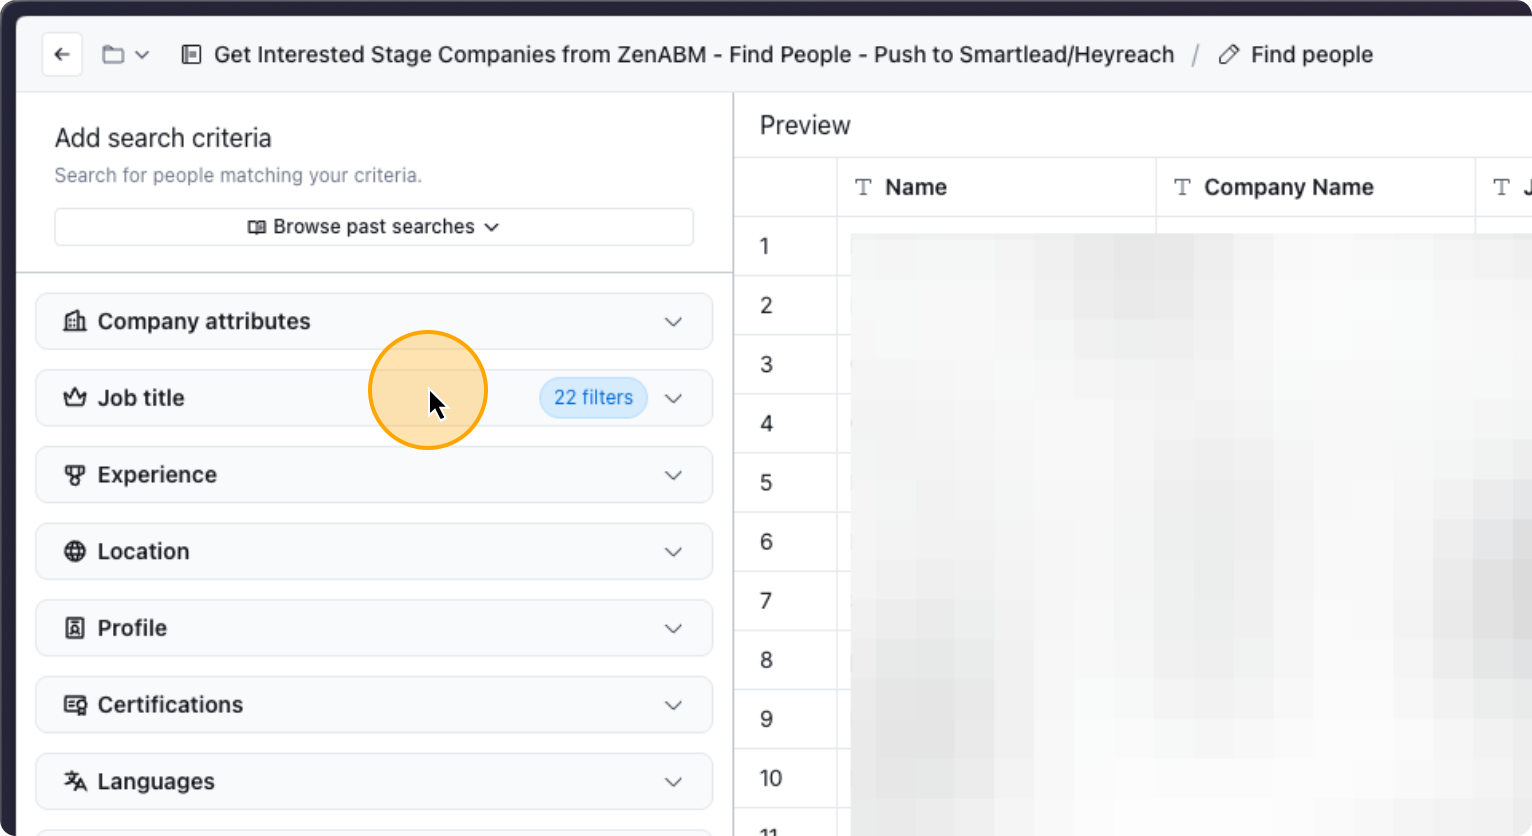
List all the job titles you want to include, as well as those you want to exclude. Add any other relevant details as needed.
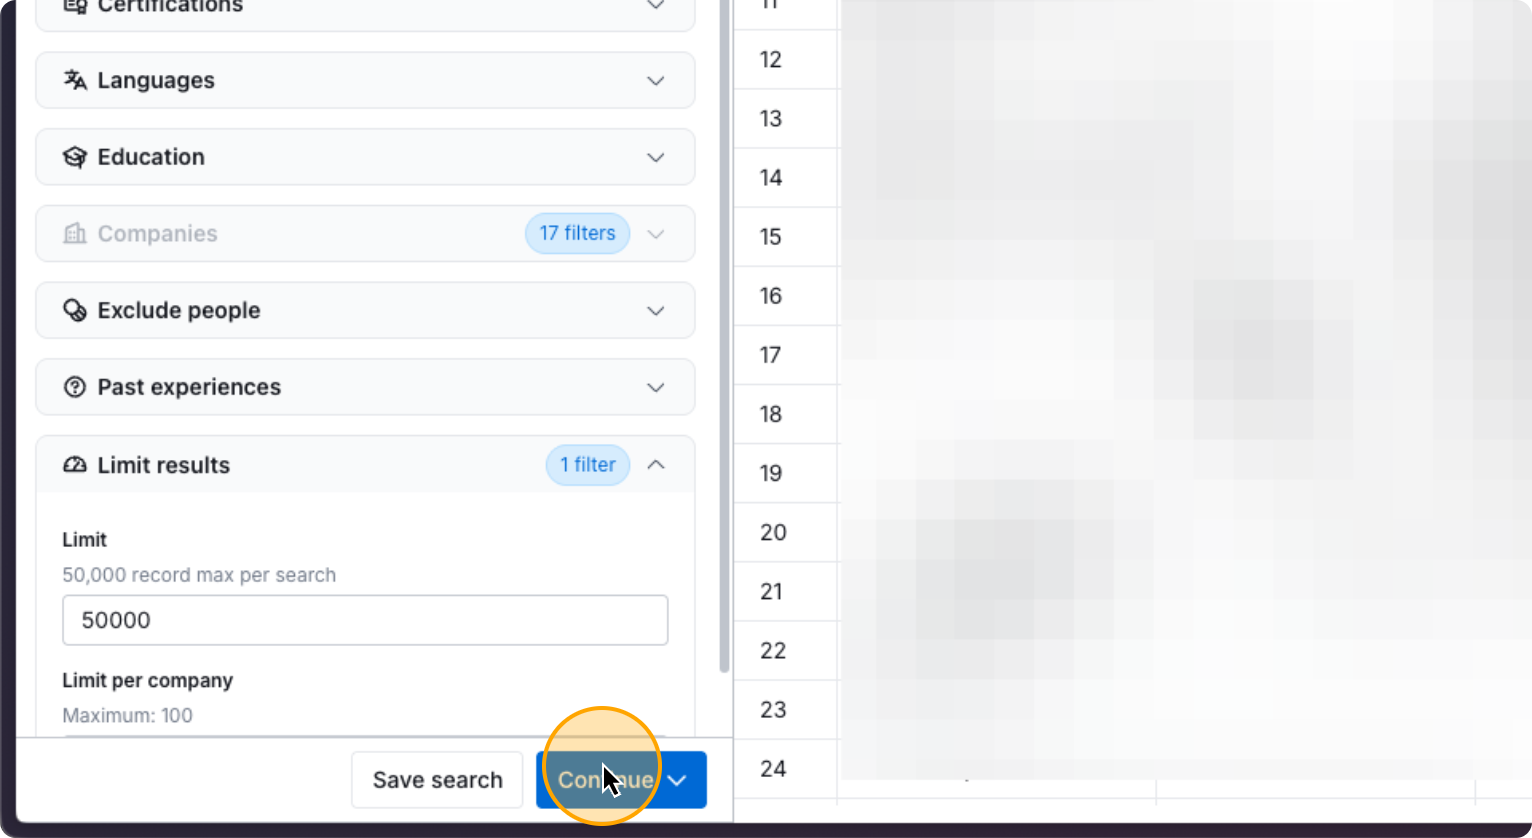
Adjust the filters as needed, then click Continue.
28. Click on “Continue ✓”
Once you do that, click on…
29. Click on “Replace existing rows”
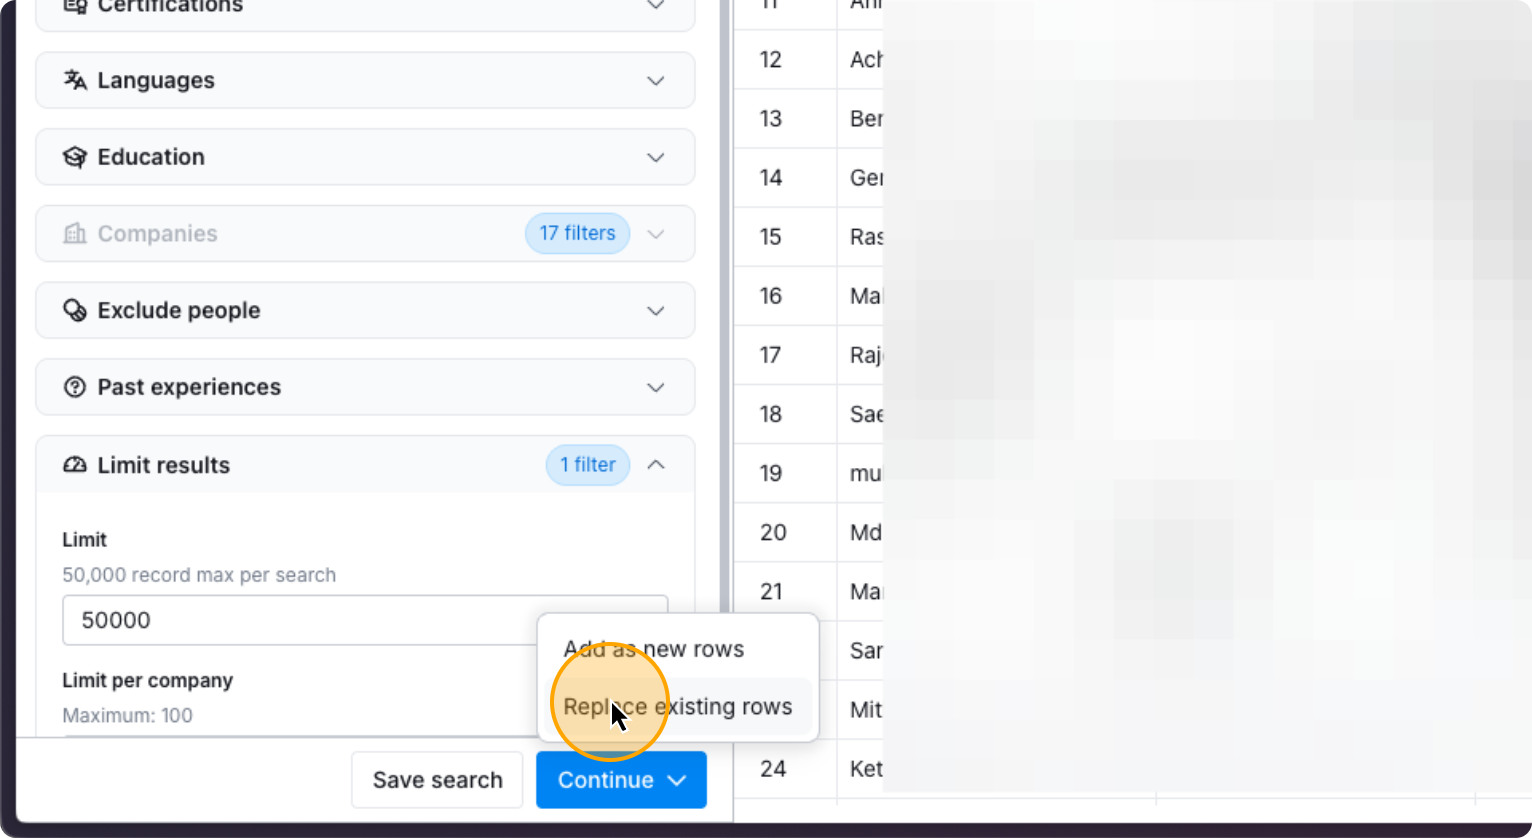
Click on “Replace Rows”, and you’re done.
30. Click on “Replace rows”
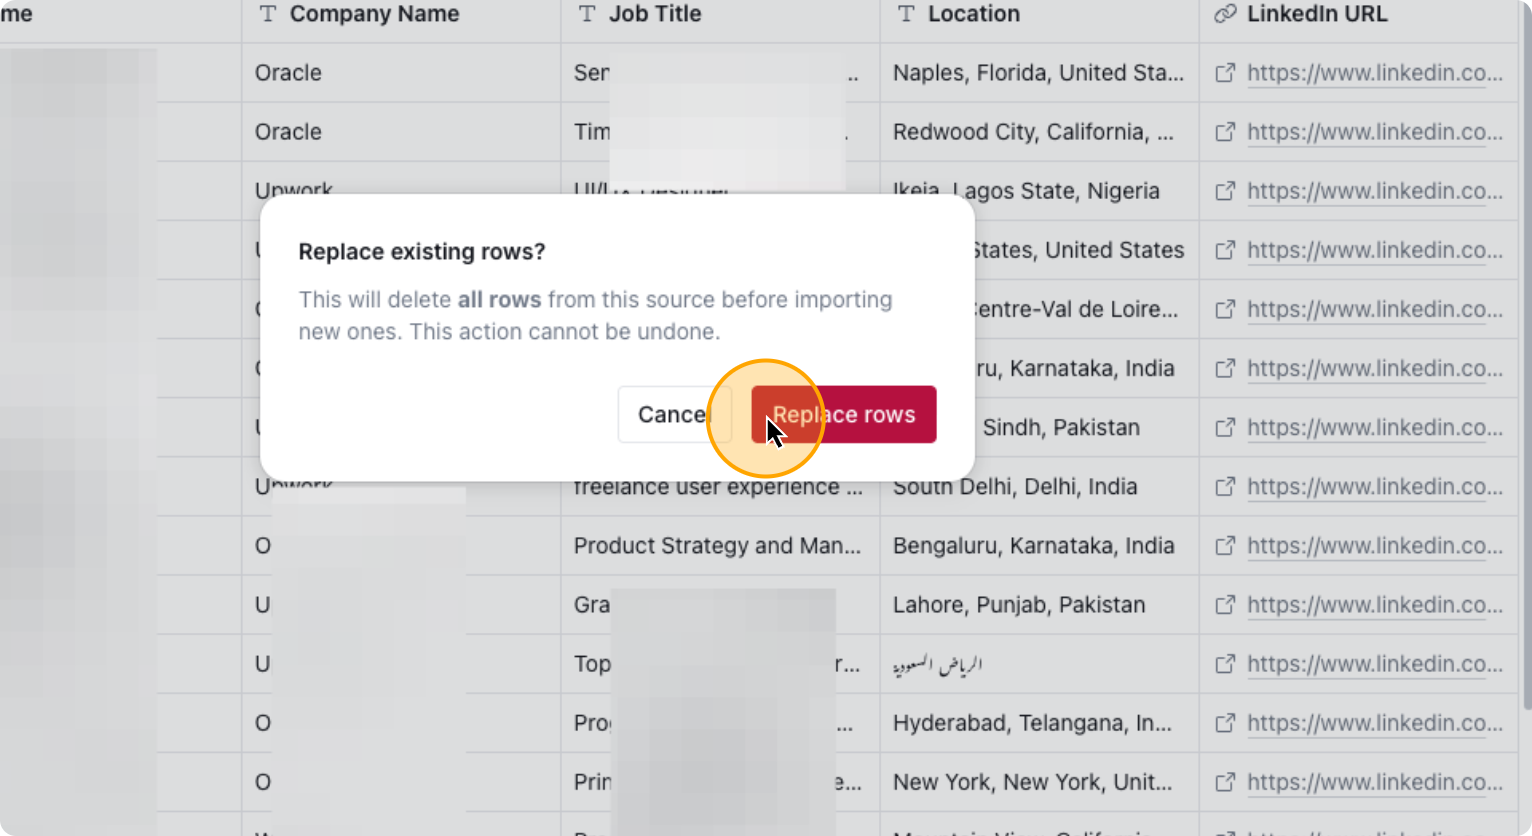
Now It will prospect into your ICP from the Interested Stage companies automatically. Go to Step 2 now.
31. Click on “Step 2”
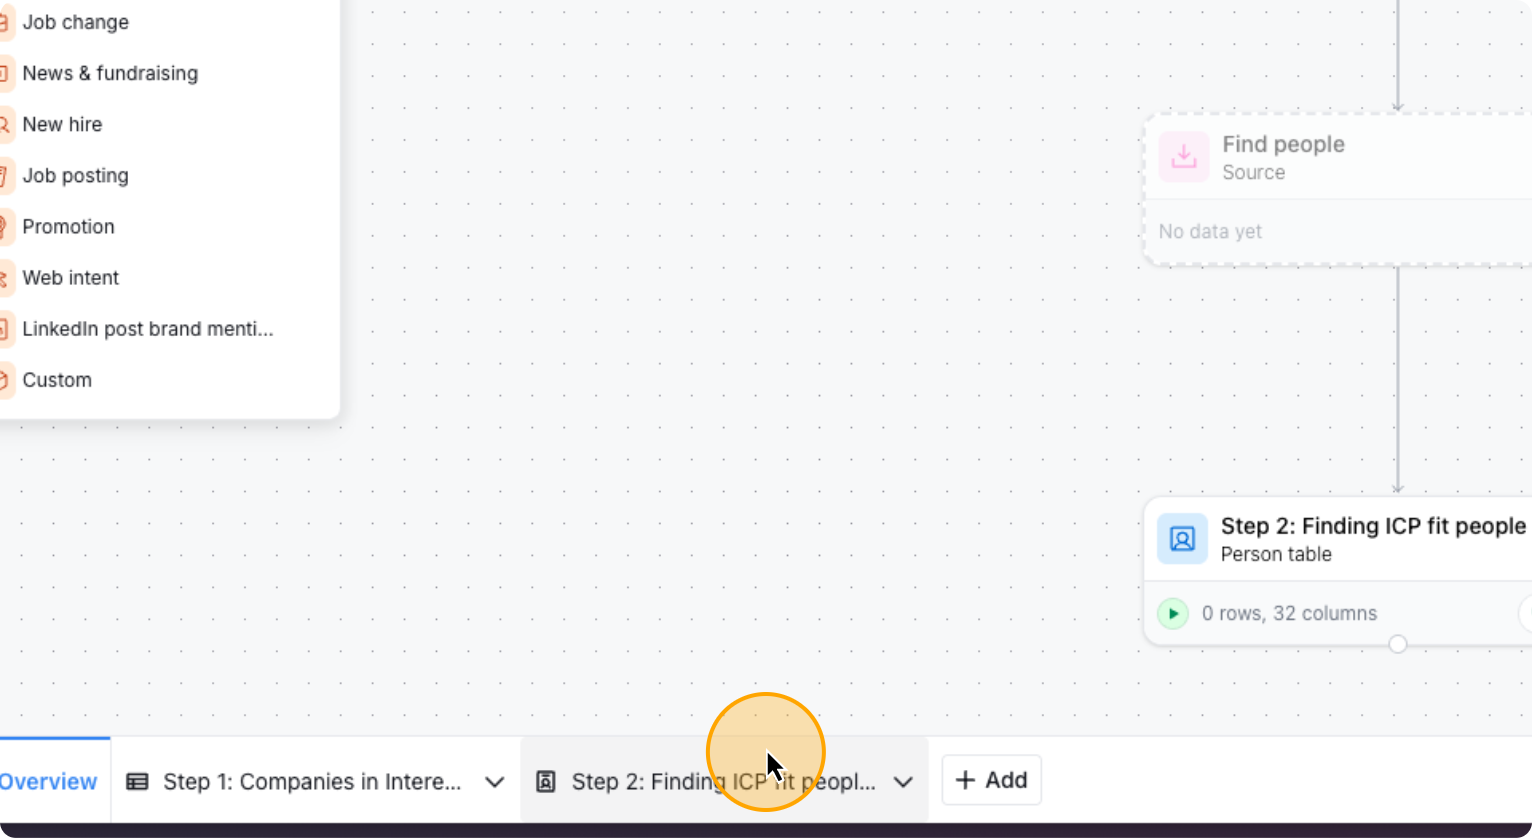
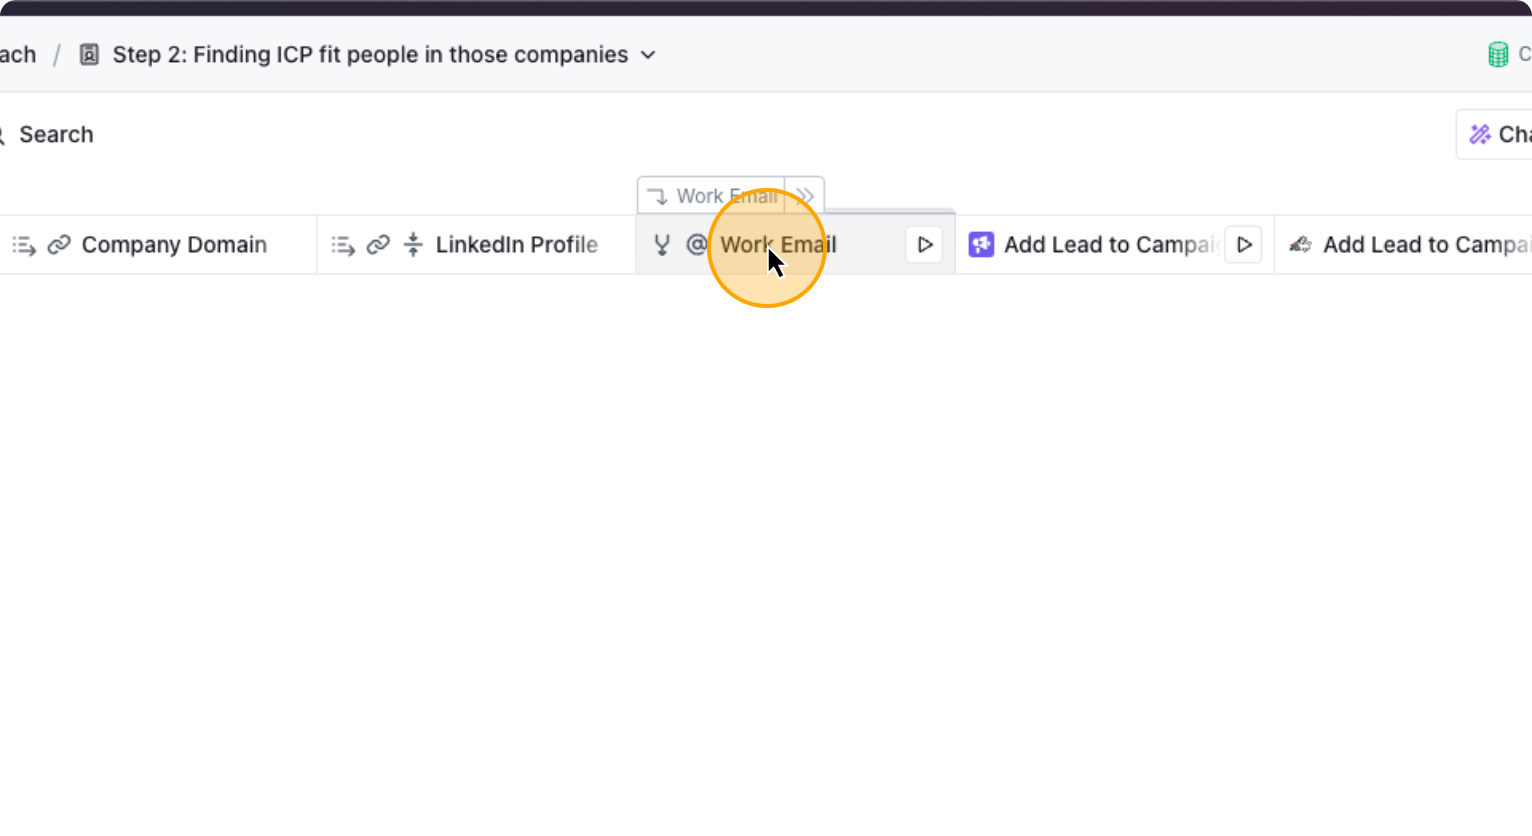
This table, finds the work emails of the prospects and pushes them to the relevant Smartlead and HeyReach campaigns automatically. By default the “Work Email” column is turned off so you don’t spend Clay credits unexpectidly. If you want to automatically find the work emails for your ICP in those interested stage companies, you need to enable “Auto Update” for this column.
32. Click on “Work Email”
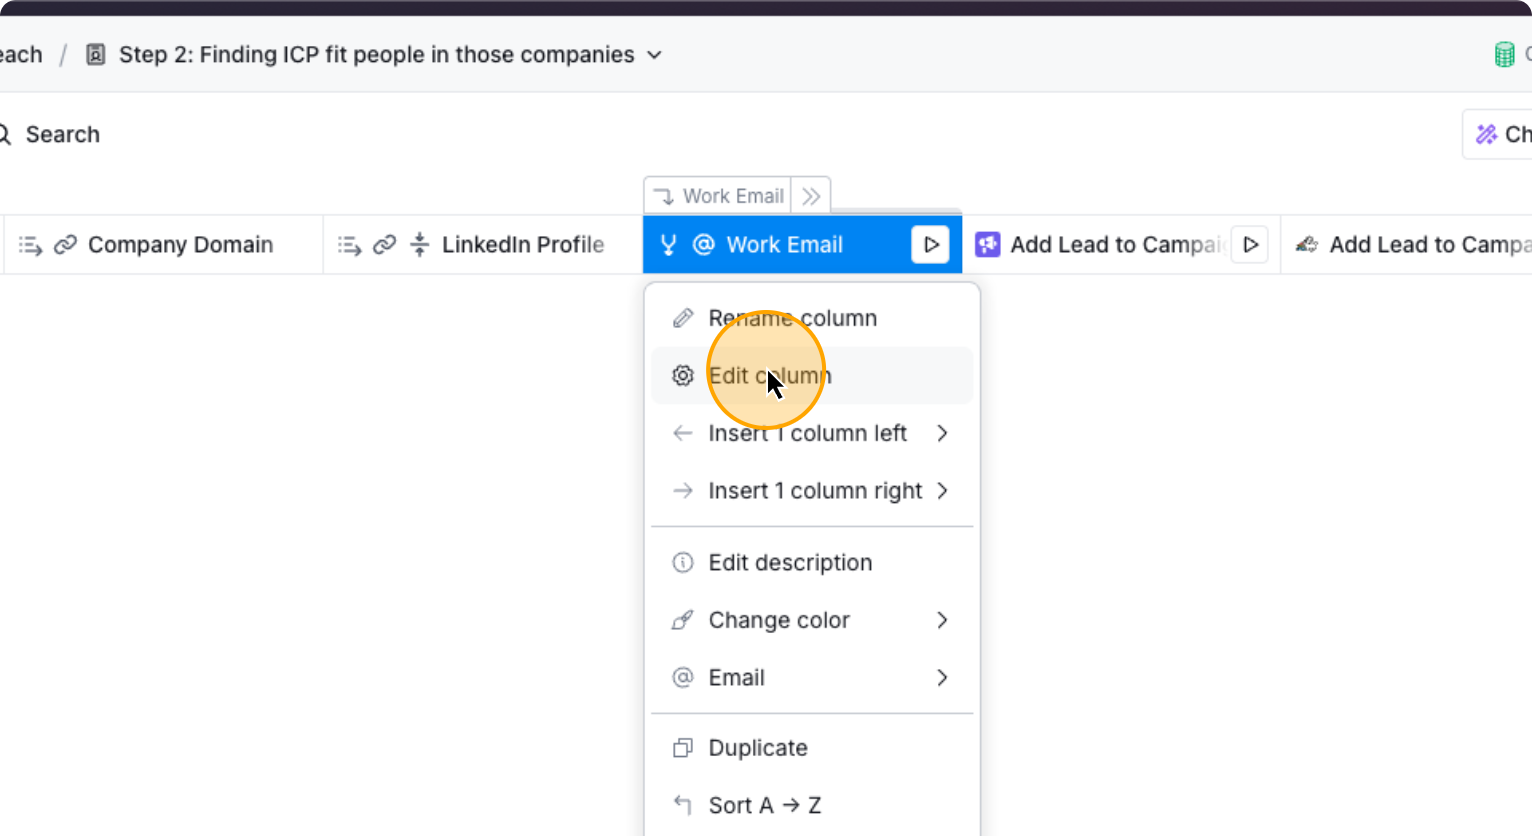
Click on “Edit Column.” Then, you…
33. Click on “Edit column”
34. Click here
35. Click here

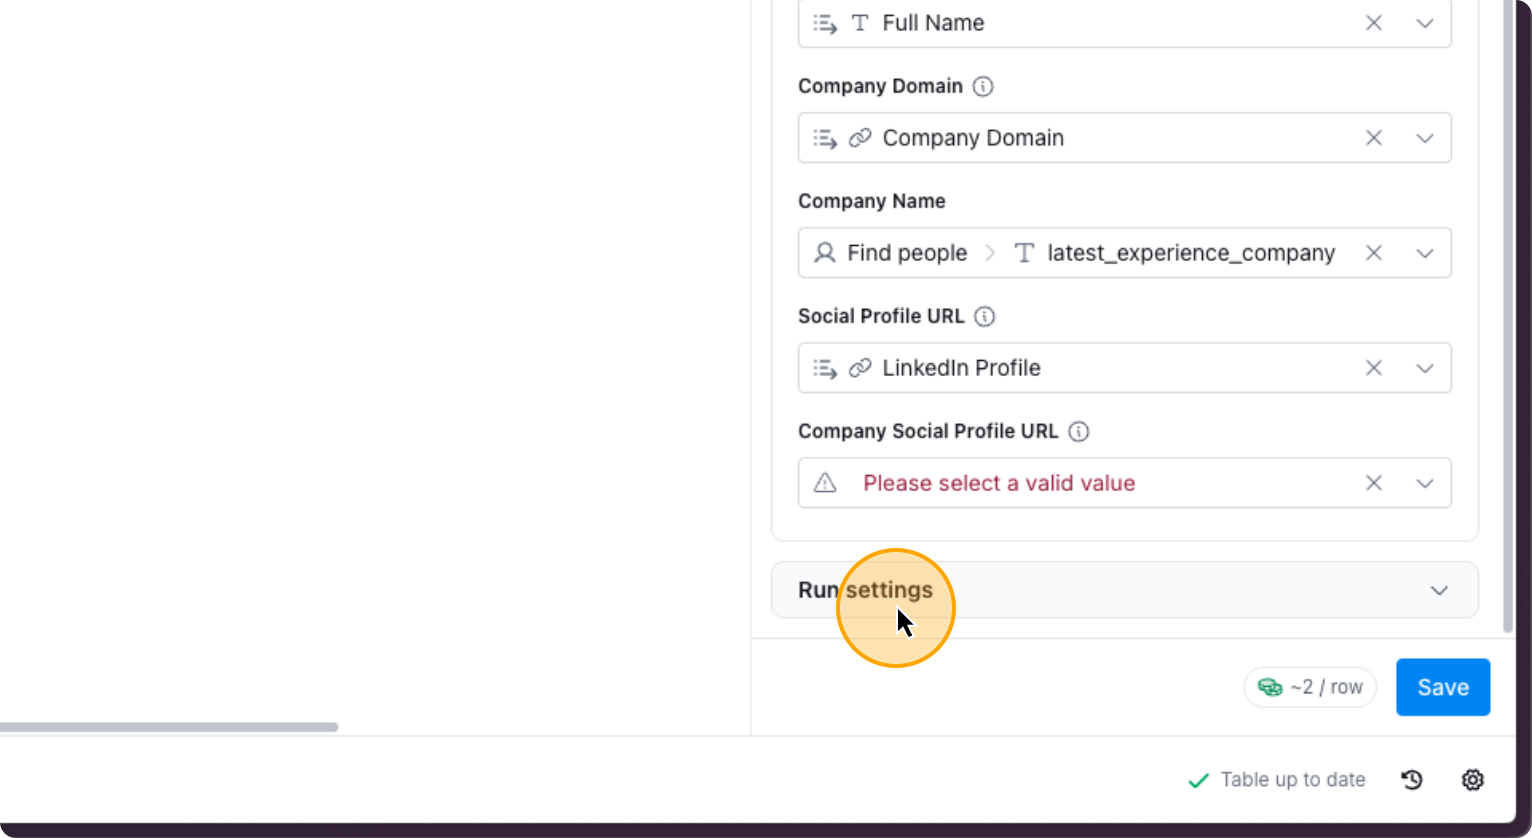
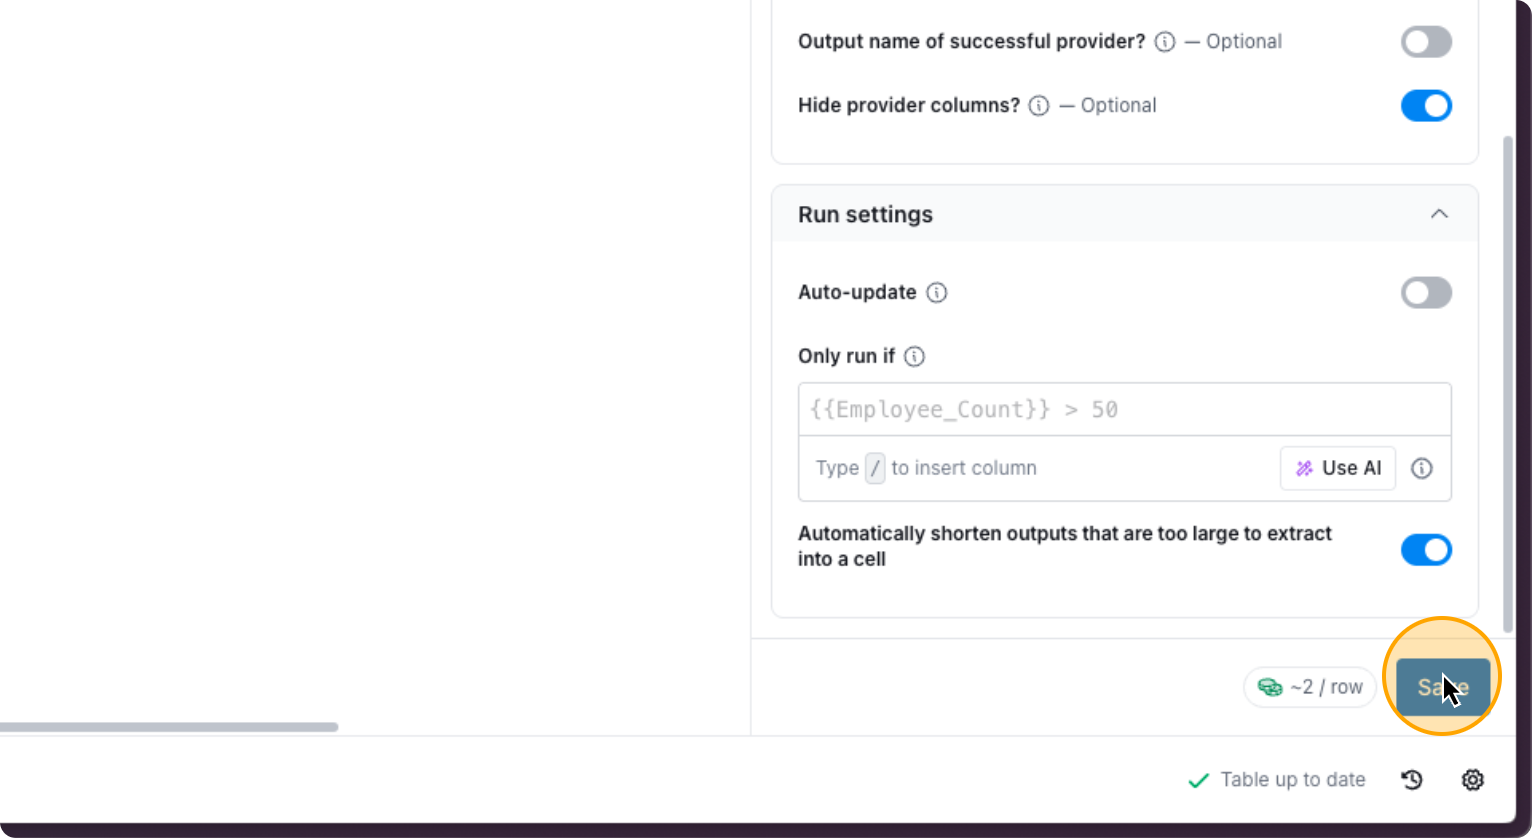
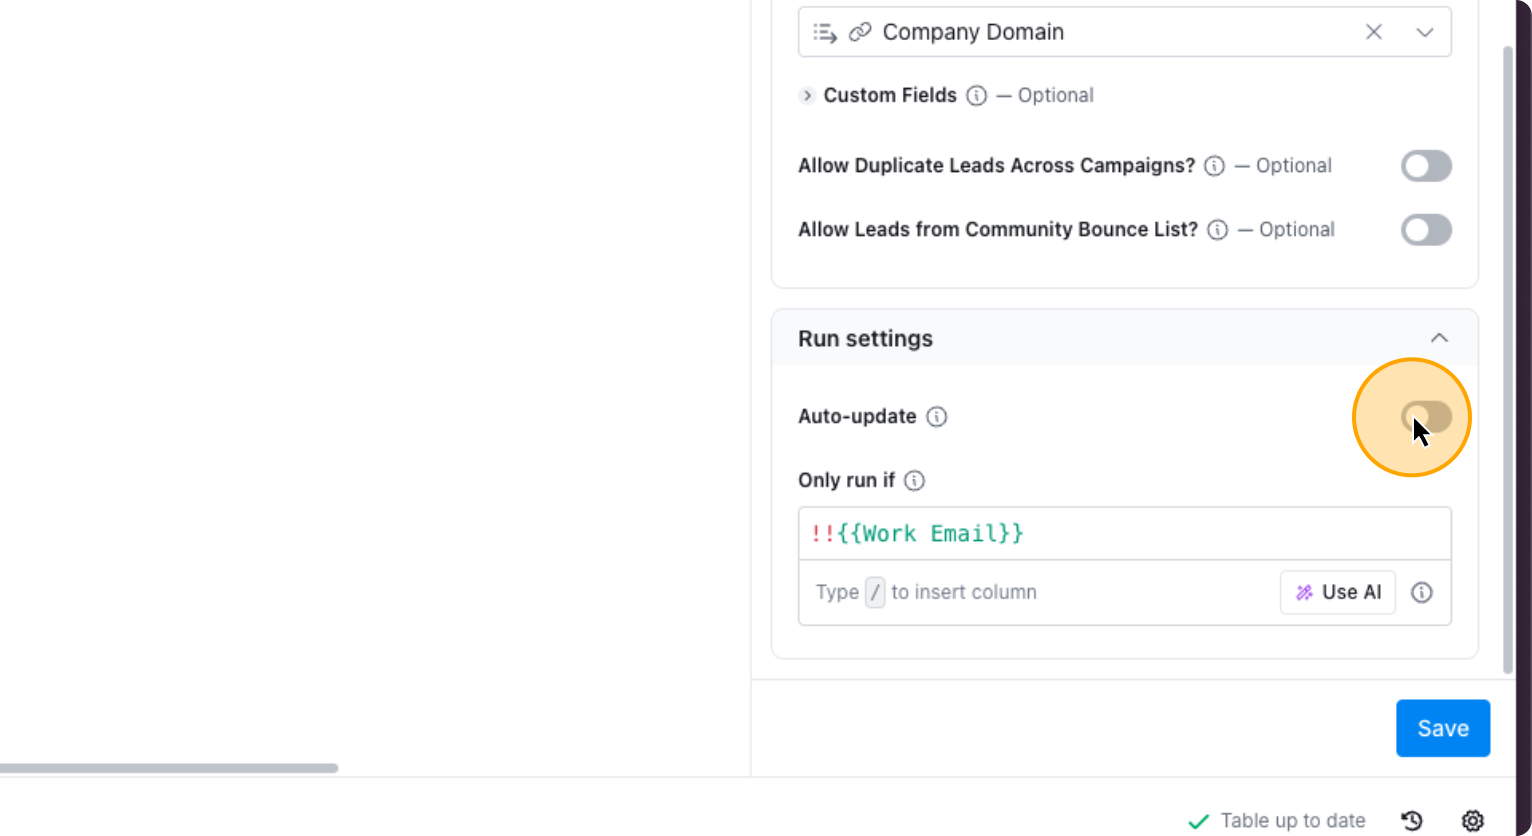
Turn on “Auto-update”.
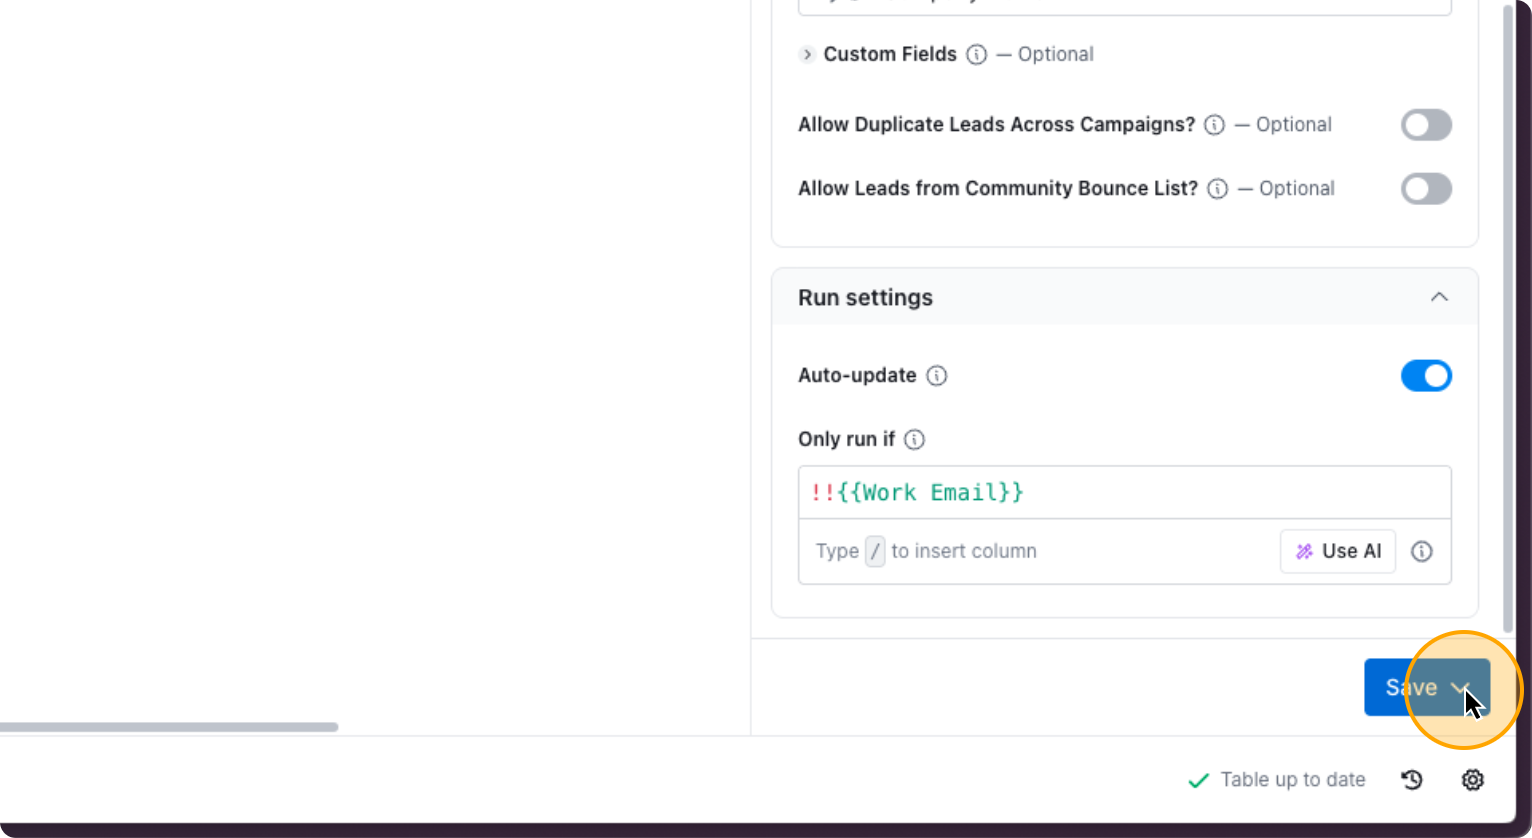
If you want to change certain settings, you can do so in “Full Configration”. If not, let it be. Click on “Save”.
36. Click on “Save”
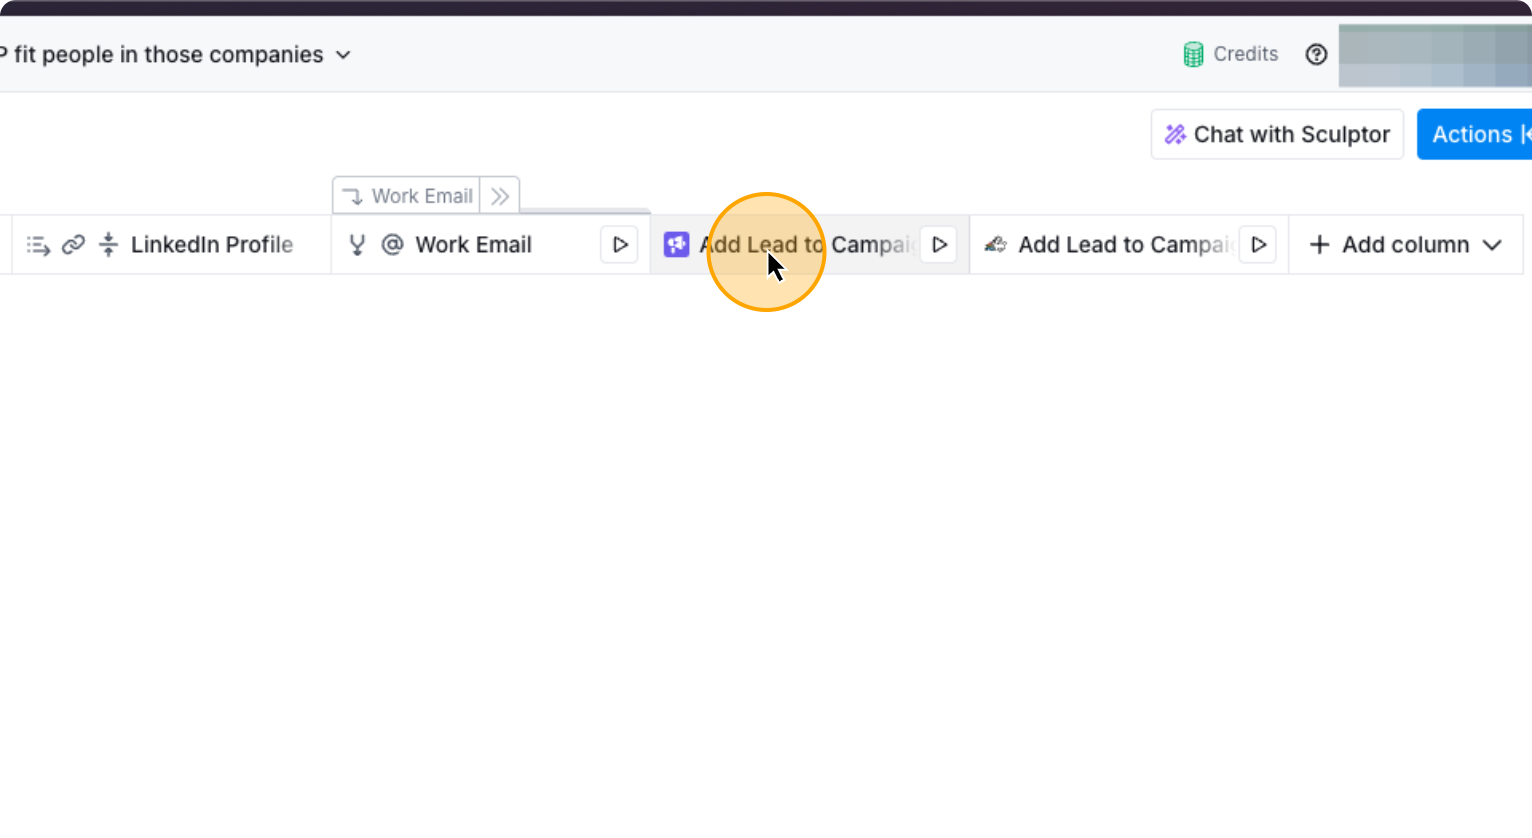
Now to select the right Smartlead Campaign to add the prospect to, follow these steps.
37. Click on the column “Add Lead to Campaigns”
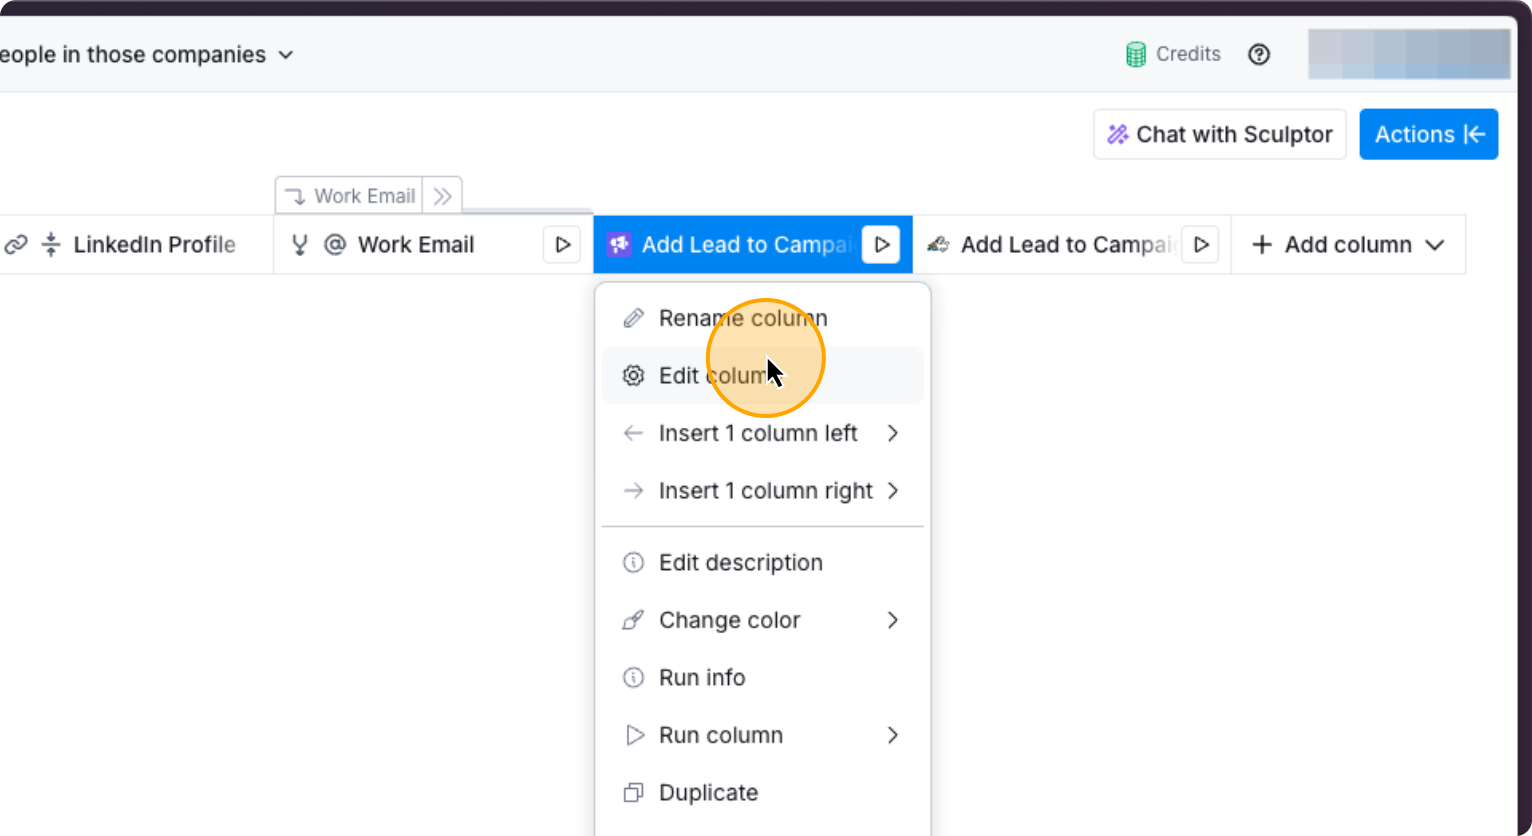
Here you need to select which Smartlead campaign do you want to add the prospect automatically to.
38. Click on “Edit column”
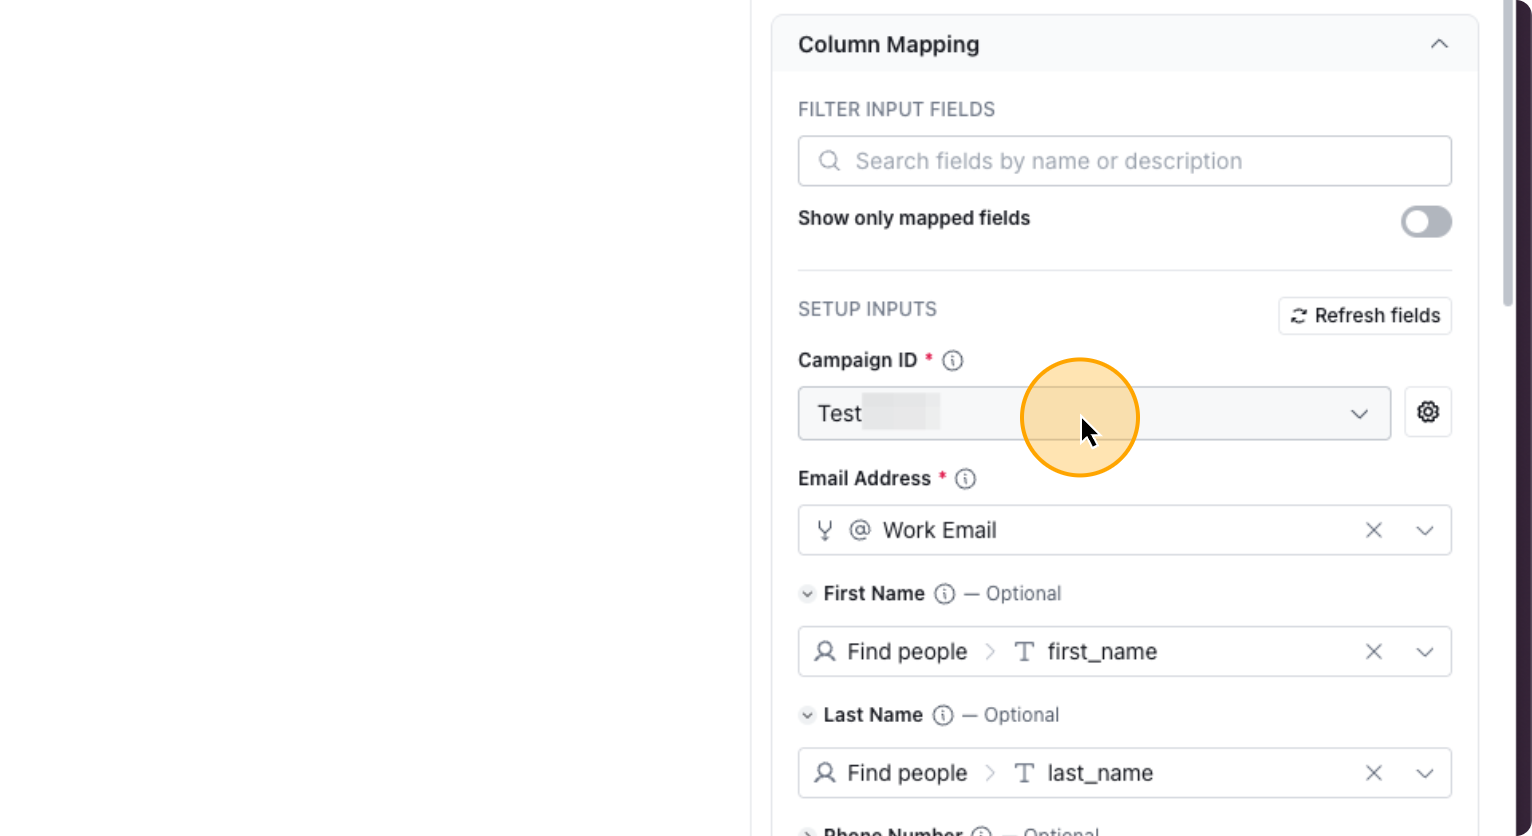
If your Smartlead account is already connected, select your account. Then, choose the campaign you want.
39. Click on “Select Smartlead.ai account”
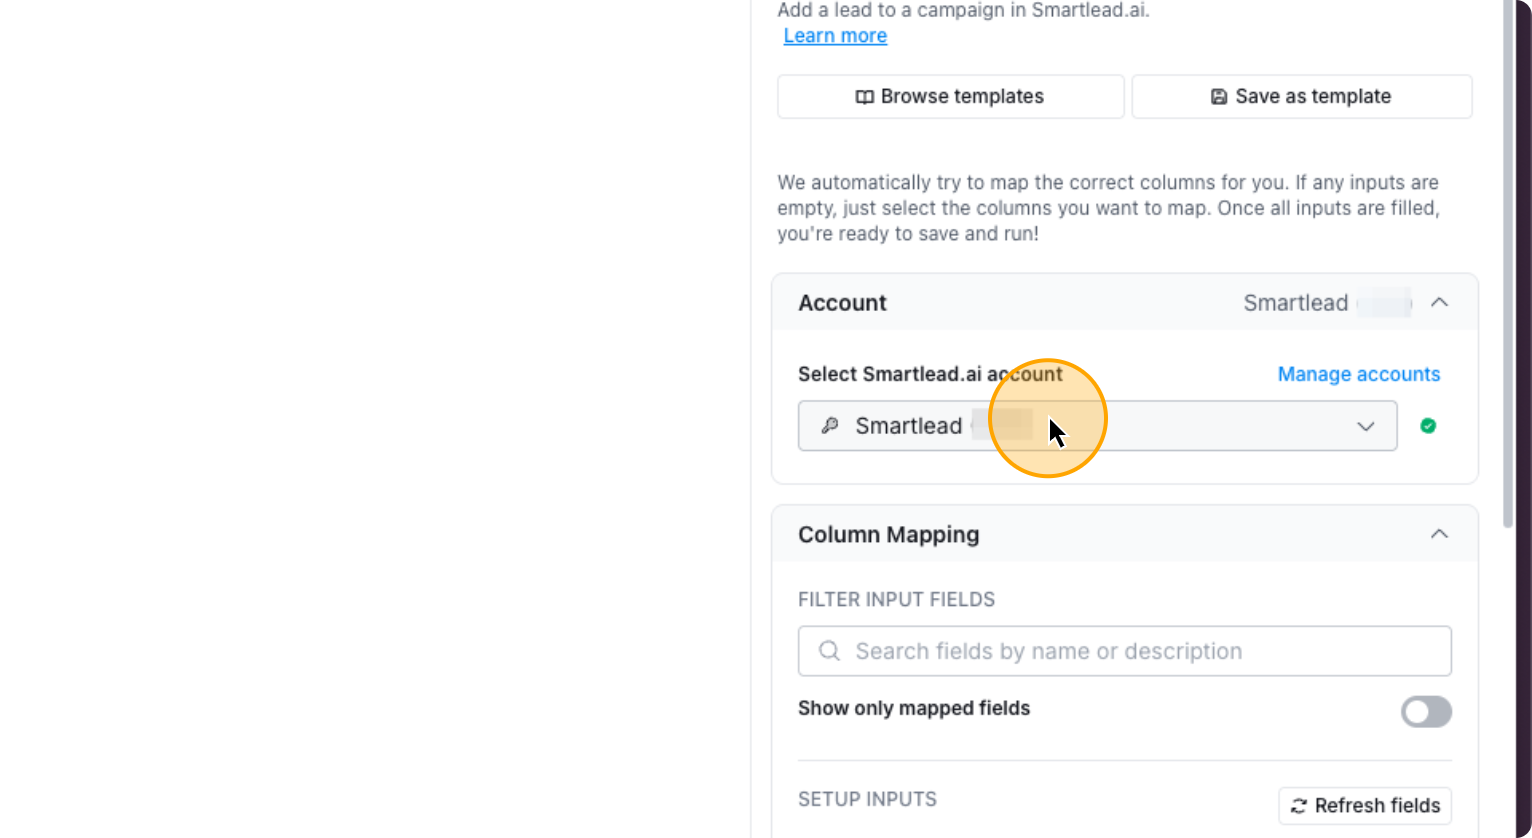
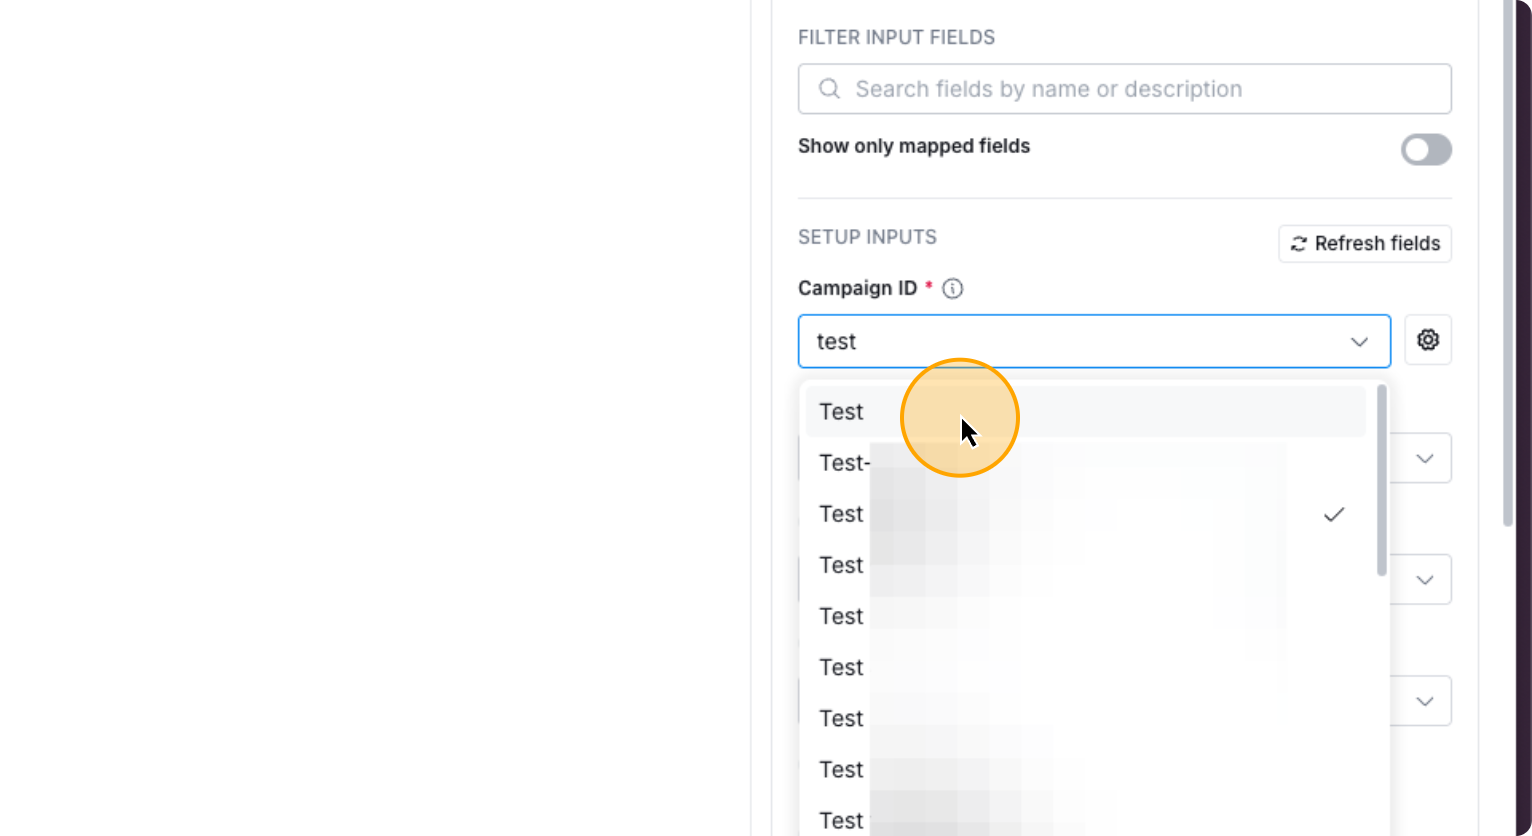
40. Click on “Campaign ID” to select the right campaign
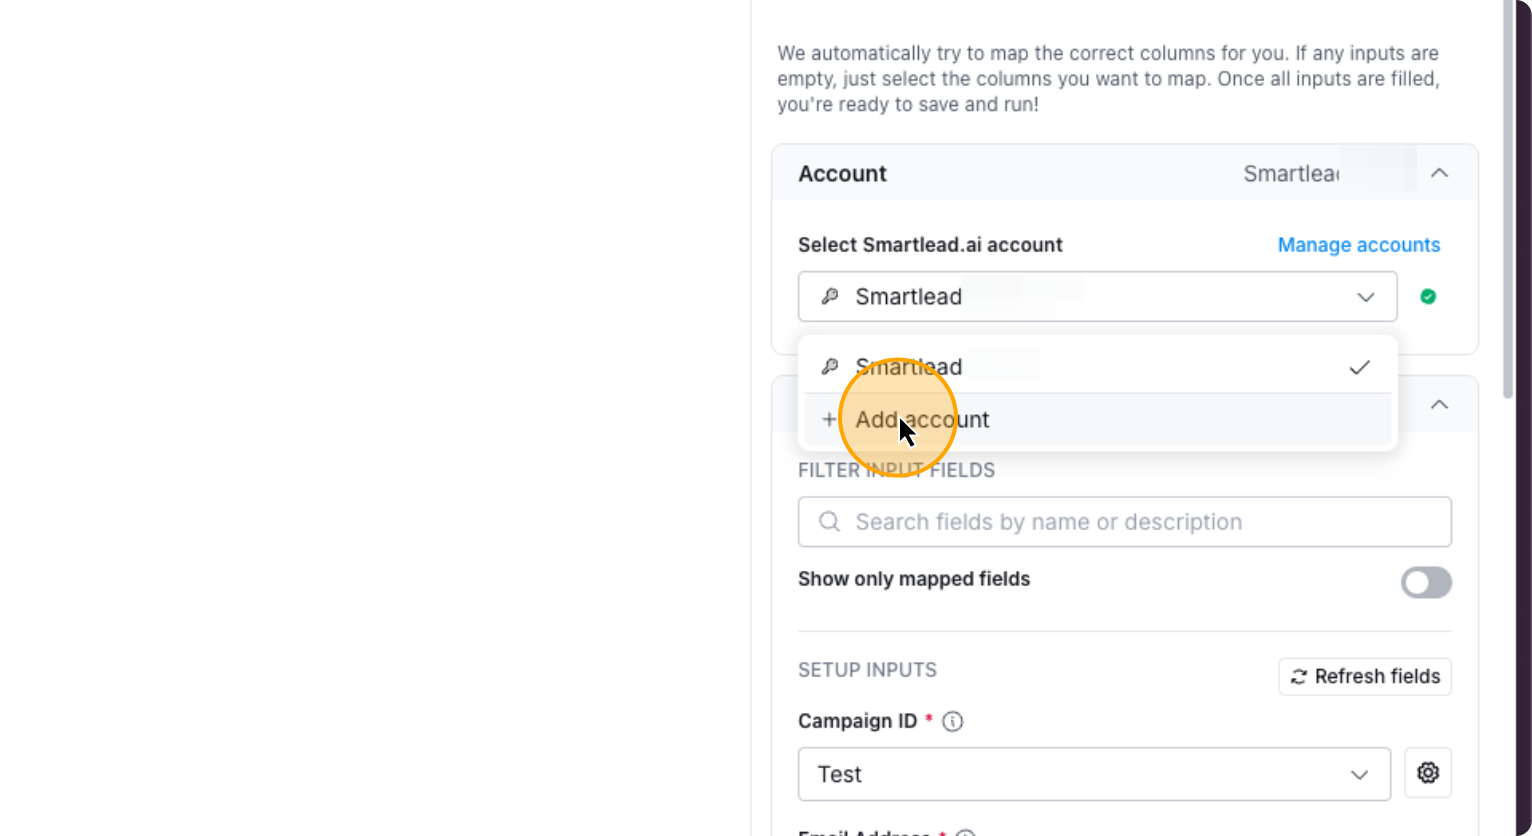
If your smartlead account isn’t connected, click “Add Account” and name your connection.
41. Click on “+ Add account”
To get your Smartlead API key, go to Smartlead and click on Settings.
42. Click here
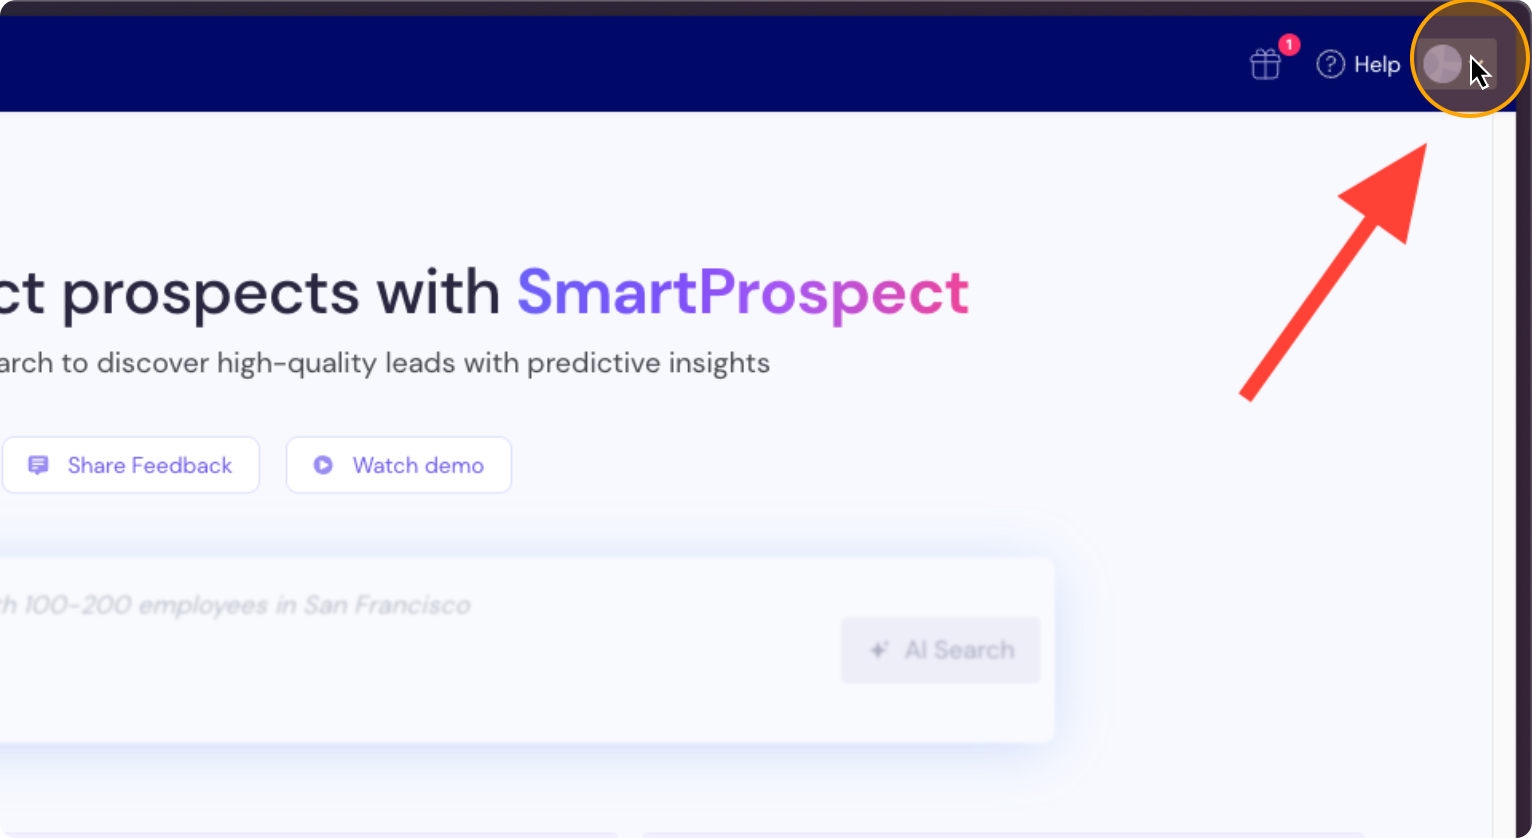
43. Click on “Settings”

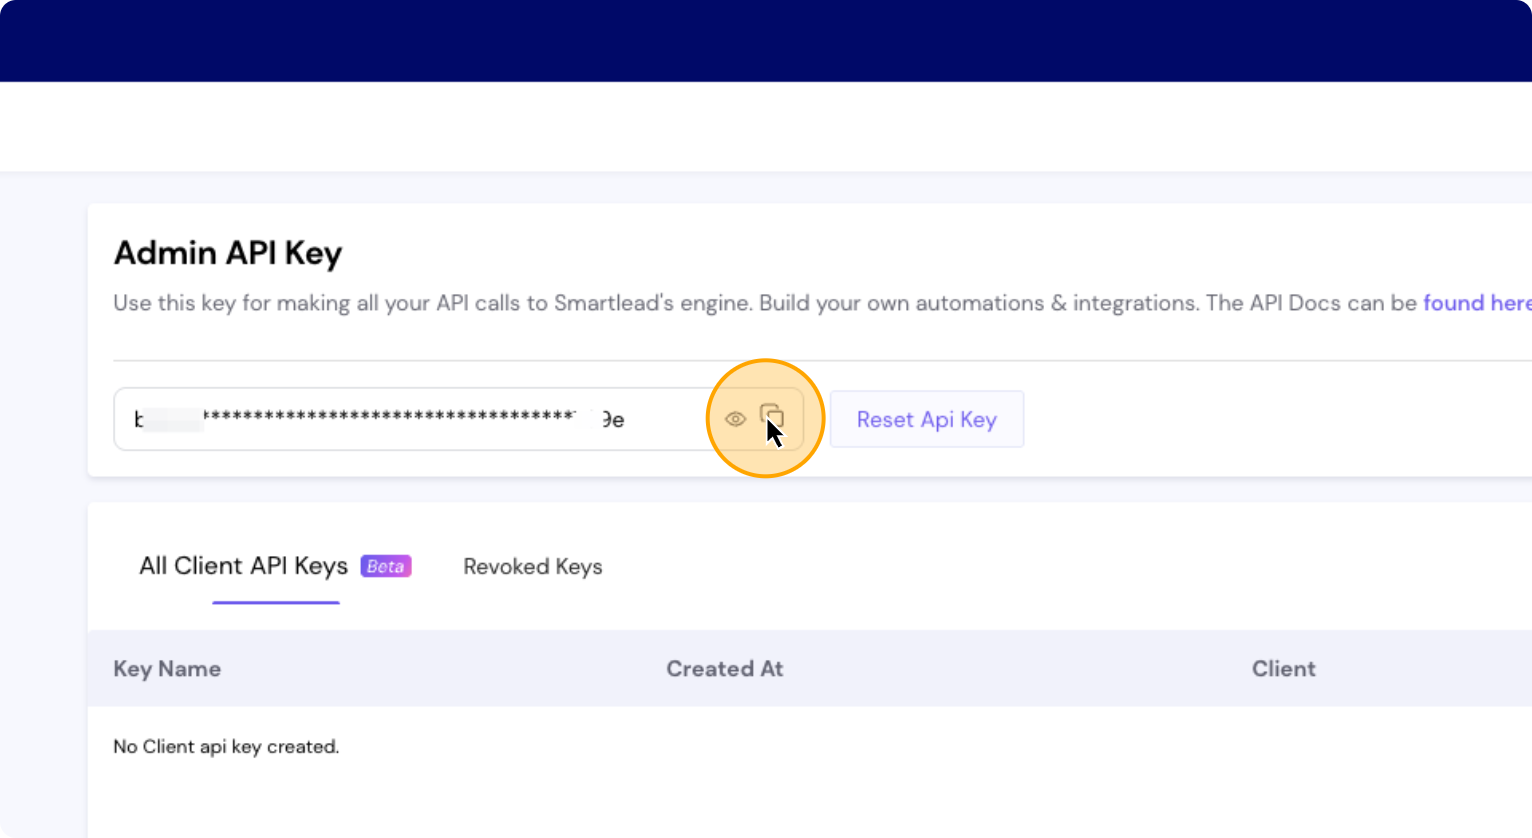
Click on API key management, then copy the API key.
44. Click on “API Key Management”
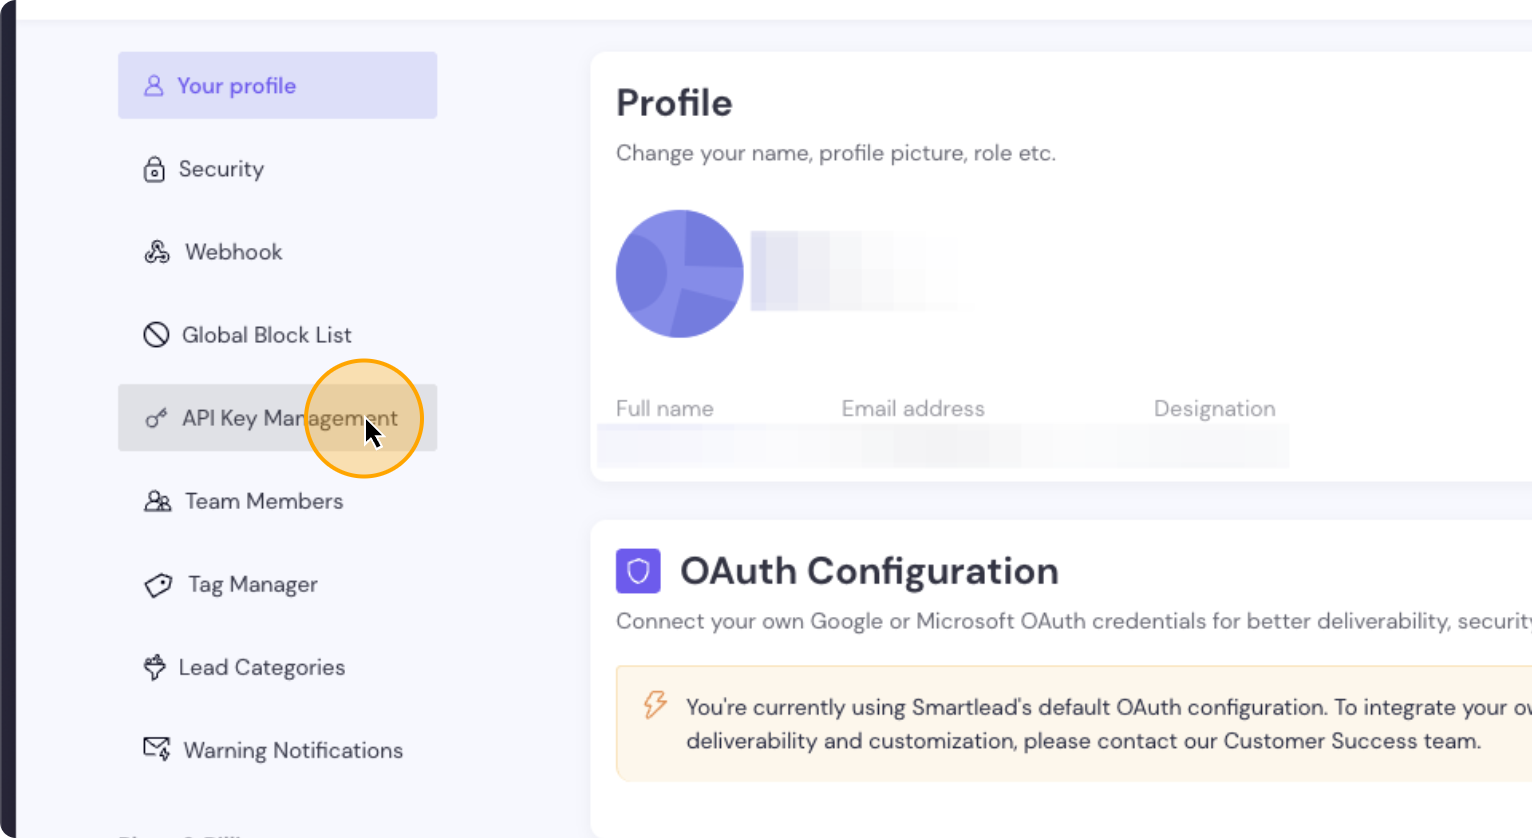
Copy the API key from this location. Click on “Copy.”
45. Click here
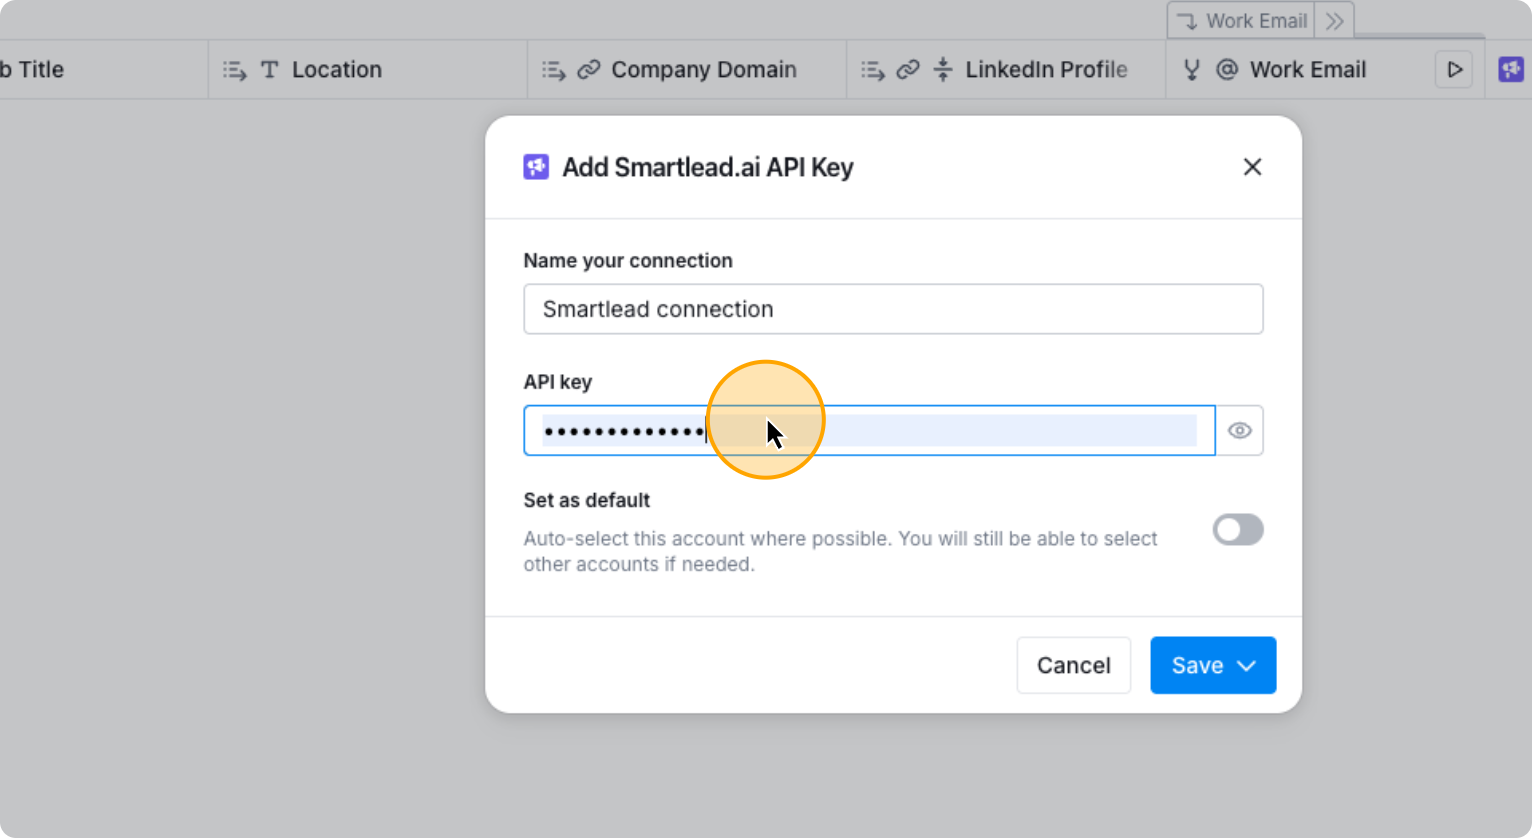
Go back to Clay and name your connection however you like.
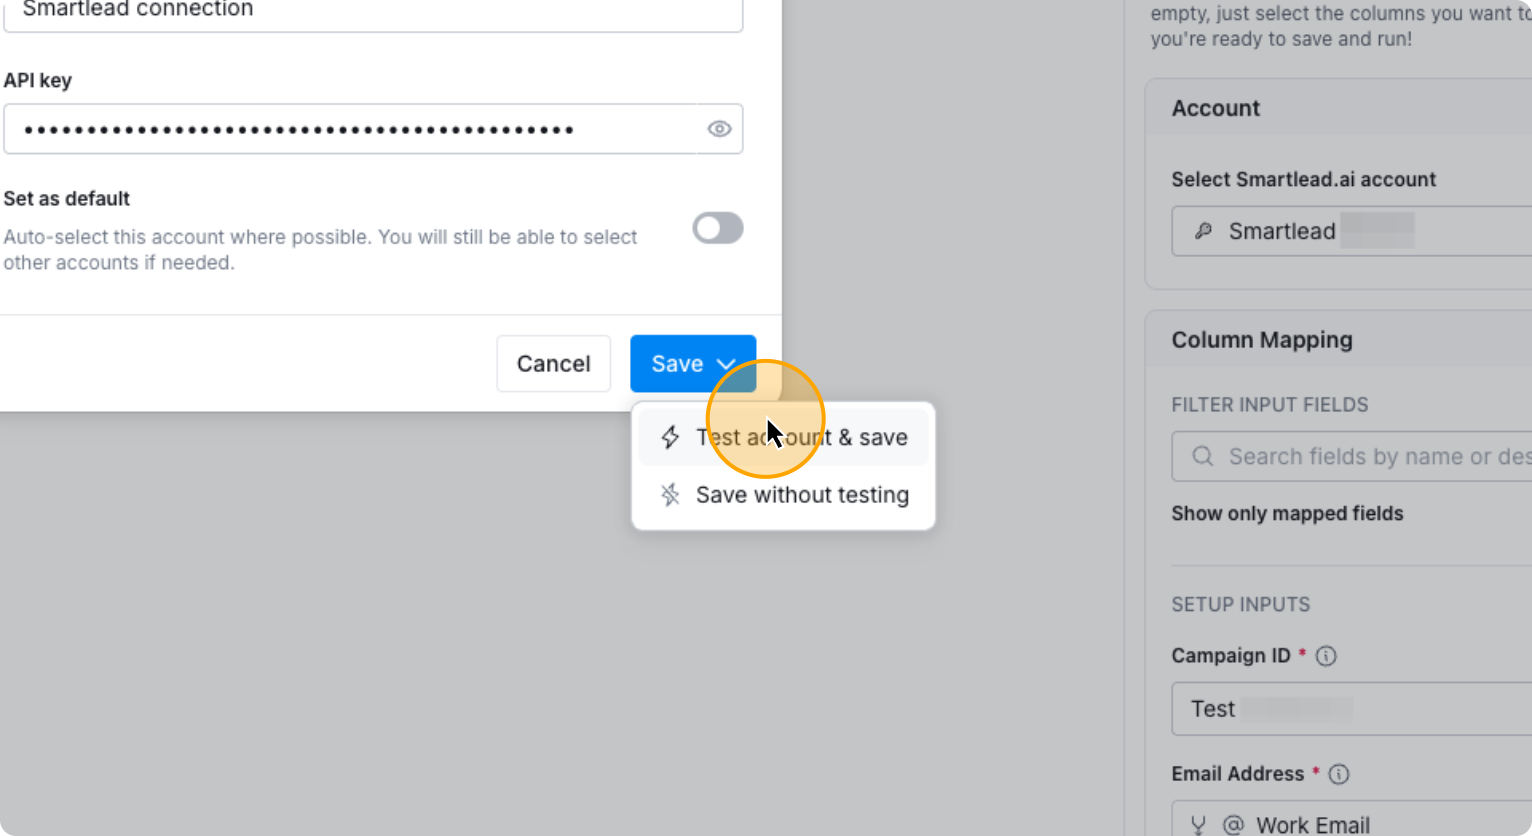
In this example let’s name it “Smartlead connection”. Paste the key here. Click save, test, and save.
46. Click here
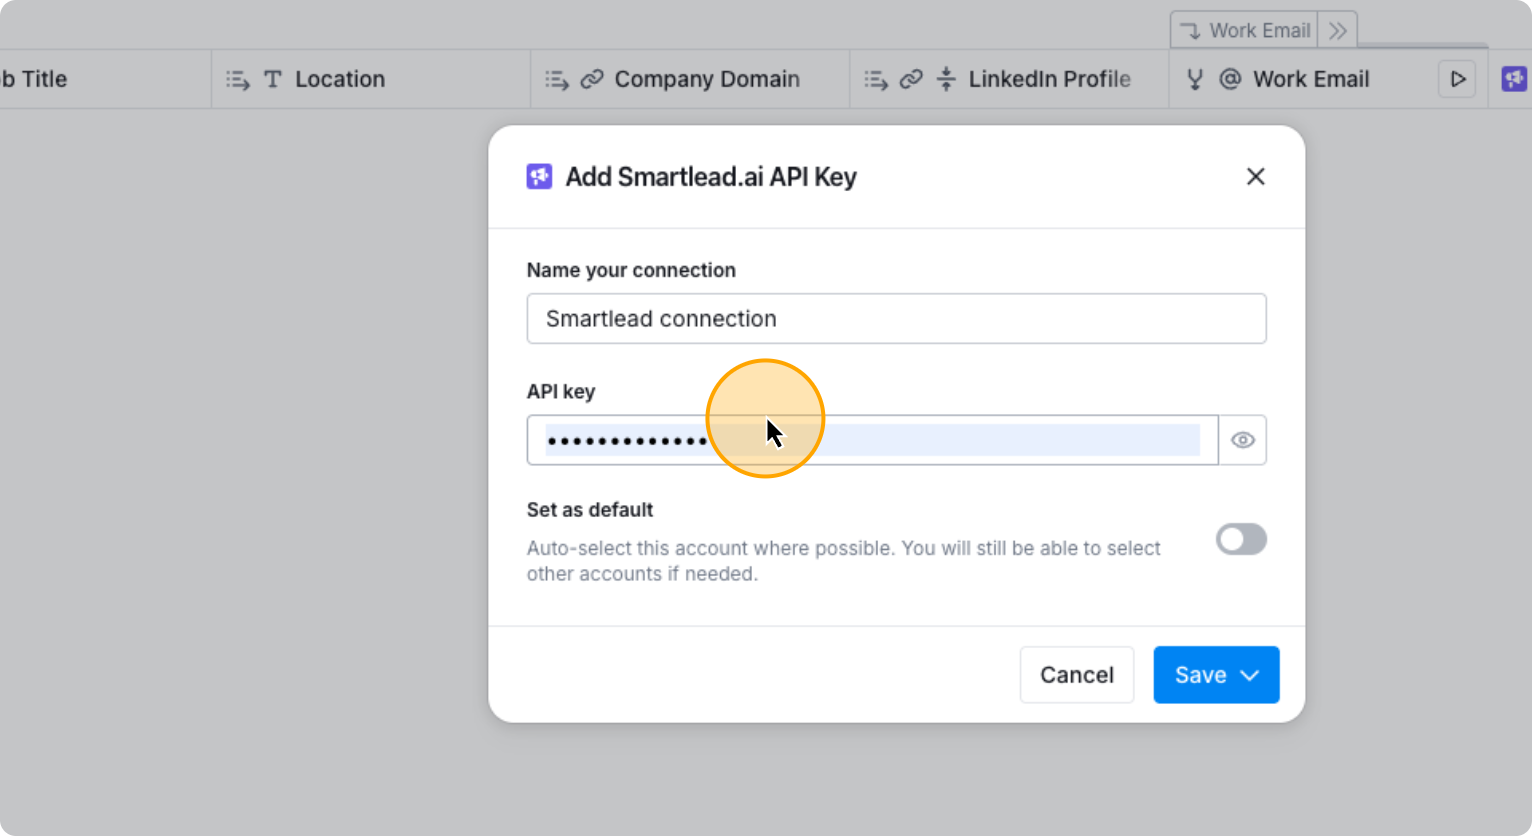
47. Paste the API key you copied from Smartlead here
48. Click on “Test account & save”
Now your Smartlead account is connected to Clay.
Simply choose the campaign you want to run and the other fields will populate automatically.
49. Select the campaign you want to push the contacts to
If you want to add custom fields, you can do so.
50. Click on “Custom Fields”

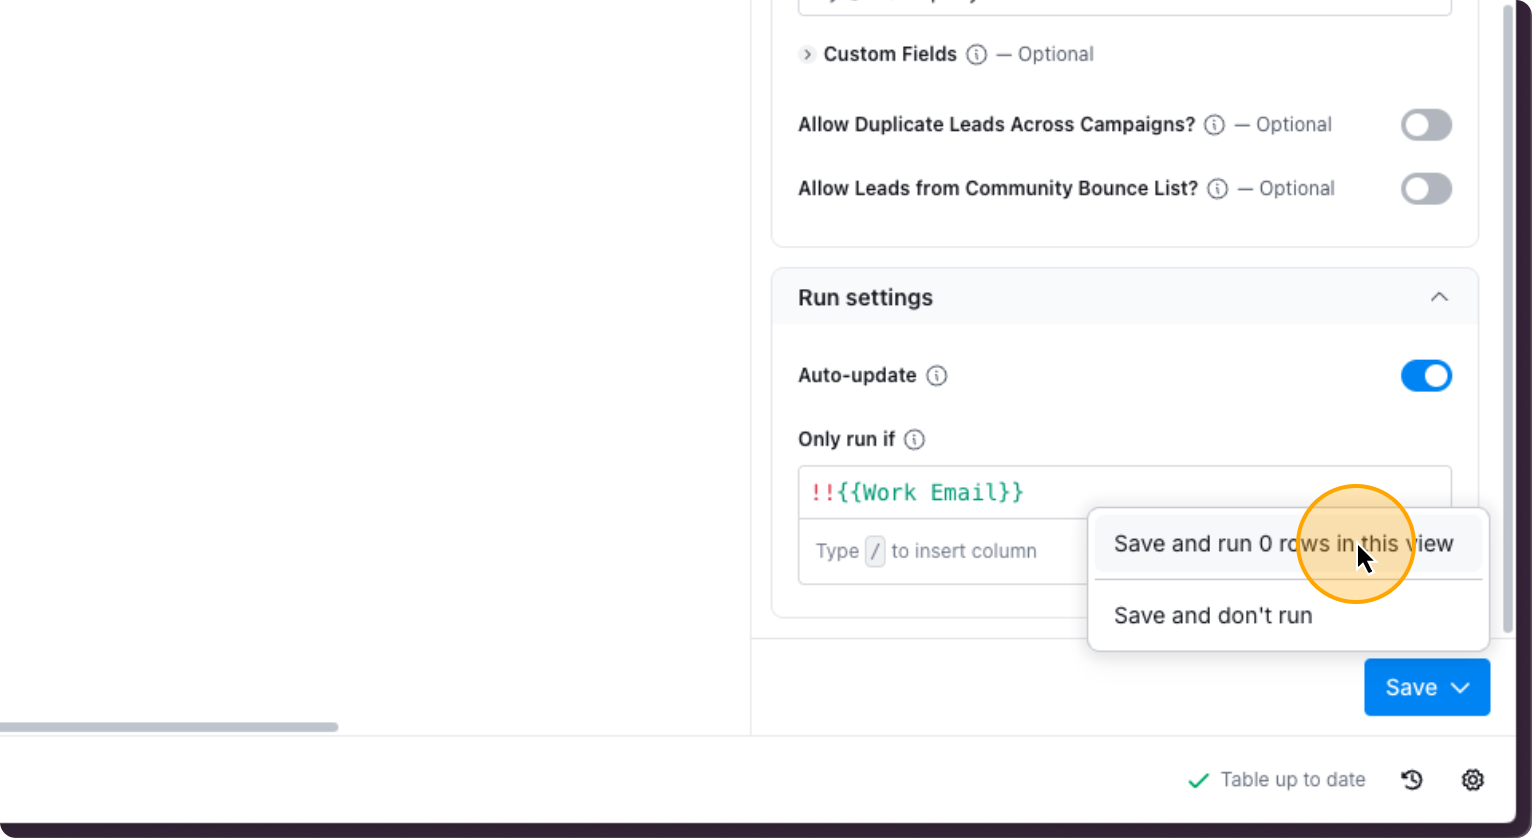
If not, you can leave it as is. To set this to run automatically, click on auto-update. Then select save and run.
51. Click here
52. Click here
53. Click on “Save and run rows in this view”
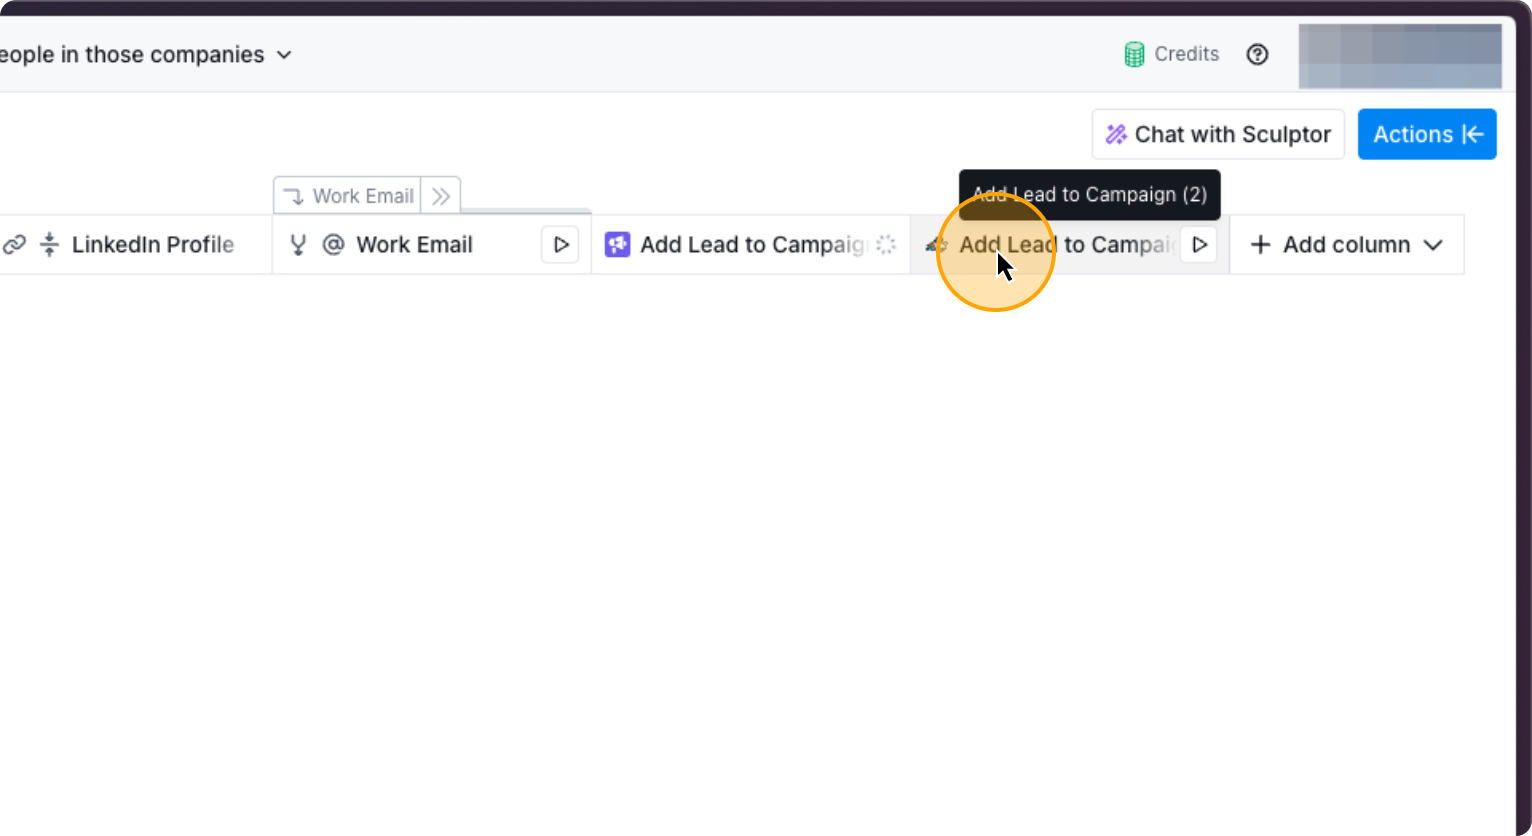
After this, you do the same for HeyReach. If it is connected, you can simply choose any campaign you want. If not, you connect it via API.
54. Click on “Add Lead to Campaign”
55. Click on “Edit column”
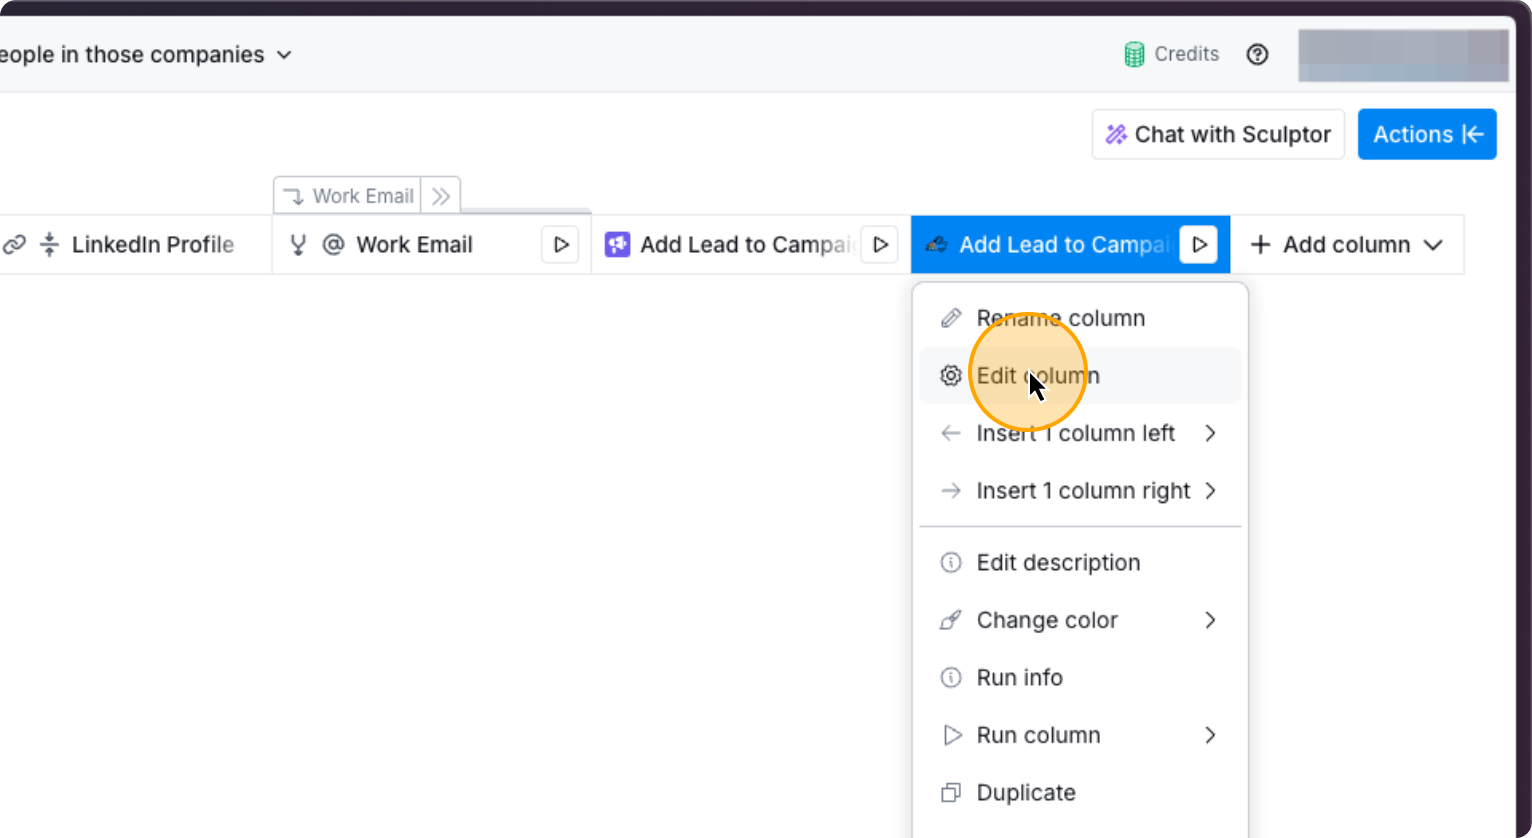
56. Click here
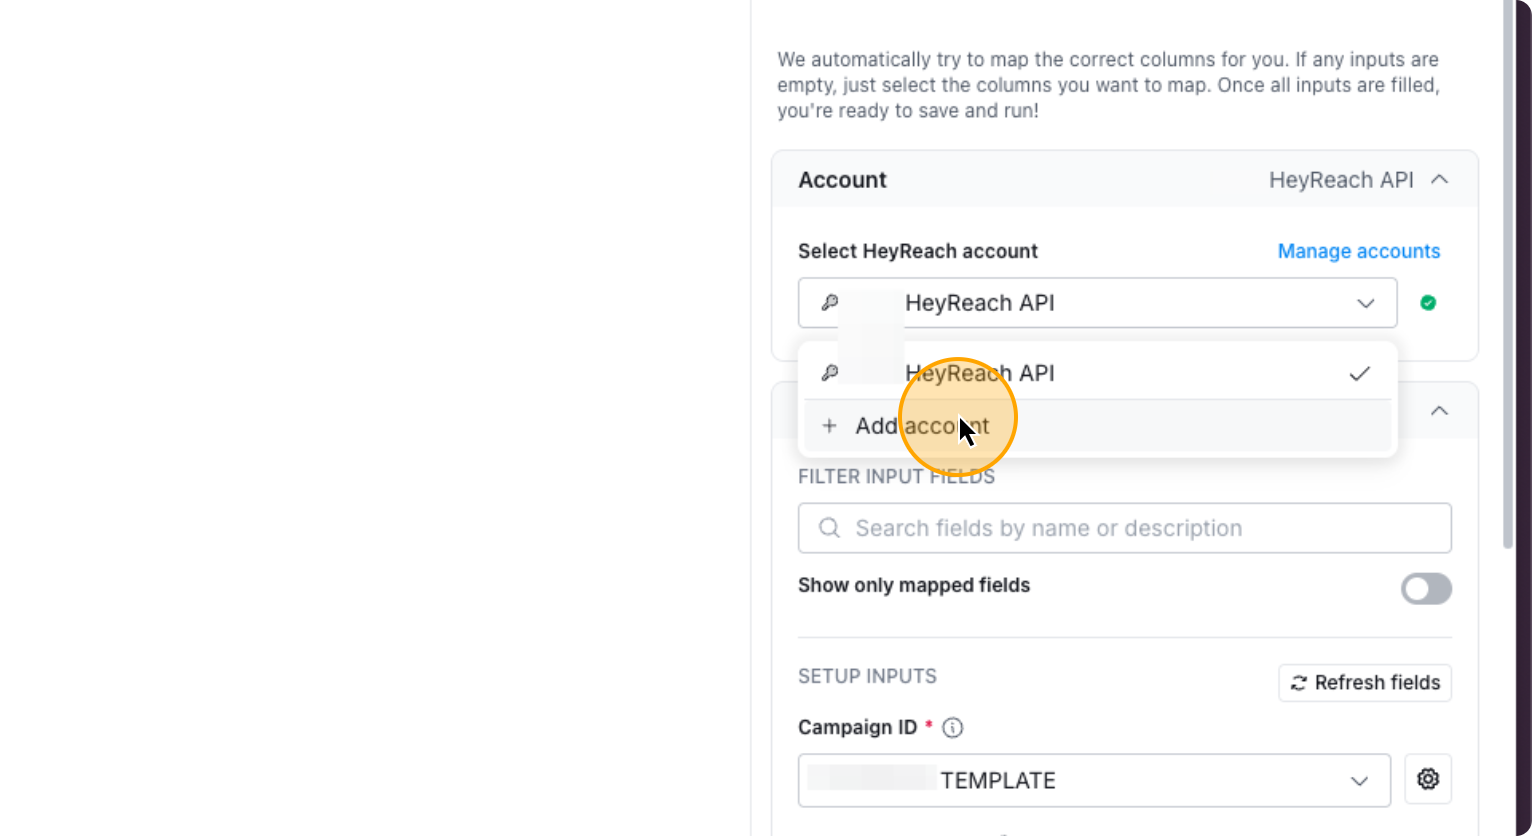
If Heyreach isn’t connected, click Add Account.
57. Click on “+ Add account”
58. Click here
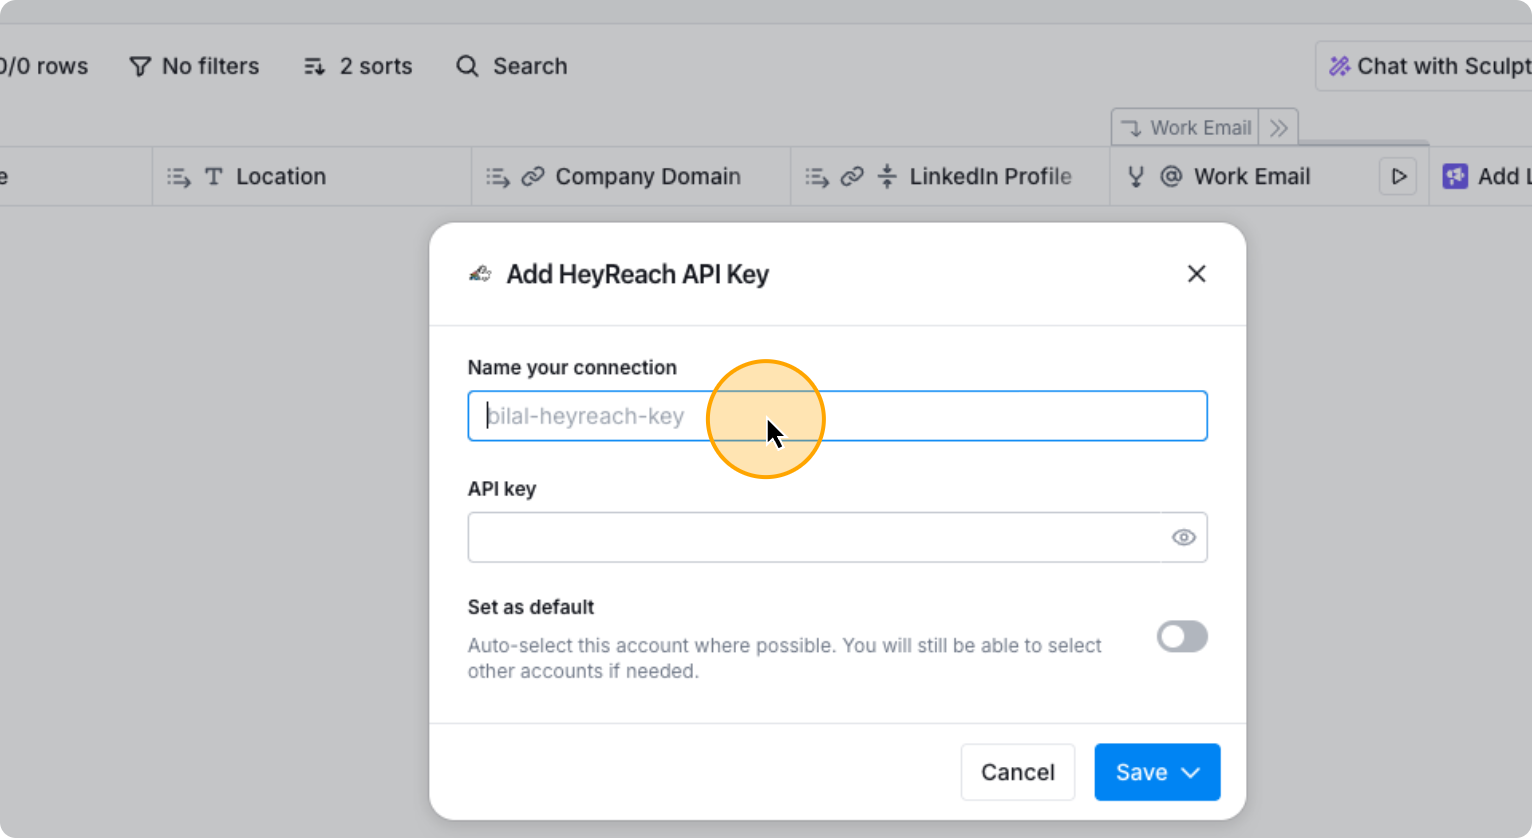
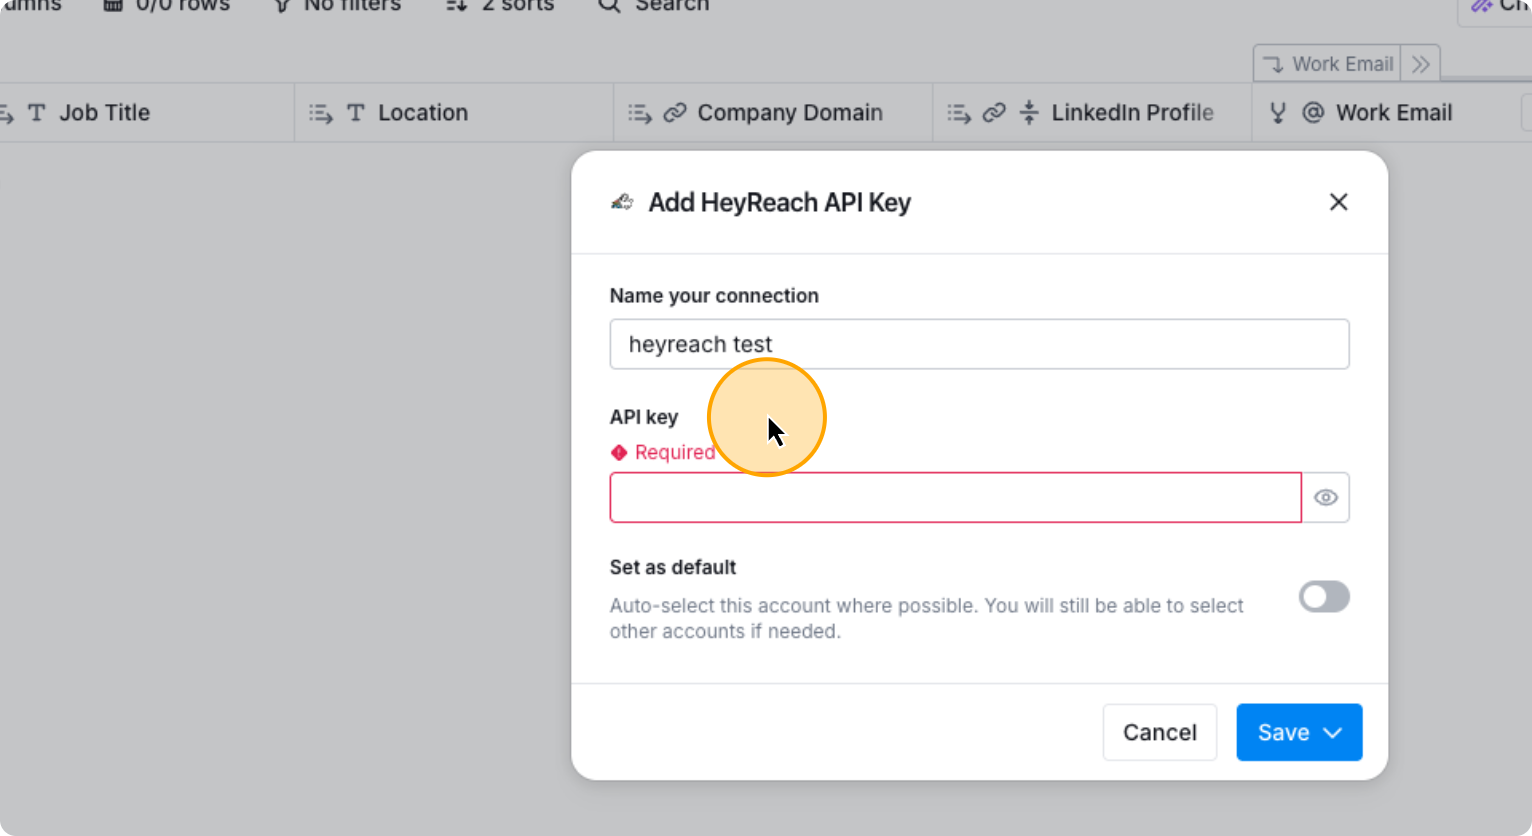
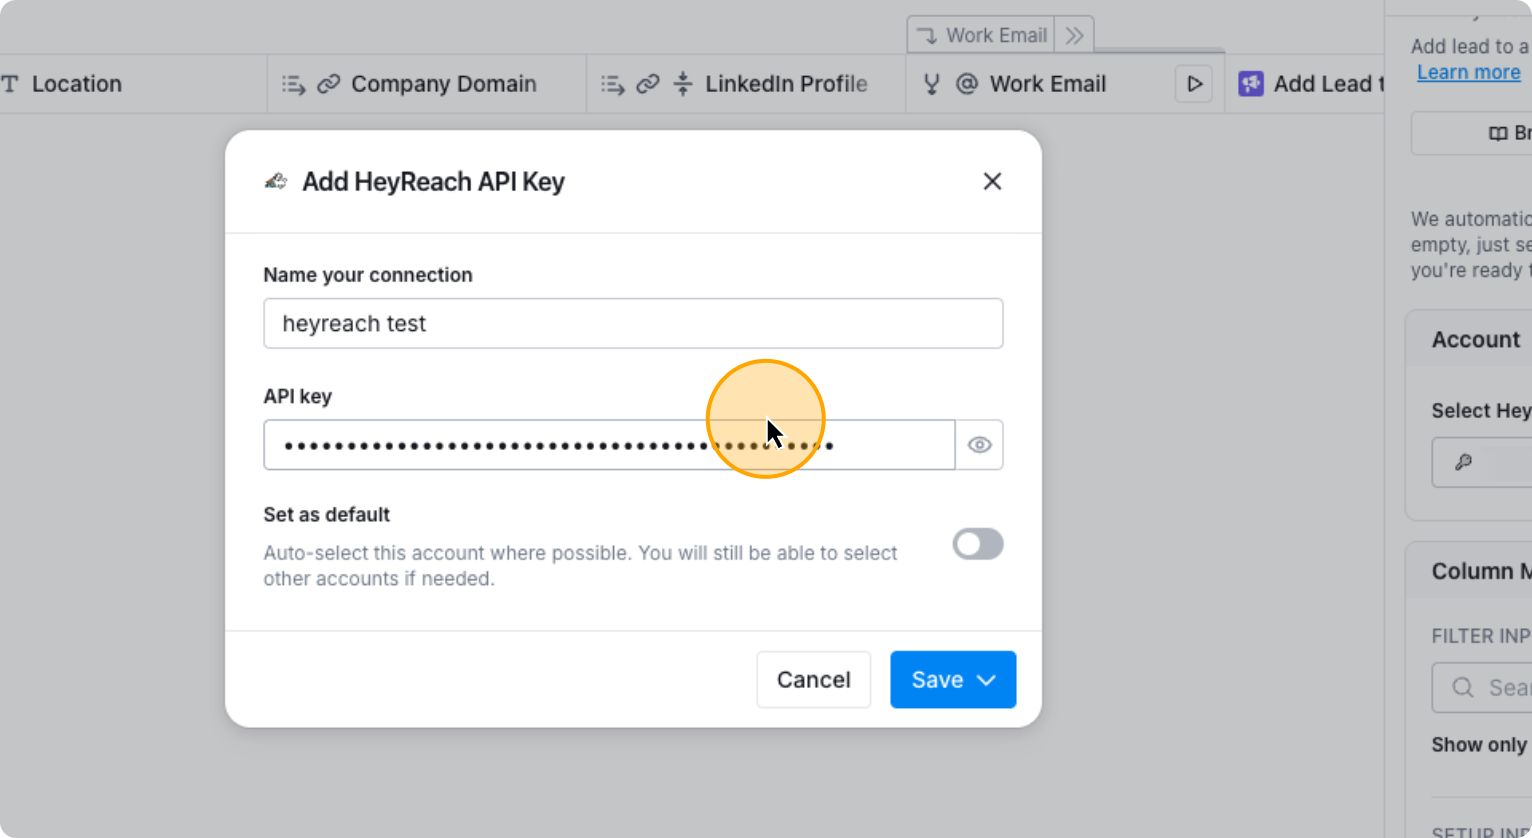
First, name your connection. Then, obtain the API key for HeyReach.
59. Click here
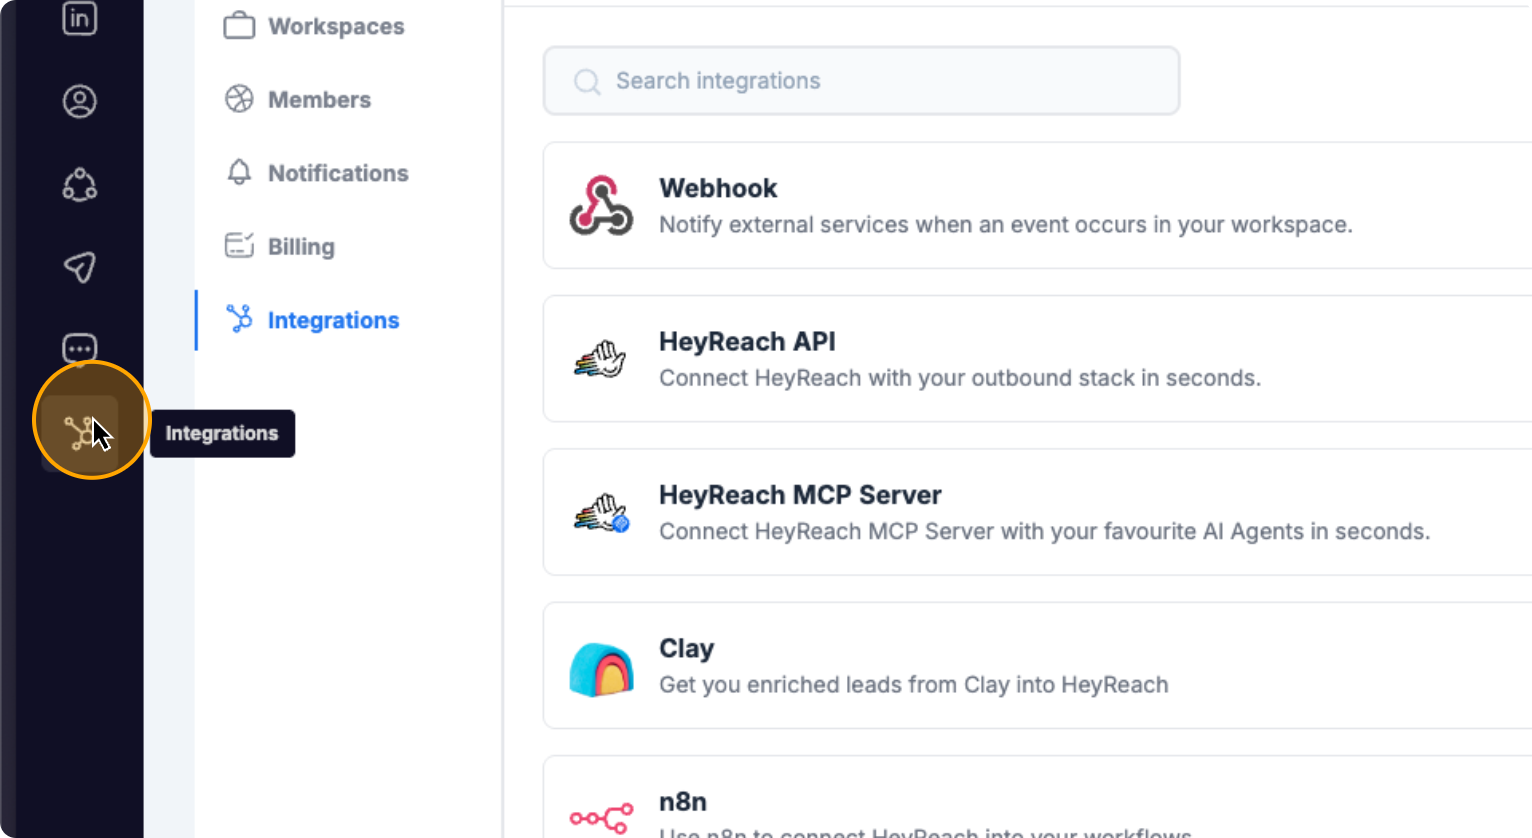
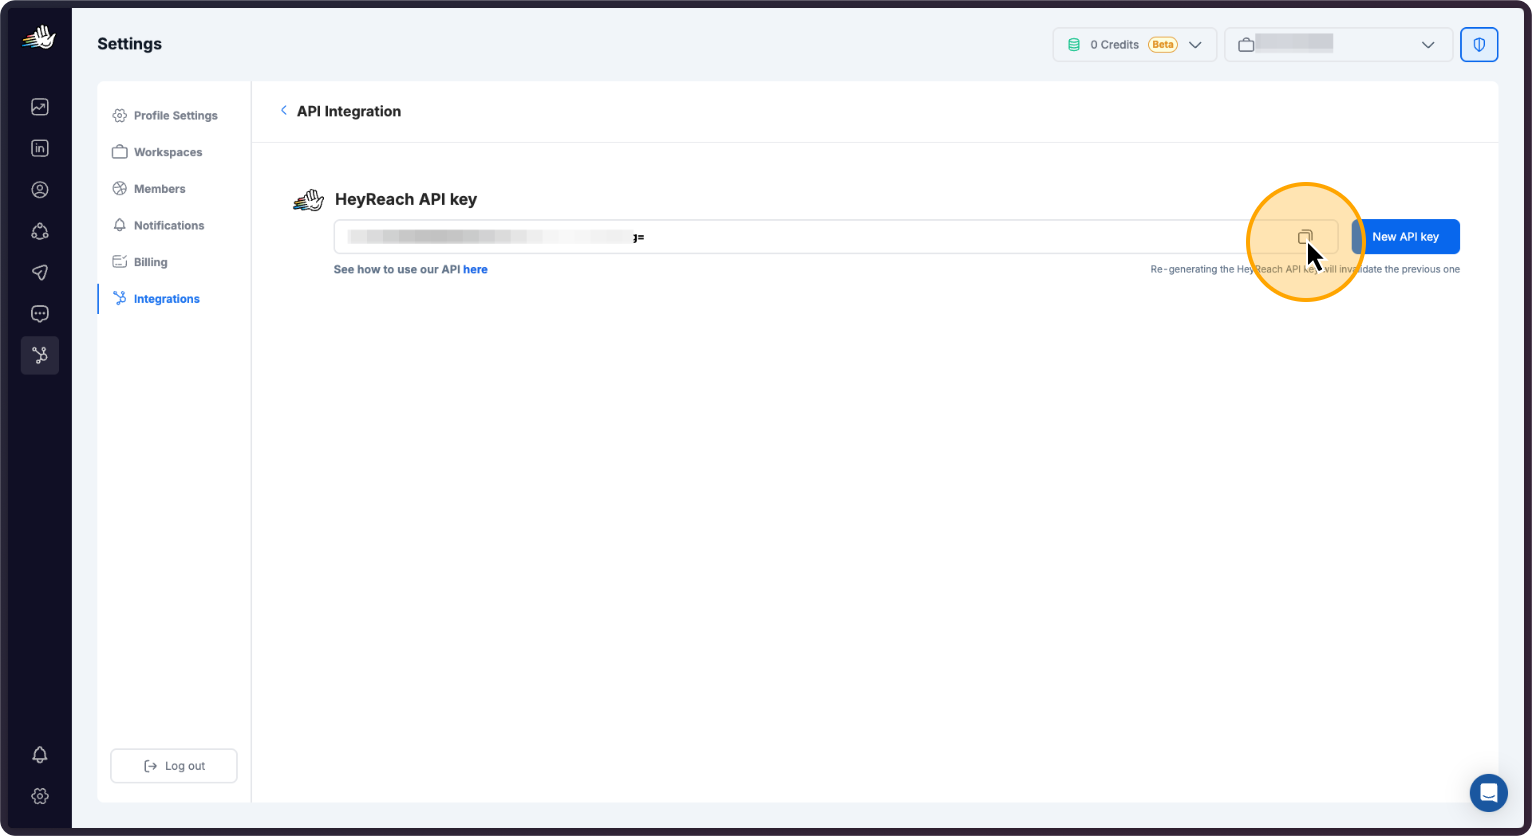
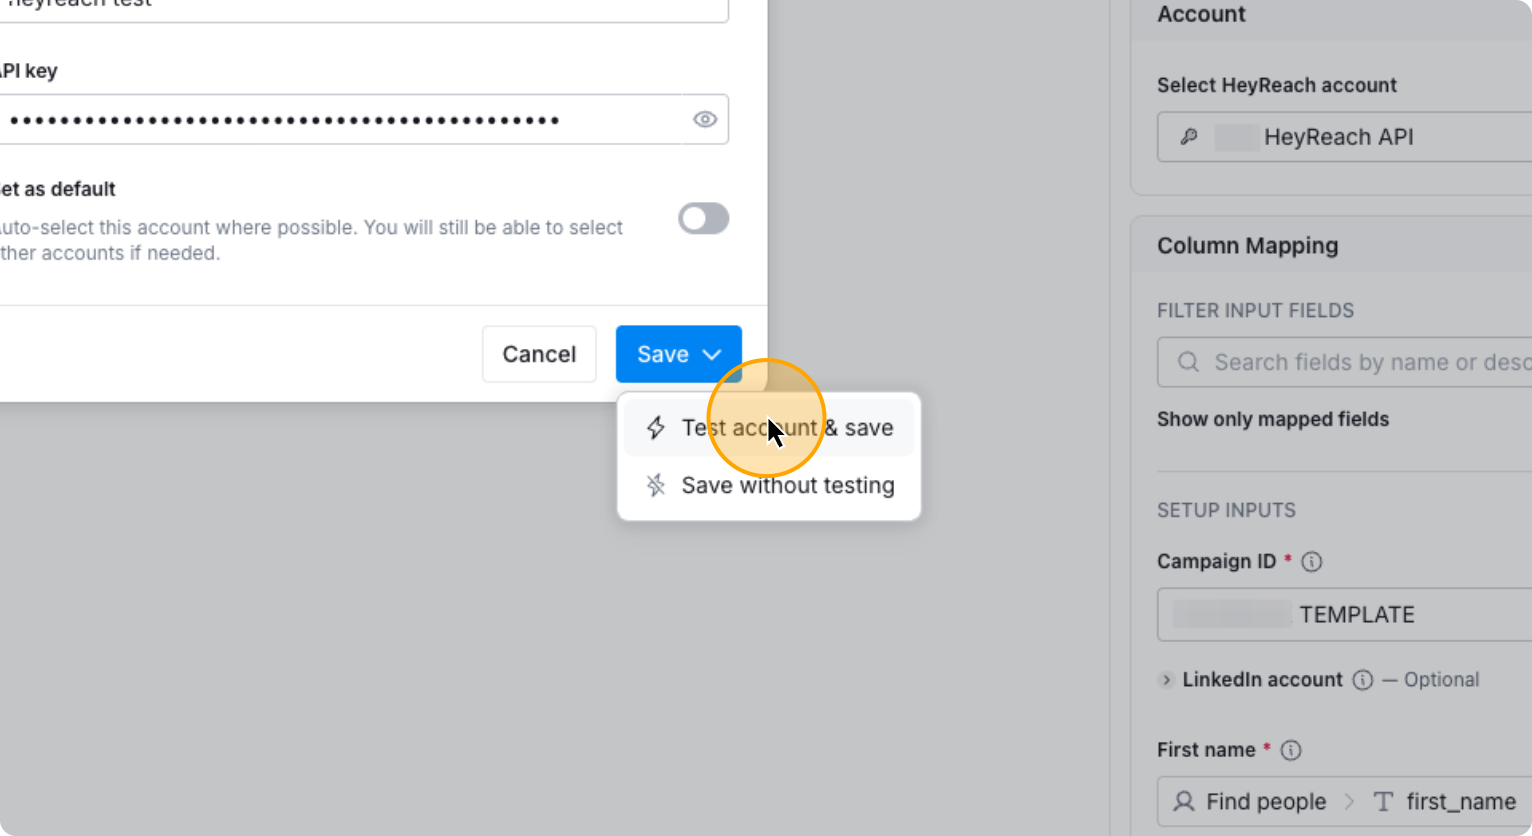
Go to HeyReach and click on Integrations. Select HeyReach API, then click Get API. Copy the API key. Go back to Clay, paste the key, then click Test Account and Save.
60. Go to HeyReach. Then “Integrations”
61. Click on “Get API key”

62. Click here
63. Go back to Clay. And paste the API Key here
64. Click on “Test account & save”
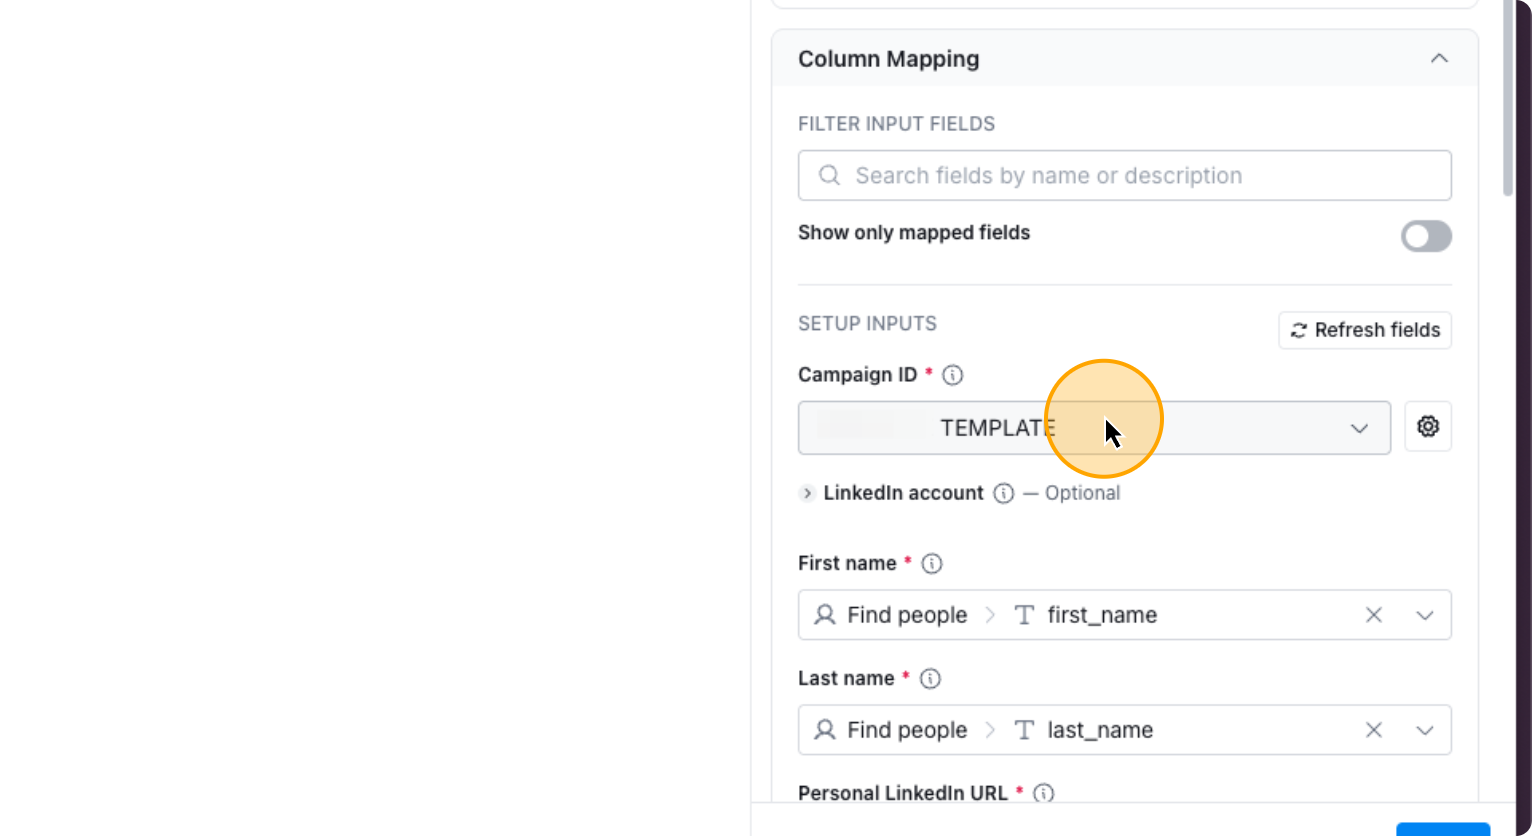
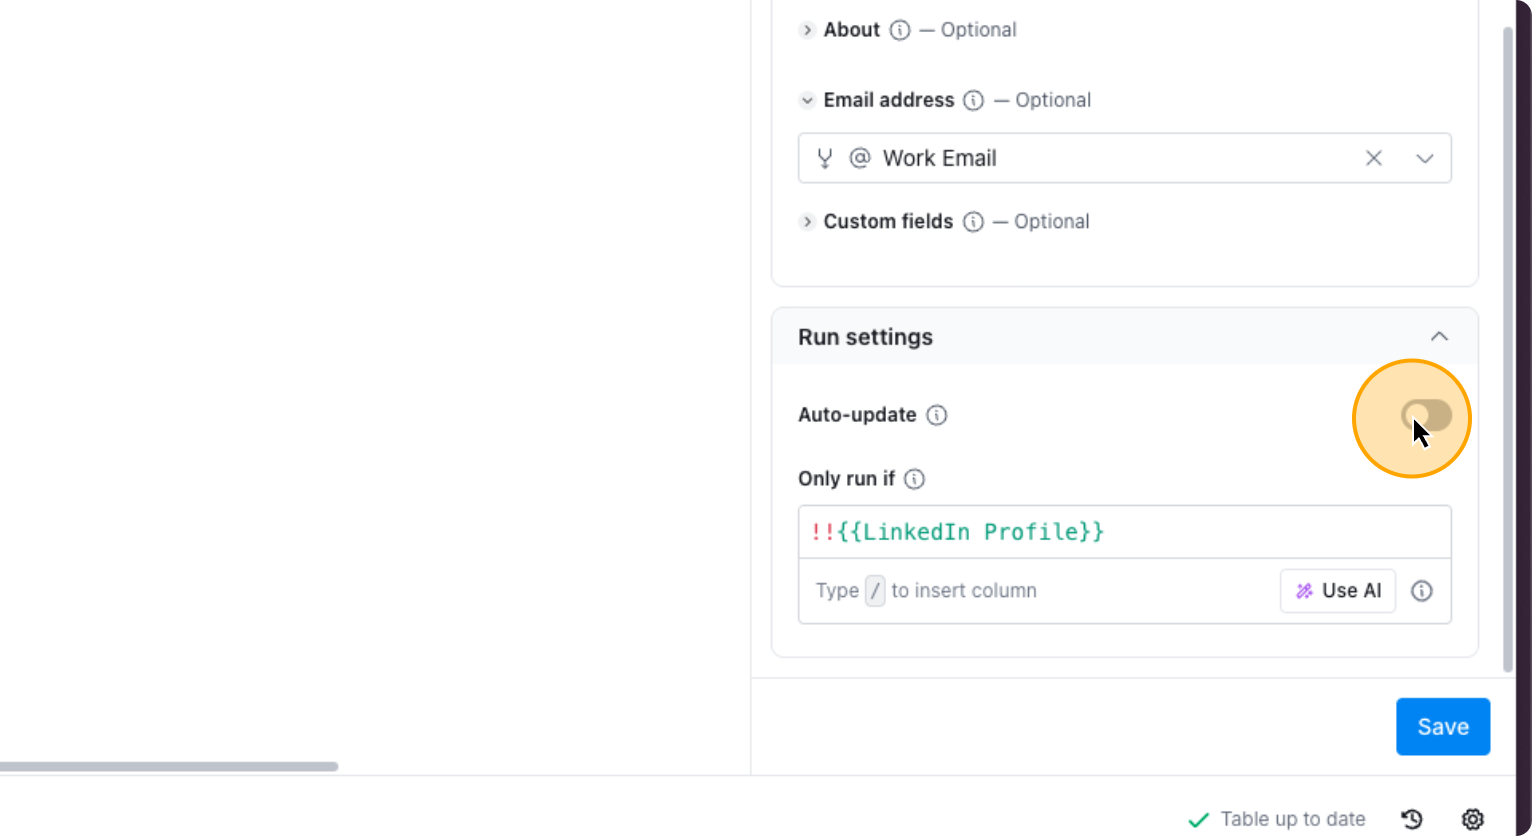
It will save, and that’s it. You can now choose your Heyreach Sequence you want to add the prospects into and add custom fields if needed. It will work automatically.
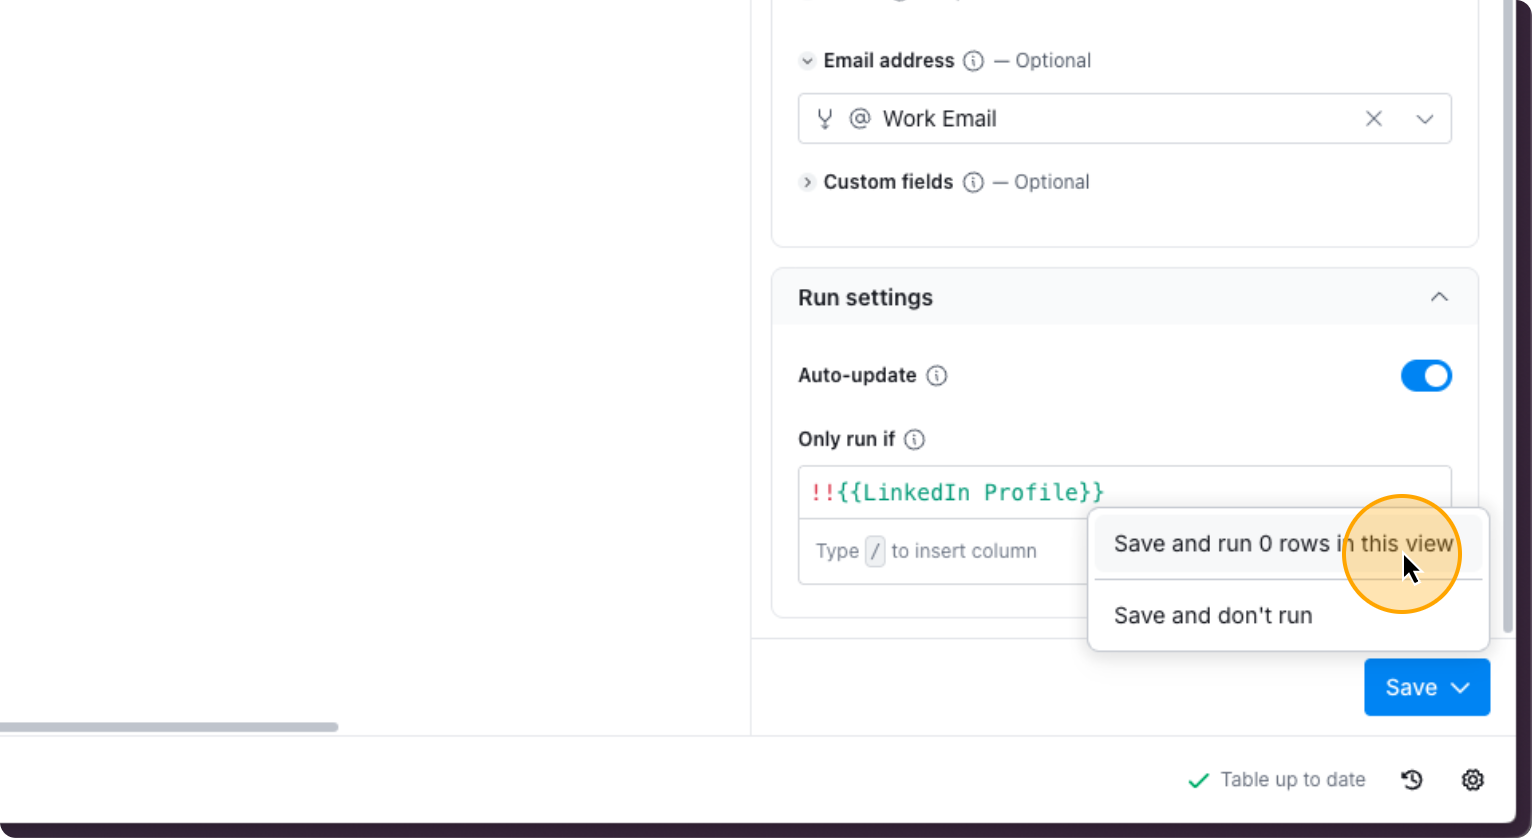
If you enable auto-update, click Run.
65. Toggle on “Auto-update”
66. Click on “Save and run rows in this view”
Okay. Everything is now set.
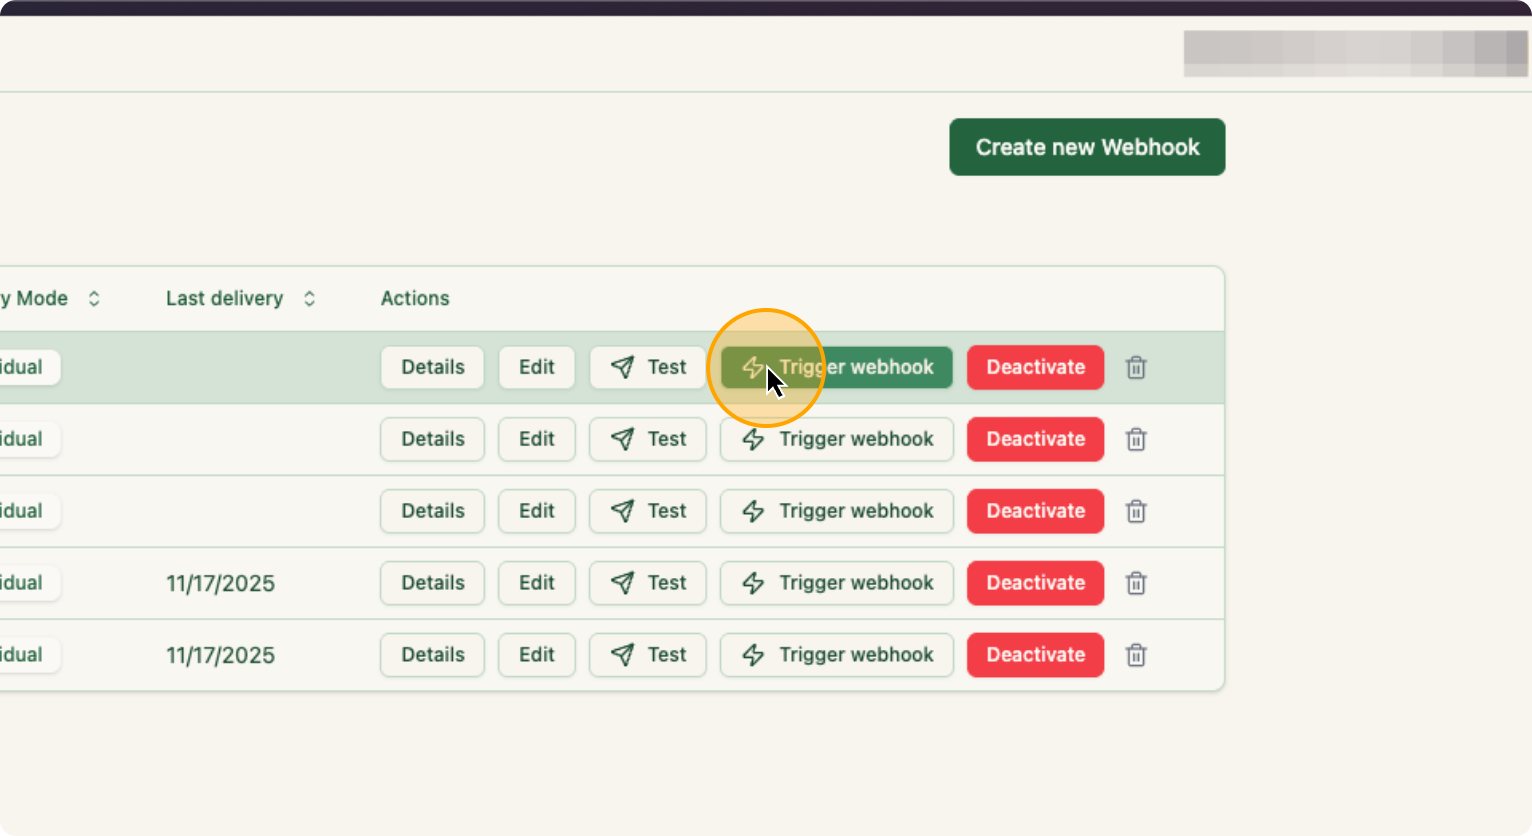
Go to ZenABM and click “Trigger Webhook.” That’s all you need to do.
67. Click on “Trigger webhook”
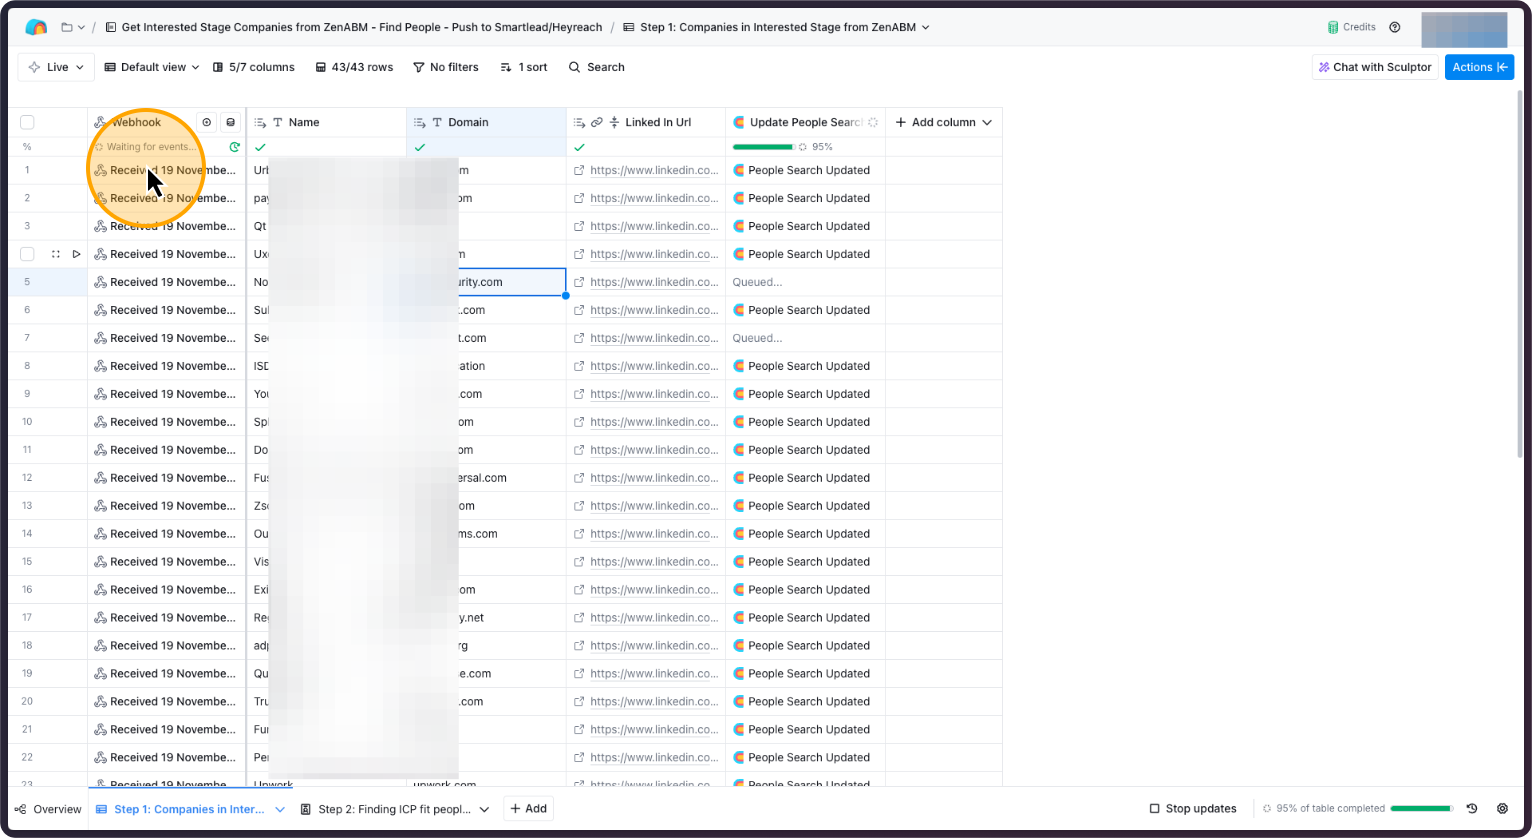
Now, return to your Clay account. You will start to see companies appearing gradually.
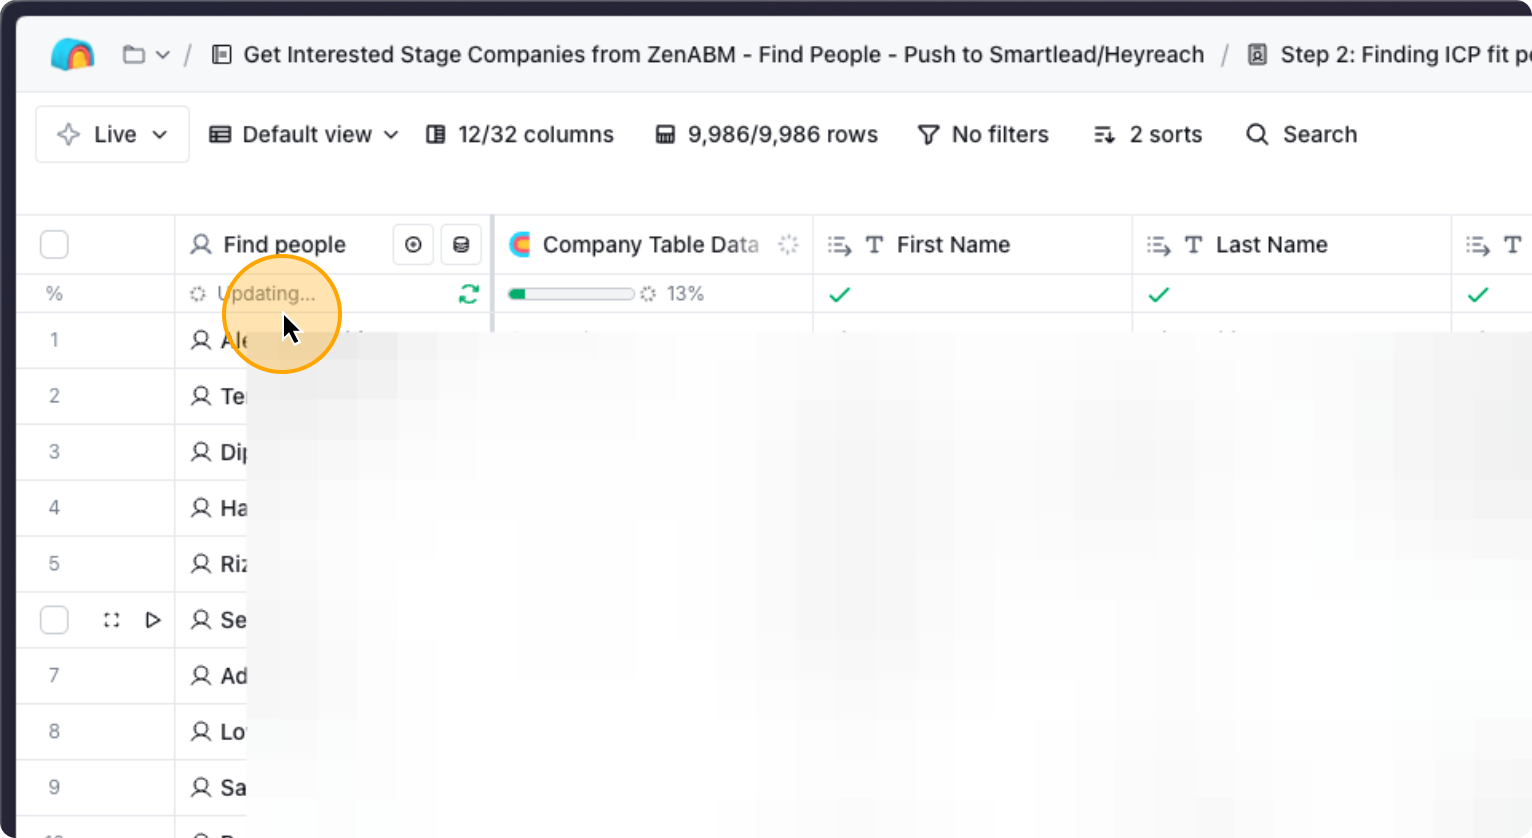
Okay, this is how it will look. It will fetch each individual webhook and automatically find people. It will find your ICP in those Interested accounts, find their emails, and add them to the appropriate campaigns.
That is all you need to do.
68. How it will look on Step 1
69. How it will look on Step 2
Ready to leverage intent-led outbound? Try ZenABM free for 37 days or book a demo to see how ad engagement signals can power your outbound strategy.
For a limited time, ZenABM will:
✅ Set up this entire workflow inside ZenABM
✅ Build your Clay table + auto-prospecting flow
✅ Implement Smartlead + Heyreach API pushes
✅ Configure anti-duplication logic
✅ Plus: Salescaptain will write your entire email outreach sequence for free
🎁 Deadline: 14 December
This offer is genuinely insane value — and it’s the fastest way to launch a warm-outbound motion that actually generates pipeline.
👉 Want this implemented for you?
Click below and book your slot while the offer is still available:
This is the next step in our Clay flow:

Click on ‘find people’, and then – ‘edit inputs’:

Then, click on “Job title” and change the ‘job title filters’ to match your ICP – you can filter your “find people” search by seniority, job functions, job titles…and exclude irrelevant ones too:

You can also select additional filters, like whether you want the job titles to be “exact matches”, and if you want to search for people that have been in the specific role for X months, and also filter them by location (country, city etc.):

Now, save your search and click continue. Go back to the flow chart, and click on step 4: this is your ICP table:

When you double click on STEP 4, you will see your Clay table with the list of prospects from your “interested stage” companies form ZenABM!
Smartlead has native API endpoints Clay can call directly. If you don’t have a Smartlead account yet – go to smartlead.ai and start a free trial – it will give you the opportunity to test this inbound-led outbound flow for free!
Smartlead → Campaigns → Create Campaign
Choose:
Sequence steps
Sending account
From name
Your warm-up inbox

Copy the API Endpoint:
👉 Smartlead API:POST https://api.smartlead.ai/v1/leads

Select your Smartlead account and then the right sequence in the “Campaign ID” (it should pull all your campaigns automatically).
Then, repeat the same steps for Heyreach in the next column:

Heyreach also exposes an API you can call directly from Clay.
Heyreach → Campaigns → Create Campaign
Choose the LinkedIn account(s)
Add sequence steps (Connect → Message → Follow-ups)
Under Integrations → Get Campaign ID
URL (Heyreach API):POST https://api.heyreach.io/v1/campaigns/{CAMPAIGN_ID}/prospects
Headers:Authorization: Bearer YOUR_HEYREACH_API_KEYContent-Type: application/json
Body:
Run this block only if:
linkedin_url exists
contact not already in Heyreach (you can store this in Clay)
li_sequence_sent != true
Set field: pushed_to_heyreach = TRUE
Clay supports Triggers now.
Trigger type: New Row Added OR Any Change in Column status
Automation:
Run email validation
Run LI enrichment
Run Heyreach API push
Mark statuses accordingly
This ensures any new prospect automatically flows through both outbound channels without touching anything.
In Clay, add these columns:
already_in_smartlead?
already_in_heyreach?
You can populate them by running:
Smartlead → Search Lead API endpoint
Heyreach → Search Prospect endpoint
Then in automation:
If already exists → SKIP.
Day 1: Value-first email
Day 3: Soft follow-up
Day 6: Content CTA (ebook, case study)
Day 10: Break-up email
Day 1: Profile visit (automated)
Day 2: Connect request
Day 5: Post-like/engage
Day 6: Short LI message
Day 12: “Mutual interest” nudge
Both channels run independently.
If you’ve made it this far, you now have everything you need to turn your LinkedIn ads into a predictable warm-outbound engine. With ZenABM, you can finally see which accounts are actually engaging with your ads, understand their intent, and route them straight into Clay → Smartlead → Heyreach with clean automations that run themselves. No more guessing, no more anonymous ad traffic, no more cold outbound into the void.
Instead, you’re reaching out to accounts that already know who you are. They’ve seen your ads. They’re clicking on your content. They’re showing intent. And thanks to ZenABM, you can activate them instantly – with personalized email and LinkedIn sequences tailored to what they care about.
But let’s be honest…setting it all up the first time can get technical – especially if you’re juggling API calls, webhook filters, and two outreach platforms.
That’s exactly why we created a special ZenABM × Salescaptain partnership.
For a limited time, ZenABM will:
✅ Set up this entire workflow inside ZenABM
✅ Build your Clay table + auto-prospecting flow
✅ Implement Smartlead + Heyreach API pushes
✅ Configure anti-duplication logic
✅ Plus: Salescaptain will write your entire email outreach sequence for free
🎁 Deadline: 14 December
This offer is genuinely insane value — and it’s the fastest way to launch a warm-outbound motion that actually generates pipeline.
👉 Want this implemented for you?
Click below and book your slot while the offer is still available: